Get ready to bake the cutest and most delicious treats in your kitchen! These Chocolate Chip Bear Cookies are not only adorable but also packed with the classic, buttery, chocolate-chip flavor everyone loves. This recipe is incredibly simple to follow, making it the perfect baking project to tackle with your kids. Forget complicated techniques; we’re focusing on fun and creating sweet memories, one bear-shaped cookie at a time.
Whether you’re preparing for a birthday party, a bake sale, or just a fun weekend activity, these cookies are guaranteed to bring a smile to anyone’s face. We’ll walk you through everything from making the perfect dough to shaping the cute bear faces. Let’s get baking!

Why You’ll Love This Chocolate Chip Bear Cookies Recipe
- Incredibly Fun to Make: The process of shaping the little bear heads and ears is an engaging activity for bakers of all ages.
- Simple, Classic Flavor: We stick to a timeless chocolate chip cookie recipe that is rich, chewy, and utterly irresistible.
- Perfect for Any Occasion: Pack them for lunch, serve them at parties, or give them as a thoughtful homemade gift. Their charm fits everywhere.
- No Special Tools Needed: You don’t need any special cookie cutters! These adorable bears are shaped entirely by hand.
Ingredients for Bear Cookies
This recipe uses simple pantry staples to create the perfect cookie dough. Here’s what you’ll need:
- All-Purpose Flour: Provides the structure for our cookies.
- Baking Soda: Helps the cookies rise just the right amount.
- Salt: Balances the sweetness and enhances the flavors.
- Unsalted Butter: Make sure it’s softened to room temperature for a smooth, creamy dough.
- Granulated Sugar & Brown Sugar: This combination creates the perfect texture—crisp edges with a soft and chewy center.
- Eggs: Act as a binder for the dough.
- Vanilla Extract: Adds a classic, warm flavor.
- Semi-Sweet Chocolate Chips: The star of the show! You’ll also need a few extra for decorating the bear faces.
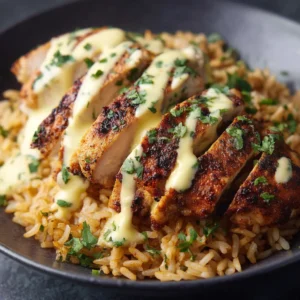
For a delicious twist on a savory dinner before you enjoy these cookies, why not try this amazing Boursin chicken recipe? It’s a creamy and flavorful dish that’s surprisingly easy to make.
Step-by-Step Instructions
Making these Chocolate Chip Bear Cookies is a simple two-part process: first, we make the dough, and then we have fun shaping it!
Part 1: Making the Cookie Dough
- Combine Dry Ingredients: In a medium bowl, whisk together the all-purpose flour, baking soda, and salt. Set it aside.
- Cream Butter and Sugars: In a large bowl, use an electric mixer to beat the softened unsalted butter, granulated sugar, and brown sugar until the mixture is light and fluffy, about 2-3 minutes.
- Add Eggs and Vanilla: Beat in the eggs one at a time, mixing well after each addition. Stir in the vanilla extract.
- Combine Wet and Dry Ingredients: Gradually add the dry ingredient mixture to the wet ingredients, mixing on low speed until just combined. Be careful not to overmix.
- Fold in Chocolate Chips: Gently fold in the semi-sweet chocolate chips with a spatula.
- Chill the Dough: Cover the bowl with plastic wrap and chill the dough in the refrigerator for at least 30 minutes. This is crucial for preventing the cookies from spreading too much while baking.
Part 2: Shaping and Baking the Bear Cookies
- Preheat Oven: Preheat your oven to 375°F (190°C) and line two baking sheets with parchment paper.
- Shape the Head: Scoop out a tablespoon of chilled dough and roll it into a ball. This will be the bear’s head. Place it on the prepared baking sheet.
- Create the Ears: Take two small, pea-sized pieces of dough and roll them into tiny balls. Gently press them onto the top of the larger dough ball to create the ears.
- Form the Muzzle: Take another small piece of dough, slightly larger than the ears, and roll it into a ball. Flatten it slightly and press it onto the lower-center of the “head” to form the muzzle.
- Add the Face: Gently press a chocolate chip into the muzzle for the nose. Place two more chocolate chips above the muzzle for the eyes.
- Bake: Arrange the cookies a few inches apart on the baking sheet. Bake for 9-11 minutes, or until the edges are golden brown.
- Cool: Let the cookies cool on the baking sheet for 5 minutes before transferring them to a wire rack to cool completely.

Tips for the Best Bear Cookies
- Don’t Skip Chilling: Chilling the dough is essential. It solidifies the fat, which helps the cookies maintain their adorable bear shape as they bake.
- Uniform Sizes: Try to make the dough balls for the heads and ears as uniform as possible to ensure even baking. A small cookie scoop can be very helpful for the heads.
- Press Firmly: When attaching the ears and muzzle, press them onto the head firmly enough to stick, but not so hard that you flatten the cookie.
If you love fun and easy dessert recipes, you should also check out these delightful 3-ingredient banana brownies. They are incredibly simple and a guaranteed crowd-pleaser.
Variations and Decoration Ideas
While classic chocolate chips are perfect, feel free to get creative!
- Different Chips: Try using white chocolate chips, peanut butter chips, or even mini M&M’s in the dough.
- Add a Bowtie: Use a small, heart-shaped sprinkle or a mini M&M to give your bear a cute bowtie under its muzzle.
- Go for a Panda: Use a chocolate cookie dough base and white chocolate chips for the eyes and muzzle to create cute panda bears. For another savory option before your sweet treat, this crockpot marry me chicken is a fantastic choice.
How to Store Your Cookies
Store your Chocolate Chip Bear Cookies in an airtight container at room temperature. They will stay fresh and delicious for up to 5 days. You can also freeze the unbaked dough balls for up to 3 months. When ready to bake, simply place the frozen dough on a baking sheet and add a few extra minutes to the baking time.
Yes, you can use store-bought refrigerated chocolate chip cookie dough as a shortcut. However, you may need to chill it further to ensure it’s firm enough to shape properly.
When you attach the small dough balls for the ears and muzzle, press them onto the main head piece firmly. The dough should be slightly sticky, which will help them adhere during baking.
Store the cooled cookies in an airtight container at room temperature. They will remain fresh for up to 5 days.
The most important step is to chill the dough for at least 30 minutes before shaping and baking. Chilling solidifies the butter, which helps the cookies hold their bear shape and prevents them from spreading out too much in the oven.
No special tools are needed! These bear cookies are designed to be shaped by hand. For consistency, you can use a 1-tablespoon cookie scoop for the head, but your hands are the best tools for rolling the dough and forming the ears and muzzle.
Share Your Creations!
We absolutely love seeing your take on our recipes. If you make these adorable Chocolate Chip Bear Cookies, be sure to share a photo and tag us! For more delicious and easy-to-follow recipes, follow us on Pinterest. We are always pinning new ideas to inspire your next kitchen adventure.

Chocolate Chip Bear Cookies: A Fun & Easy Recipe
Whip up these adorable and delicious Chocolate Chip Bear Cookies! This easy-to-follow recipe is a perfect, fun-filled baking project for kids and adults alike, resulting in the cutest chocolate chip cookies you've ever seen.
Ingredients
Equipment
Instructions
Making the Cookie Dough- In a medium bowl, whisk together the all-purpose flour, baking soda, and salt. Set it aside.
- In a large bowl, use an electric mixer to beat the softened unsalted butter, granulated sugar, and brown sugar until the mixture is light and fluffy, about 2-3 minutes.
- Beat in the eggs one at a time, mixing well after each addition. Stir in the vanilla extract.
- Gradually add the dry ingredient mixture to the wet ingredients, mixing on low speed until just combined. Be careful not to overmix.
- Gently fold in the semi-sweet chocolate chips with a spatula.
- Cover the bowl with plastic wrap and chill the dough in the refrigerator for at least 30 minutes. This is crucial for preventing the cookies from spreading too much while baking.
Shaping and Baking the Bear Cookies- Preheat your oven to 375°F (190°C) and line two baking sheets with parchment paper.
- Scoop out a tablespoon of chilled dough and roll it into a ball. This will be the bear's head. Place it on the prepared baking sheet.
- Take two small, pea-sized pieces of dough and roll them into tiny balls. Gently press them onto the top of the larger dough ball to create the ears.
- Take another small piece of dough, slightly larger than the ears, and roll it into a ball. Flatten it slightly and press it onto the lower-center of the 'head' to form the muzzle.
- Gently press a chocolate chip into the muzzle for the nose. Place two more chocolate chips above the muzzle for the eyes.
- Arrange the cookies a few inches apart on the baking sheet. Bake for 9-11 minutes, or until the edges are golden brown.
- Let the cookies cool on the baking sheet for 5 minutes before transferring them to a wire rack to cool completely.
Notes
Don't Skip Chilling: Chilling the dough is essential. It solidifies the fat, which helps the cookies maintain their adorable bear shape as they bake.
Uniform Sizes: Try to make the dough balls for the heads and ears as uniform as possible to ensure even baking. A small cookie scoop can be very helpful for the heads.
Press Firmly: When attaching the ears and muzzle, press them onto the head firmly enough to stick, but not so hard that you flatten the cookie.
Chocolate Chip Bear Cookies: A Fun & Easy Recipe
Ingredients
Equipment
Instructions
- In a medium bowl, whisk together the all-purpose flour, baking soda, and salt. Set it aside.
- In a large bowl, use an electric mixer to beat the softened unsalted butter, granulated sugar, and brown sugar until the mixture is light and fluffy, about 2-3 minutes.
- Beat in the eggs one at a time, mixing well after each addition. Stir in the vanilla extract.
- Gradually add the dry ingredient mixture to the wet ingredients, mixing on low speed until just combined. Be careful not to overmix.
- Gently fold in the semi-sweet chocolate chips with a spatula.
- Cover the bowl with plastic wrap and chill the dough in the refrigerator for at least 30 minutes. This is crucial for preventing the cookies from spreading too much while baking.
- Preheat your oven to 375°F (190°C) and line two baking sheets with parchment paper.
- Scoop out a tablespoon of chilled dough and roll it into a ball. This will be the bear's head. Place it on the prepared baking sheet.
- Take two small, pea-sized pieces of dough and roll them into tiny balls. Gently press them onto the top of the larger dough ball to create the ears.
- Take another small piece of dough, slightly larger than the ears, and roll it into a ball. Flatten it slightly and press it onto the lower-center of the 'head' to form the muzzle.
- Gently press a chocolate chip into the muzzle for the nose. Place two more chocolate chips above the muzzle for the eyes.
- Arrange the cookies a few inches apart on the baking sheet. Bake for 9-11 minutes, or until the edges are golden brown.
- Let the cookies cool on the baking sheet for 5 minutes before transferring them to a wire rack to cool completely.
Notes
Uniform Sizes: Try to make the dough balls for the heads and ears as uniform as possible to ensure even baking. A small cookie scoop can be very helpful for the heads.
Press Firmly: When attaching the ears and muzzle, press them onto the head firmly enough to stick, but not so hard that you flatten the cookie.