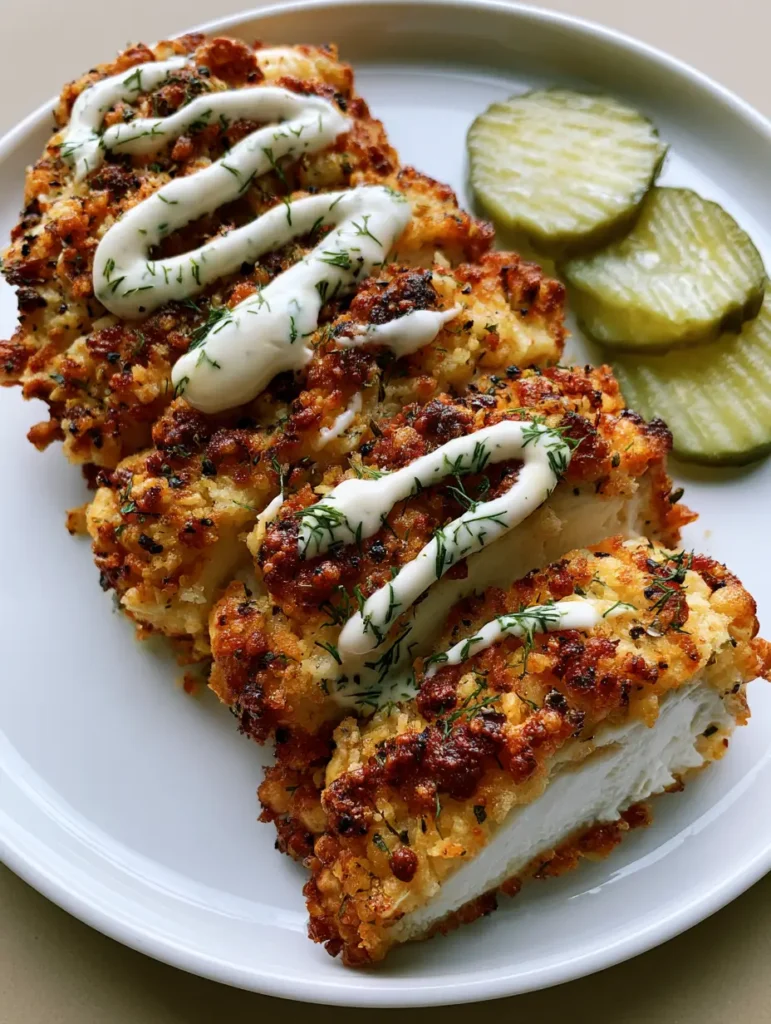
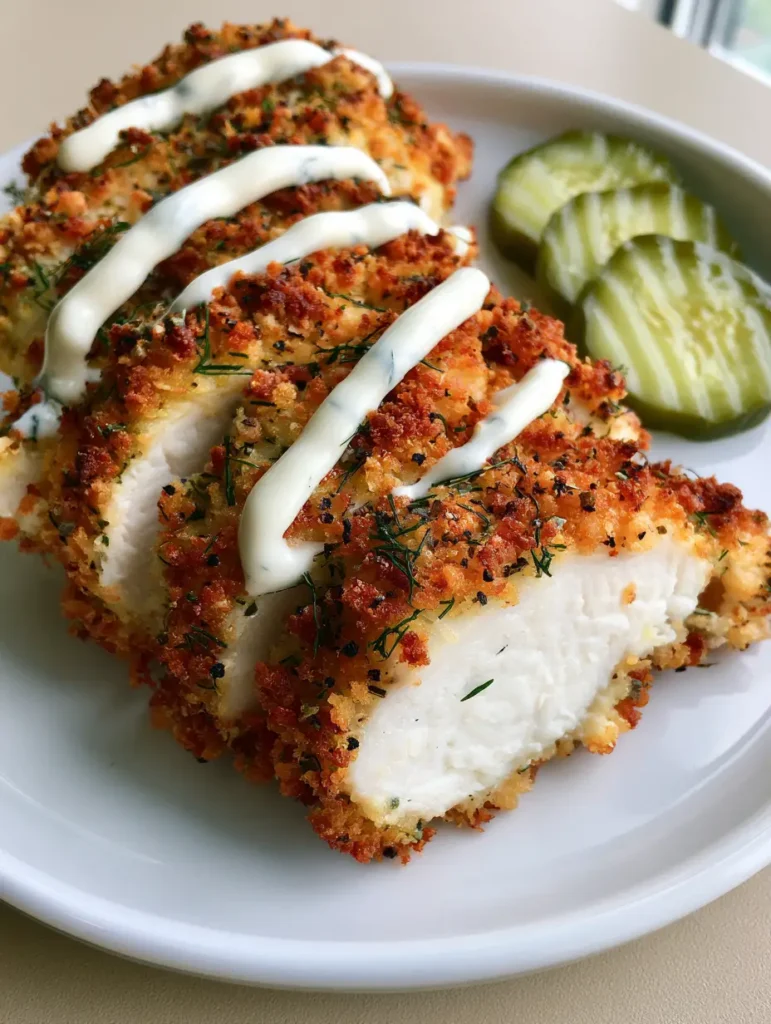
If you are a fan of that unmistakable vinegary tang and a crust so loud it echoes, this Dill Pickle Chicken is the ultimate dinner upgrade. This isn’t just another breaded chicken recipe; it is a masterclass in texture and flavor layering that transforms basic poultry into a gourmet experience. We have meticulously designed this dish to deliver a high-contrast visual and sensory punch, featuring a golden-brown exterior and a juicy, opaque white interior.
Imagine slicing into a breast that has been brined to perfection, only to find a coating that shatters with every bite. The Dill Pickle Chicken is finished with a precise zig-zag drizzle of creamy ranch and served with the iconic trio of green pickle chips. Whether you are looking for a weeknight win or a centerpiece for a casual gathering, this recipe hits every mark for enthusiasts of bold flavors.
Why This Crunchy Dill Pickle Chicken Recipe Works Every Single Time
- Double-Layered Crunch: By combining Panko breadcrumbs with freshly grated Parmesan, we create a multi-dimensional crust that browns faster and stays crispier than standard flour coatings.
- The Brine Secret: Utilizing a pickle juice brine ensures that the Dill Pickle Chicken remains incredibly juicy and “opaque white” inside, as described in our culinary blueprint.
- Visual Sophistication: The contrast of the green dried dill flakes against the golden-brown crust, topped with a professional ranch drizzle, makes this plate look like it came straight from a high-end bistro.
- Profound Flavor Profile: The acidity of the pickles balances the rich, salty notes of the Parmesan and the creamy ranch dressing perfectly.
Essential Elements for the Ultimate Dill Pickle Chicken Crunch
Boneless Skinless Chicken Breasts: We use 1.5 lbs (680g) of chicken, sliced into even cutlets to ensure rapid, uniform cooking. This allows the crust to brown perfectly without drying out the center.
Dill Pickle Brine: 1 cup (240ml) of juice from your favorite pickle jar acts as a tenderizer. The salt and vinegar in the brine penetrate the fibers, seasoning the chicken from the inside out.
Panko Breadcrumbs: 1.5 cups (90g) of Japanese-style Panko provide that “extra crunchy” texture requested in the visual blueprint. Their larger surface area creates more “nooks and crannies” for the heat to crisp up.
Grated Parmesan Cheese: 1/2 cup (45g) of finely grated Parmesan is the secret to the deep golden-brown color. As the cheese melts and fries against the pan, it creates a savory, umami-rich lattice.
Dried Dill Flakes: 2 tbsp (4g) of dried dill flakes are essential for the visual and aromatic signature of this dish. These flakes remain vibrant and visible in the breading after cooking.
Cracked Black Pepper: 1 tsp (2g) of coarsely cracked pepper provides those distinct dark flecks visible in the high-resolution prompt images. It adds a gentle heat that cuts through the creaminess of the ranch.
Creamy Ranch Dressing: 1/4 cup (60ml) of high-quality, thick ranch dressing is used for the final zig-zag drizzle. It provides a cool, herbal finish to the hot, crispy chicken.
Dill Pickle Chips: Exactly 3 round green pickle chips per serving are used as a garnish. This provides a fresh, acidic crunch to cleanse the palate between bites of the rich Dill Pickle Chicken.
Foundational Fats: 3 tbsp (45ml) of neutral oil (like avocado or grapeseed) and 1 tbsp (14g) of butter. The oil allows for high-heat searing, while the butter helps achieve that specific golden-brown hue.
Pro-Level Tools for a Picture-Perfect Plate
To achieve the “handheld smartphone photo” aesthetic with professional results, you need a heavy-bottomed skillet. A cast-iron pan or a heavy stainless steel skillet is preferred for even heat distribution. This prevents “hot spots” that could burn the Parmesan before the chicken is cooked through.
You will also need a wire cooling rack set over a baking sheet. Placing the Dill Pickle Chicken directly on a plate after frying will cause steam to build up, making the bottom soggy. A wire rack allows air to circulate, maintaining that 360-degree crunch. Finally, a squeeze bottle or a small piping bag is necessary to achieve the “zig-zag drizzle” of ranch dressing with precision.
Developing the Texture: Step-by-Step Instructions
The Brining Phase for Maximum Juiciness
Place your sliced chicken breasts into a large bowl or resealable bag. Pour 1 cup (240ml) of dill pickle brine over the meat, ensuring every piece is submerged. Let this sit for at least 30 minutes, but no more than 2 hours, as the acid can begin to “cook” the chicken if left too long.
Constructing the Triple-Dredge Coating
Set up three shallow bowls. In the first, place 1/2 cup (60g) of all-purpose flour seasoned with a pinch of salt. In the second, whisk 2 large eggs. In the third, combine your Panko, Parmesan, dried dill flakes, and cracked black pepper. This third bowl is where the visual magic of the Dill Pickle Chicken happens.
Achieving the Golden-Brown Sear
Heat your oil and butter in the skillet over medium-high heat. You will know it is ready when a stray breadcrumb sizzles immediately upon contact. Carefully lay the chicken in the pan, working in batches to avoid crowding, which would lower the oil temperature and lead to greasiness.
Cook for 4-5 minutes per side. Watch for the visual cue: the edges of the breading should look dark gold and the Parmesan should appear lacy and crisp. The chicken should reach an internal temperature of 165°F (74°C) while remaining “opaque white” and glistening with moisture.
The Final Plating and Garnish
Place the sliced Dill Pickle Chicken onto a plain white ceramic plate against a neutral background. Arrange three round green dill pickle chips beside the meat. Fill a squeeze bottle with ranch and apply a thin, zig-zag drizzle across the top of the slices. This creates the exact “top-down view” aesthetic from our visual guide.
Chef’s Secrets for a Flawless Result
- Press the Breading: When dredging in the Panko-Parmesan mix, use the heel of your hand to firmly press the coating into the chicken. This ensures the crust doesn’t flake off in the pan.
- Temperature Control: If the Parmesan is browning too quickly, turn the heat down to medium. The cheese contains solids that can burn if the oil is screaming hot.
- Rest Before Slicing: Allow the chicken to rest for 3 minutes on the wire rack before slicing. This allows the juices to redistribute, ensuring the “juicy” interior seen in the visual prompt.
- The Ranch Drizzle: If your ranch is too thick to drizzle, whisk in a teaspoon of pickle juice to thin it out while adding an extra punch of flavor.
Smart Storage and Crisp-Focused Reheating
While this Dill Pickle Chicken is best served fresh for maximum crunch, leftovers can be stored in an airtight container for up to 3 days. To maintain the structural integrity of the crust, avoid the microwave. The microwave will make the breading rubbery and soft.
For best results, reheat in an air fryer at 350°F (175°C) for 3-4 minutes, or in a toaster oven. This will re-crisp the Parmesan and Panko without overcooking the chicken breast. Wait to apply the ranch drizzle and fresh pickle chips until after reheating.
What to Serve with Your Dill Pickle Chicken
Because this dish has a bold, acidic profile, it pairs beautifully with creamy or slightly sweet sides. For a classic deli-style dinner, serve it alongside a loaded macaroni salad that can stand up to the pickle tang. If you want something even more indulgent, a side of creamy garlic pasta provides a smooth textural contrast to the crunchy chicken.
For those looking for a lighter pairing, a fresh Amish pasta salad offers a sweet and sour note that complements the dill. And if you’re feeling adventurous with your side dishes, try serving this with cheesy zucchini breadsticks to double down on the cheesy, crispy theme.
Frequently Asked Questions
Yes! Preheat your air fryer to 400°F (200°C). Spray the breaded chicken generously with oil on both sides and cook for 12-15 minutes, flipping halfway through until the crust is golden-brown.
You can, but dried dill flakes are preferred for the breading as they distribute more evenly and don’t burn as easily as fresh herbs during the high-heat frying process.
The pickle juice brine provides a distinct tang and incredible juiciness, but it isn’t overpowering. The addition of dried dill flakes and fresh pickle chips on the side allows you to control the ‘pickle intensity’ of each bite.
For the best flavor, brine for at least 30 minutes. Avoid going over 2 hours, as the high acid content in the vinegar can change the texture of the chicken proteins, making them slightly mushy.
This usually happens if the chicken is too wet or the oil isn’t hot enough. Make sure to pat the chicken dry after brining, and press the Panko-Parmesan mixture firmly into the meat with your hands.
The Definitive Dill Pickle Chicken Recipe
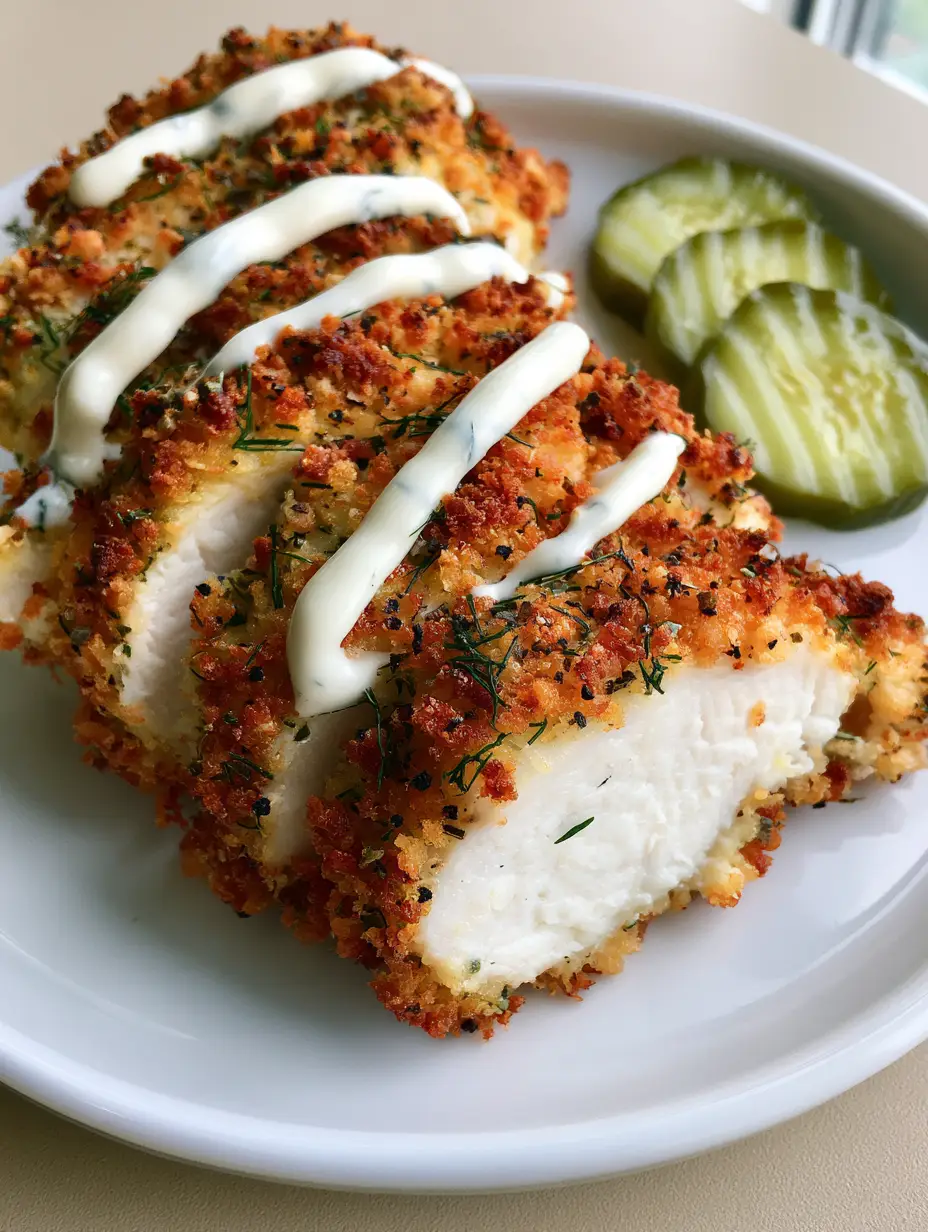
Dill Pickle Chicken with Extra Crunchy Parmesan Breading
Ingredients
Equipment
Instructions
- Submerge chicken slices in 1 cup (240ml) pickle brine for 30-60 minutes.
- Coat chicken in flour, dip in whisked eggs, and press firmly into the Panko, Parmesan, and dill mixture.
- Fry chicken in oil and butter over medium-high heat for 4-5 minutes per side until golden-brown and crispy.
- Slice chicken, place on plate with 3 pickle chips, and apply a zig-zag drizzle of ranch dressing.
Notes
Use a wire rack for cooling to prevent the bottom from becoming soggy.
Join the Harvest Community!
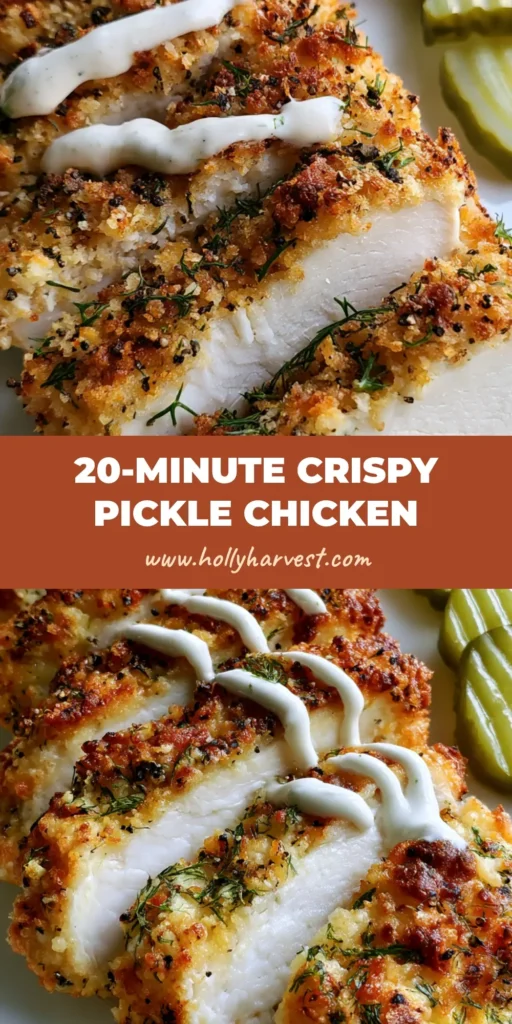
The Dill Pickle Chicken is more than a meal; it’s a conversation starter. The contrast of the golden-brown crust and the vibrant green dill makes it a photogenic star on any dinner table. If you enjoyed this recipe, please leave a comment below and tell us how yours turned out!
Don’t forget to follow us on Pinterest for more visually stunning recipe inspiration. Share your creations by tagging us—we love seeing your “handheld smartphone photos” of our recipes in the wild! For more chicken inspiration, check out our other favorite poultry dishes on the blog.