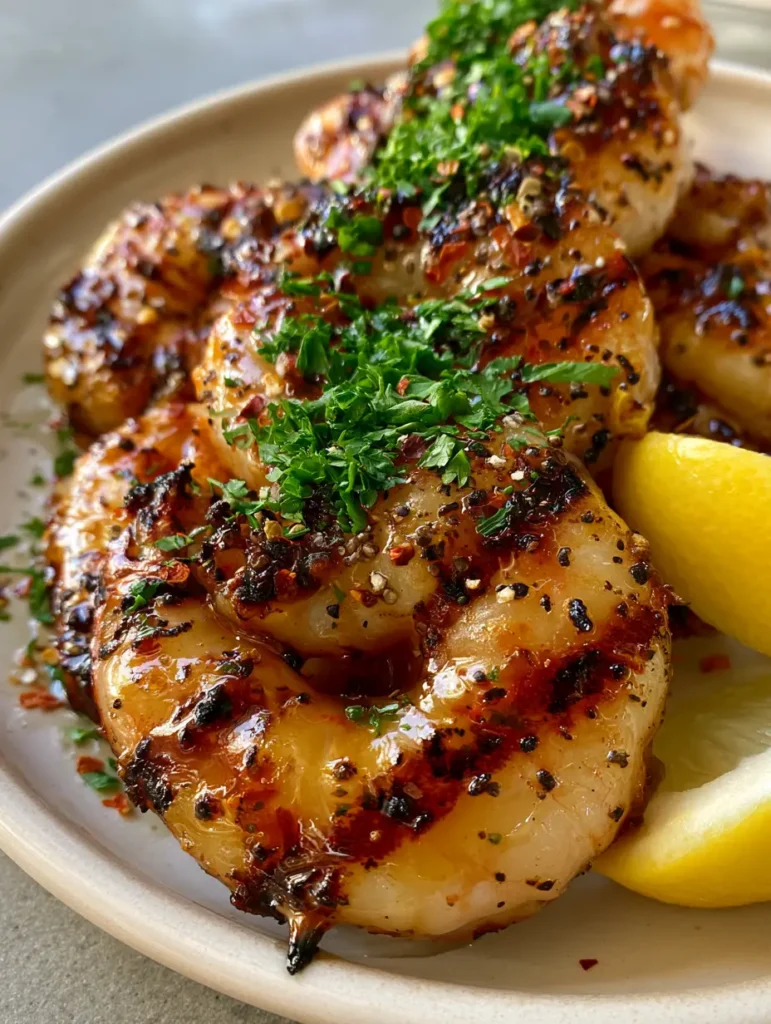
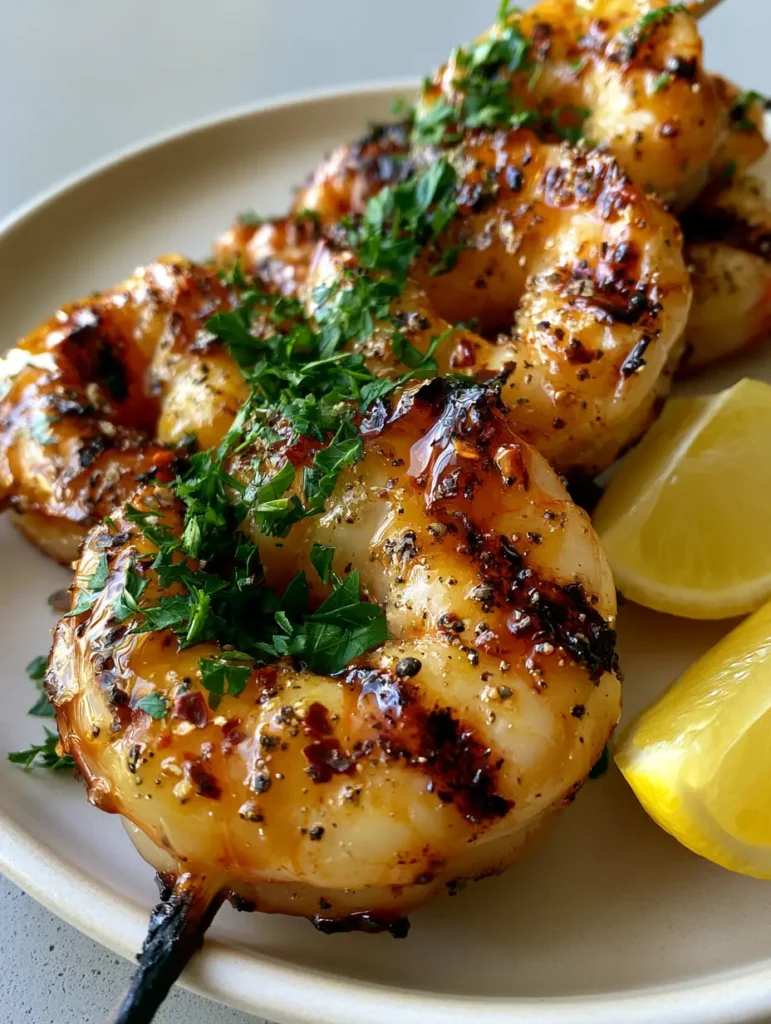
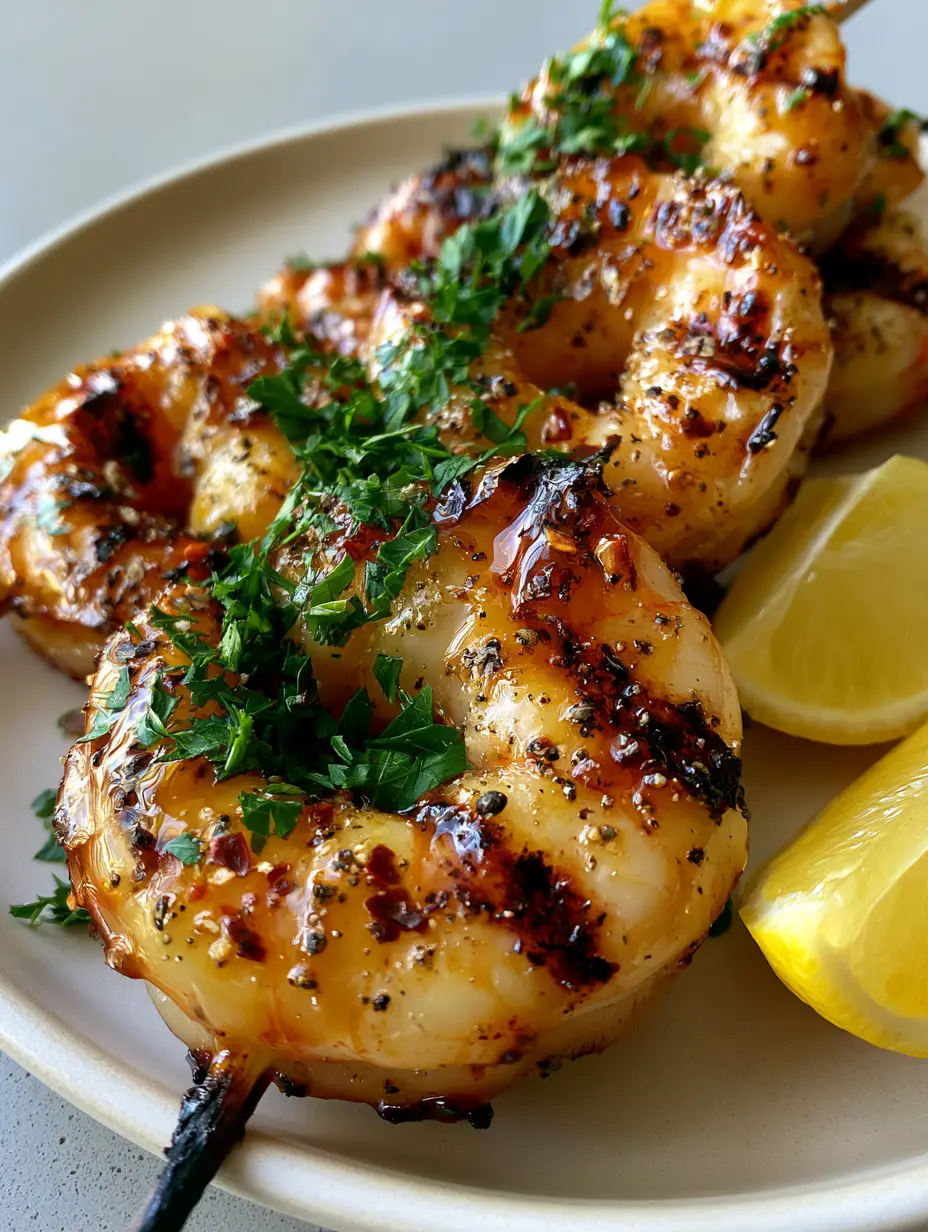
There is nothing quite like the sight of Honey Glazed Grilled Shrimp resting on a platter, their shells (or tails) catching the golden hour light. This recipe is designed to deliver that perfect handheld smartphone photo aesthetic: large, curved, opaque pink shrimp boasting distinct dark brown charred grill marks. The star of the show is a thick, glossy golden-amber honey glaze that clings to every crevice, speckled with the heat of red pepper flakes and the bite of cracked black pepper.
Whether you are hosting a backyard barbecue or looking for a quick weeknight dinner that feels like a five-star meal, these skewers are the answer. We have meticulously crafted this method to ensure the honey caramelizes without burning, resulting in a succulent texture and a flavor profile that balances sweet, heat, and citrus. The final dusting of finely chopped fresh bright green parsley adds that professional pop of color against the neutral light grey background of your serving plate.
Why These Sticky Honey Skewers Are a Total Game Changer
- The Perfect Char: By managing grill temperatures and glaze timing, we achieve those deep brown sear marks without overcooking the delicate shrimp.
- Glossy Amber Finish: Our specific honey-to-acid ratio creates a glaze that stays thick and reflective, rather than running off into the coals.
- Symphony of Textures: Experience the snap of the shrimp, the stickiness of the honey, and the slight crunch of cracked black pepper in every bite.
- Visual Precision: This dish is designed to look exactly like a professional food photograph, complete with vibrant yellow lemon wedges for that essential acidic lift.
Everything You Need for Sticky Glazed Perfection
The secret to incredible Honey Glazed Grilled Shrimp lies in the quality of your seafood and the balance of your marinade. Here is what you will need to gather.
Large Shrimp (16/20 count): You want 1.5 lbs (680g) of jumbo shrimp, peeled and deveined with tails left on for that classic visual appeal. Larger shrimp are essential because they provide enough surface area for charring while remaining juicy inside.
High-Quality Honey: Use 1/2 cup (120ml) of clover or wildflower honey to form the base of our golden-amber glaze. Honey provides the natural sugars necessary for that thick, glossy coating that catches the light so beautifully.
Fresh Lemon Juice & Wedges: You will need 2 tbsp (30ml) of juice for the glaze and extra vibrant yellow wedges for serving. The acidity cuts through the sugar and brightens the opaque pink protein of the shrimp.
Cracked Black Pepper & Red Pepper Flakes: Use 1 tsp (2g) of coarsely cracked pepper and 1/2 tsp (1g) of red chili flakes. These create the distinct “speckled” look described in our visual blueprint while adding layers of warmth.
Fresh Parsley: A generous 1/4 cup (15g) of finely chopped bright green parsley is non-negotiable for the final garnish. It provides the necessary color contrast against the warm tones of the honey and shrimp.
Foundational Ingredients: Do not forget 2 tbsp (30ml) of neutral oil with a high smoke point (like avocado or grapeseed oil) for the grill grates. You will also need 1/2 tsp (3g) of kosher salt to enhance the natural sweetness of the shellfish.
Must-Have Tools for Professional Skewering
To achieve the look of those perfectly aligned skewers, equipment matters just as much as ingredients. You cannot get those distinct grill marks without the right gear.
Wooden Skewers: If using bamboo, ensure you have at least 12-15 skewers. They provide a rustic, organic look that contrasts beautifully with the off-white ceramic plates often used in professional food photography.
Heavy-Duty Grill Pan or Outdoor Grill: A cast-iron grill surface is ideal for creating those dark brown charred marks that define a high-end grilled dish. If you love this smoky flavor profile, you might also enjoy our BBQ Chicken Rice Bowls.
Silicone Basting Brush: This is the only way to apply the “thick, glossy golden-amber honey glaze” evenly without wiping away the spices. A brush allows you to dab the glaze into the curves of the shrimp.
The Master Method for Achieving That Perfect Grill Char
Preparing the Shrimp and Skewers
If using wooden skewers, soak them in water for at least 30 minutes before grilling. This prevents them from splintering or catching fire, keeping the focus on the beautiful shrimp.
Pat the shrimp bone-dry with paper towels. This is a crucial culinary step; moisture is the enemy of the sear. If the shrimp are wet, they will steam instead of developing those dark brown char marks.
Whisking the Glossy Honey Glaze
In a small bowl, combine the honey, lemon juice, salt, cracked black pepper, and red pepper flakes. Whisk vigorously until the glaze is uniform and thick.
Set aside about 1/4 cup (60ml) of the glaze in a separate ramekin for final serving. This ensures you aren’t cross-contaminating the finished dish with raw shrimp juices from the basting brush.
The Skewering Technique
Thread the shrimp onto the skewers, piercing through both the thick head-end and the tail-end. This creates a “C” shape that looks curved and plump on the plate.
Ensure the shrimp are touching but not smashed together. This allows the heat to circulate while keeping them stable on the grill for even marking.
Searing for Visual and Flavor Impact
Preheat your grill to medium-high heat (about 400°F/204°C). Lightly oil the grates using a folded paper towel dipped in oil. You should hear a distinct sizzle the moment the shrimp hit the metal.
Lay the skewers down and cook for 2 minutes without moving them. This patience is what creates those “distinct dark brown charred grill marks.” Flip the skewers using tongs; the shrimp should now be turning opaque pink.
The Glazing Finale
Generously brush the honey mixture over the upward-facing side of the shrimp. Flip and cook for another 60 seconds, then brush the other side. The honey will bubble and caramelize almost instantly.
Remove the skewers the moment the shrimp are opaque throughout and the glaze is thick and reflective. Overcooking will lead to rubbery shrimp, so trust the visual cues of the pink flesh and golden glaze.
Professional Secrets for Grilling Success
- The “Dry Rub” First: If you want even more color, toss the dry shrimp in a tiny bit of smoked paprika before skewering for an underlying glow.
- Avoid Glaze Burn: Honey has a high sugar content and burns quickly. Only apply the glaze during the final 90 seconds of cooking to keep it golden-amber rather than black.
- The Double Skewer Trick: Use two skewers per row of shrimp to prevent them from spinning when you try to flip them. This ensures perfect contact with the grill grates.
- Freshness Factor: Always use fresh lemon juice. Bottled juice lacks the bright enzymes that make the Honey Glazed Grilled Shrimp truly sing.
Smart Storage and Reheating Advice
While these are best served fresh off the grill for maximum glossiness, you can store leftovers in an airtight container for up to 2 days. The honey glaze will thicken further in the fridge.
To reheat, avoid the microwave as it will turn the shrimp rubbery. Instead, flash-sear them in a hot skillet for 30 seconds per side or place them in a 350°F (175°C) oven just until warmed through. They are also excellent served cold over Shrimp and Avocado Bowls.
What to Serve with Honey Glazed Shrimp
The sweetness of the honey and the acidity of the lemon make these skewers incredibly versatile. For a complete summer spread, pair them with a refreshing Mexican Street Corn Salad.
If you are looking for more skewer inspiration, our Dill Pickle Chicken Skewers offer a tangy contrast to the sweetness here. For a light lunch, serve these shrimp alongside a bowl of Authentic Greek Salad.
Frequently Asked Questions
Yes, but ensure they are completely thawed and patted extremely dry. Any excess moisture will prevent the honey glaze from sticking and stop the char marks from forming.
Absolutely. Soaking bamboo skewers for at least 30 minutes prevents them from burning and breaking, ensuring your Honey Glazed Grilled Shrimp look pristine when served.
Honey contains natural sugars that burn quickly. Apply the glaze only during the final 60-90 seconds of grilling to achieve a glossy golden-amber finish without carbonizing.
Leaving the tails on provides a better visual ‘handle’ and helps the shrimp maintain their curved shape on the skewers, which is essential for that professional food photography look.
Overcooking is the main culprit. Shrimp only need 2-3 minutes per side. Once they turn opaque pink and reach an internal temperature of 120°F (49°C), remove them from the heat immediately.
The Complete Honey Glazed Grilled Shrimp Recipe
Honey Glazed Grilled Shrimp: The Ultimate Sticky Summer Skewers
Ingredients
Equipment
Instructions
- Submerge wooden skewers in water for at least 30 minutes to prevent burning on the grill.
- Pat the shrimp thoroughly dry with paper towels and season with kosher salt. Dry surface is essential for charring.
- Whisk honey, lemon juice, black pepper, and red pepper flakes in a small bowl until smooth.
- Thread shrimp onto skewers. Place on a preheated 400°F (204°C) grill for 2 minutes per side until opaque pink with dark brown char marks.
- During the last 90 seconds, brush the honey glaze generously over both sides of the shrimp until glossy and bubbling.
- Remove from heat, sprinkle with fresh parsley, and serve with yellow lemon wedges.
Notes
Apply the honey glaze only at the end to prevent the sugars from burning.
Bring the Taste of Summer Home
These Honey Glazed Grilled Shrimp are more than just a meal; they are a sensory experience. From the sizzle of the grill to the final dusting of parsley, every step is designed to create a dish that tastes as incredible as it looks. The combination of charred edges and sticky sweetness is a crowd-pleaser that never fails.
If you enjoyed this recipe, please leave a comment below and let us know how your char marks turned out! Don’t forget to share your photos and follow us on Pinterest for more culinary inspiration. Happy grilling!