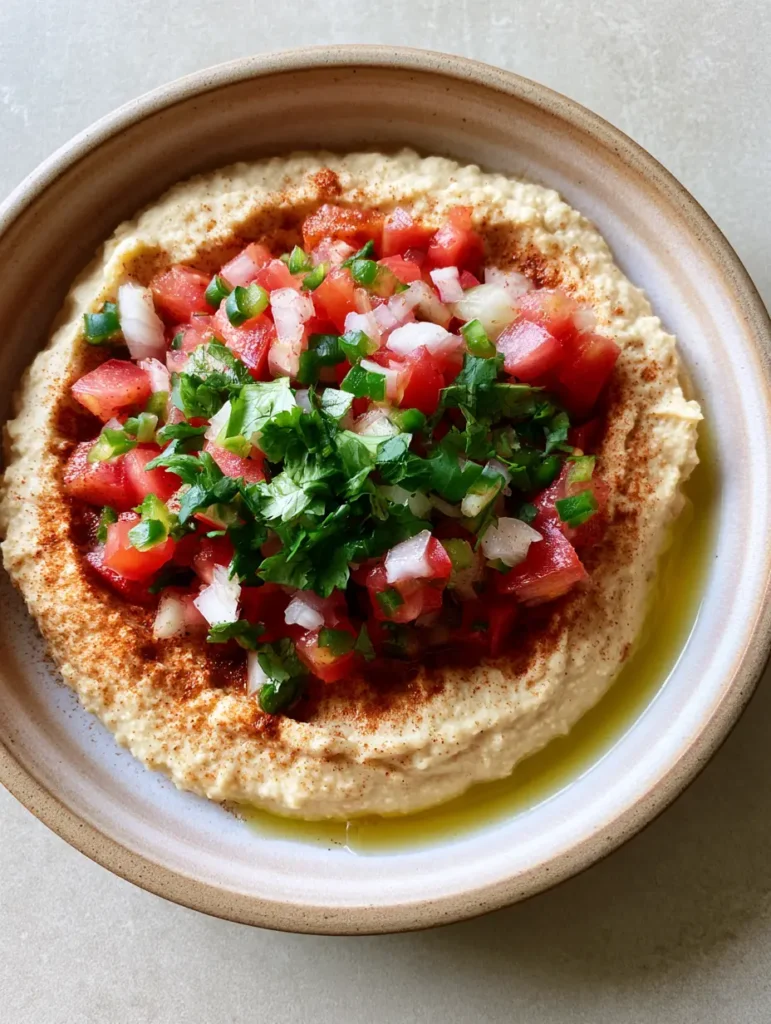
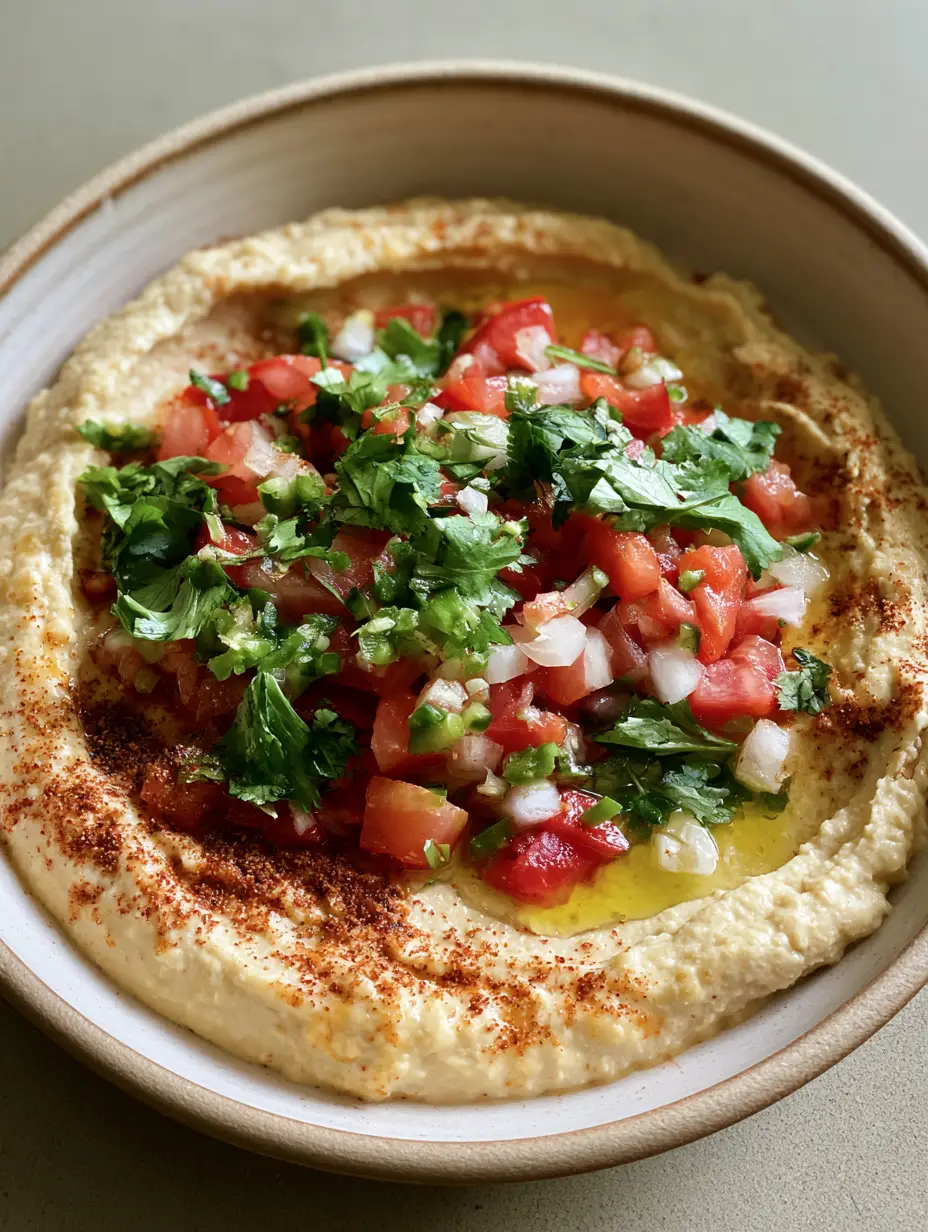
Experience the perfect culinary marriage where the velvety traditions of the Middle East meet the vibrant, bold zest of Mexico in this Taco Hummus. This isn’t just a dip; it’s a sophisticated fusion of textures designed to be the centerpiece of your next gathering. Imagine a shallow ceramic bowl filled with a base so smooth it reflects the soft, natural daylight, topped with a colorful crown of hand-chopped aromatics.
Our Taco Hummus captures the essence of a handheld smartphone photo—unpretentious, fresh, and irresistibly appetizing. By combining the earthy protein of chickpeas with the sharp bite of raw white onions and the heat of minced jalapenos, we create a flavor profile that is both familiar and excitingly new. Whether you are prepping for a quick lunch or a festive dinner, this recipe delivers professional results with minimal effort.
Why This Mexican-Inspired Chickpea Dip is a Total Game Changer
- Unparalleled Smoothness: We use specific emulsification techniques to ensure your beige chickpea base is creamy and velvet-like, providing the perfect canvas for toppings.
- Textural Contrast: The crunch of raw white onions and the juiciness of diced red tomatoes provide a sensory “pop” against the dense hummus.
- Visual Vibrancy: The contrast between the reddish-brown taco seasoning and the bright green cilantro leaves makes this dish a visual masterpiece.
- Nutrient-Dense Profile: High in fiber and plant-based protein, this is a guilt-free indulgence that pairs perfectly with a variety of healthy sides.
Essential Components for the Perfect Taco Hummus Base
To achieve the visual and culinary success seen in our blueprint, every ingredient serves a structural and flavor-driven purpose. We don’t just throw things in a blender; we build layers of taste.
15 oz (425g) Canned Chickpeas: These provide the protein-rich foundation. For the smoothest results, look for “Kabuli” variety chickpeas which have thinner skins and a creamier interior.
1/3 cup (80ml) Premium Tahini: Tahini is the “invisible” glue of this recipe. It adds a nutty undertone and ensures the beige color is rich and light rather than dull and grey.
3 tbsp (45ml) Fresh Lemon Juice: The acidity is crucial to cut through the fat of the tahini and the richness of the olive oil. Always use fresh citrus for that bright, zingy finish.
2 tbsp (30ml) Ice-Cold Water: This is a professional chef’s secret. Adding ice water during the blending process aerates the hummus, making it fluffy and light.
1 tsp (6g) Fine Sea Salt: Salt is the universal flavor enhancer that bridges the gap between the chickpeas and the taco-inspired garnishes.
The Signature Pico de Gallo Topping and Aromatics
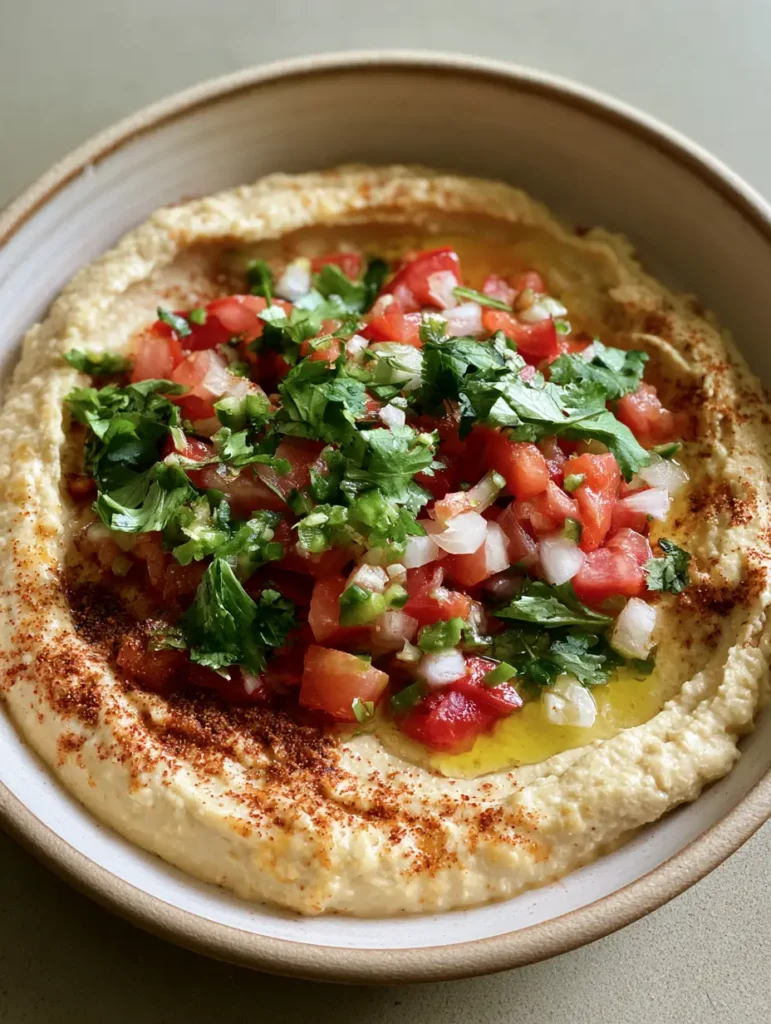
The visual blueprint requires a “fresh pico de gallo garnish,” which means we need high-quality raw produce to sit atop our Taco Hummus. The quality of your dicing here dictates the final aesthetic.
1/2 cup (75g) Diced Raw Red Tomatoes: Choose Roma or plum tomatoes for their low water content. This prevents the salsa from making your hummus soggy over time.
1/4 cup (40g) Diced Raw White Onions: White onions offer a sharper, cleaner crunch than red or yellow varieties, which is essential for that authentic taco profile.
1 tbsp (10g) Minced Raw Jalapenos: Keep the seeds in if you want a heat kick, or remove them for a milder, peppery flavor. Ensure they are minced finely for even distribution.
2 tbsp (3g) Fresh Cilantro Leaves: These should be scattered loosely to add height and a “just-picked” look to your bowl. Cilantro provides the necessary herbal top note.
1 tsp (3g) Dried Taco Seasoning: A light sprinkle of a reddish-brown blend (typically containing cumin, chili powder, and paprika) adds the smoky “taco” identity.
1 tbsp (15ml) Translucent Yellow Olive Oil: A final drizzle of high-quality Extra Virgin Olive Oil creates a beautiful sheen that catches the light in your photos.
Professional Tools for a Flawless Presentation
To recreate the handheld smartphone photo look, you need more than just a blender. You need the right tools to handle the delicate garnish and the dense dip.
A high-speed food processor is non-negotiable for achieving that “creamy beige” texture. Look for a model with at least a 7-cup capacity. For the pico de gallo, a sharp chef’s knife is required to ensure the tomatoes and onions are cleanly diced rather than crushed.
Finally, a shallow ceramic bowl is the ideal vessel. The wide surface area allows you to spread the hummus in a thin, even layer, making it easier to center the garnish and drizzle the oil effectively.
Step-by-Step Evolution of Your Taco Hummus
Phase 1: Achieving the Silky Chickpea Foundation
Drain and rinse your 15 oz (425g) chickpeas thoroughly. For a truly elite texture, place the chickpeas in a pot with water and a pinch of baking soda, simmering for 10 minutes until the skins are falling off.
Combine the chickpeas, 1/3 cup (80ml) tahini, 3 tbsp (45ml) lemon juice, and 1 tsp (6g) salt in the processor. Blend on high for 3 full minutes. Slowly drizzle in 2 tbsp (30ml) of ice water while the motor is running. You are looking for a visual cue of a pale, glossy, and whipped consistency.
Phase 2: Hand-Crafting the Fresh Pico Garnish
While the hummus rests, prepare your toppings. Dice the 1/2 cup (75g) red tomatoes and 1/4 cup (40g) white onions into uniform 1/4-inch (6mm) cubes. Finely mince the 1 tbsp (10g) jalapeno.
Mix these three ingredients in a small bowl. Do not add lime or salt to this garnish mixture yet; we want the vegetables to remain “raw” and structured as per the visual prompt, avoiding any wilting or weeping of juices into the hummus base.
Phase 3: The Art of the Plating and Garnish
Transfer the hummus to your shallow ceramic bowl. Use the back of a spoon to create a slight well in the center. Carefully spoon the pico de gallo mixture into that central well.
Take your 1 tsp (3g) of taco seasoning and sprinkle it from a height to ensure an even, light dusting across the surface. Scatter the 2 tbsp (3g) of fresh cilantro leaves over the salsa. Finish with a slow, circular drizzle of 1 tbsp (15ml) olive oil, ensuring the “translucent yellow” pools slightly in the hummus crevices.
Mastering the Sensory Details: Expert Tips
- The Temperature Trick: Serve your Taco Hummus at room temperature. Cold hummus loses its nuances and the olive oil can solidify, ruining the translucent visual effect.
- Chickpea Peeling: If you have 5 extra minutes, rubbing the skins off the chickpeas between two paper towels will result in a professional-grade smoothness that is impossible to achieve otherwise.
- Seed Control: When dicing your tomatoes, remove the watery “gel” and seeds. This ensures your pico de gallo stays vibrant and doesn’t bleed red juice into your beige hummus.
- Seasoning Balance: If your taco seasoning is salt-heavy, reduce the salt in the hummus base by half a teaspoon to maintain balance.
The Ideal Pairings for Your Taco Hummus
This dip is incredibly versatile and serves as a bridge between different cuisines. For a full “Mex-Terranean” spread, consider serving this alongside our Mediterranean Chicken Tacos. The smoky spices in the hummus complement the grilled chicken perfectly.
If you are looking for more plant-based dipping options, this pairs beautifully with a side of Cowboy Caviar (coming soon). The bean-based salsa adds even more texture and fiber to your snack plate. For a lighter approach, serve with crisp cucumber slices or warm pita bread that has been lightly toasted on the grill.
For those hosting a backyard BBQ, this Taco Hummus is a fantastic starter while you wait for Grilled Shrimp Skewers to finish on the flame. The creaminess of the dip balances the charred, smoky flavor of the seafood.
Storage and Longevity
While Taco Hummus is best enjoyed immediately for visual peak, you can store it in an airtight container in the refrigerator for up to 4 days. Note that the raw onions will become more pungent over time.
We do not recommend freezing this recipe once the fresh toppings are added. The cellular structure of the raw tomatoes and onions will break down upon thawing, resulting in a watery mess. If you must freeze, freeze the hummus base alone and add fresh toppings just before serving.
Frequently Asked Questions
Absolutely! This recipe is naturally vegan and gluten-free. Just double-check your taco seasoning label to ensure there are no hidden anti-caking agents containing gluten.
Yes, you can use a plain, high-quality store-bought hummus as a shortcut. Simply spread it into a shallow bowl and add the fresh diced tomatoes, onions, jalapenos, and taco seasoning as directed.
The key is to use Roma tomatoes and remove the watery seeds/pulp before dicing. Also, avoid adding salt to the vegetable garnish until the very moment of serving.
The spice level depends on the jalapeno. To keep it mild, remove all seeds and membranes from the pepper. For more heat, include the seeds or add a pinch of cayenne to the taco seasoning.
Ice water helps to emulsify the tahini and chickpeas, creating a lighter, fluffier texture and a paler, more professional beige color.
The Complete Taco Hummus Recipe Card
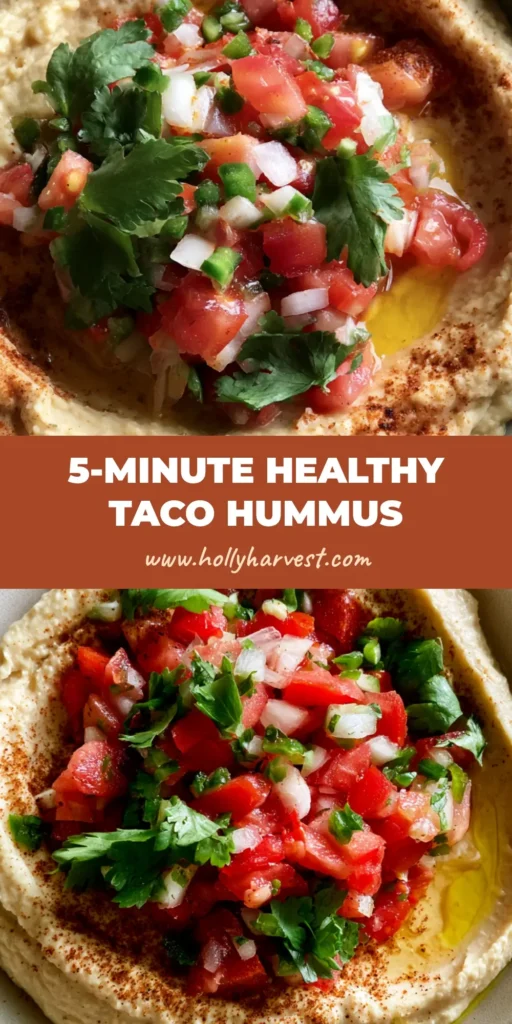
Taco Hummus: The Ultimate Creamy Mexican-Inspired Dip with Fresh Pico de Gallo
Ingredients
Equipment
Instructions
- Place chickpeas, tahini, lemon juice, and salt in a food processor. Process for 3 minutes until a thick, beige paste forms.
- With the motor running, slowly add the ice water. Continue blending until the hummus looks airy, pale, and glossy.
- In a separate bowl, toss together the diced tomatoes, white onions, and minced jalapenos to create the fresh pico de gallo.
- Spread the hummus into a shallow ceramic bowl. Center the pico de gallo on top, sprinkle with taco seasoning, scatter cilantro leaves, and finish with a drizzle of olive oil.
Notes
Use a shallow bowl to maximize the surface area for the taco-inspired toppings.
Join the Harvest Community!
We hope this Taco Hummus becomes a staple in your kitchen! It’s a testament to how simple ingredients, when treated with professional technique, can become something truly extraordinary. The combination of smooth chickpeas and fresh, raw salsa is a winner every single time.
If you enjoyed this recipe, please leave a comment below and let us know how it turned out! Don’t forget to follow us on Pinterest for more visually stunning recipe inspiration. Sign up for our newsletter to get elite culinary tips delivered straight to your inbox every week!