The Salmon Sushi Bake has taken the culinary world by storm, and for good reason. Imagine all the bright, umami-rich flavors of your favorite spicy salmon roll, transformed into a warm, comforting, and shareable casserole. This isn’t just a meal; it’s a sensory experience that bridges the gap between traditional Japanese flavors and the cozy indulgence of a home-cooked bake.
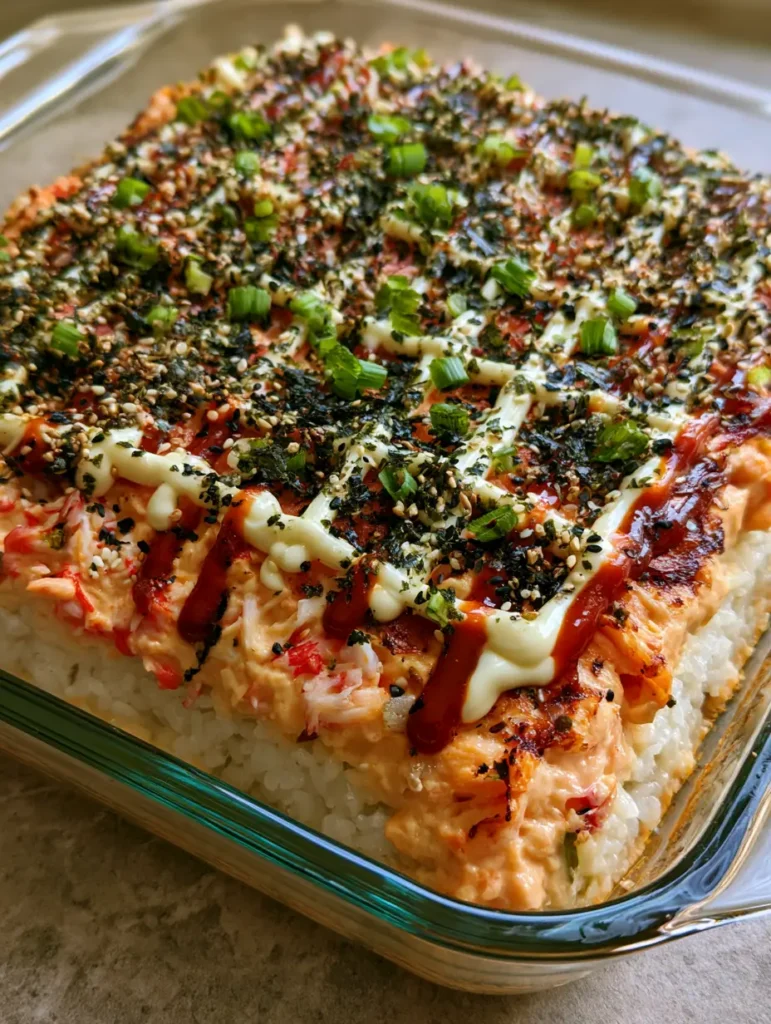
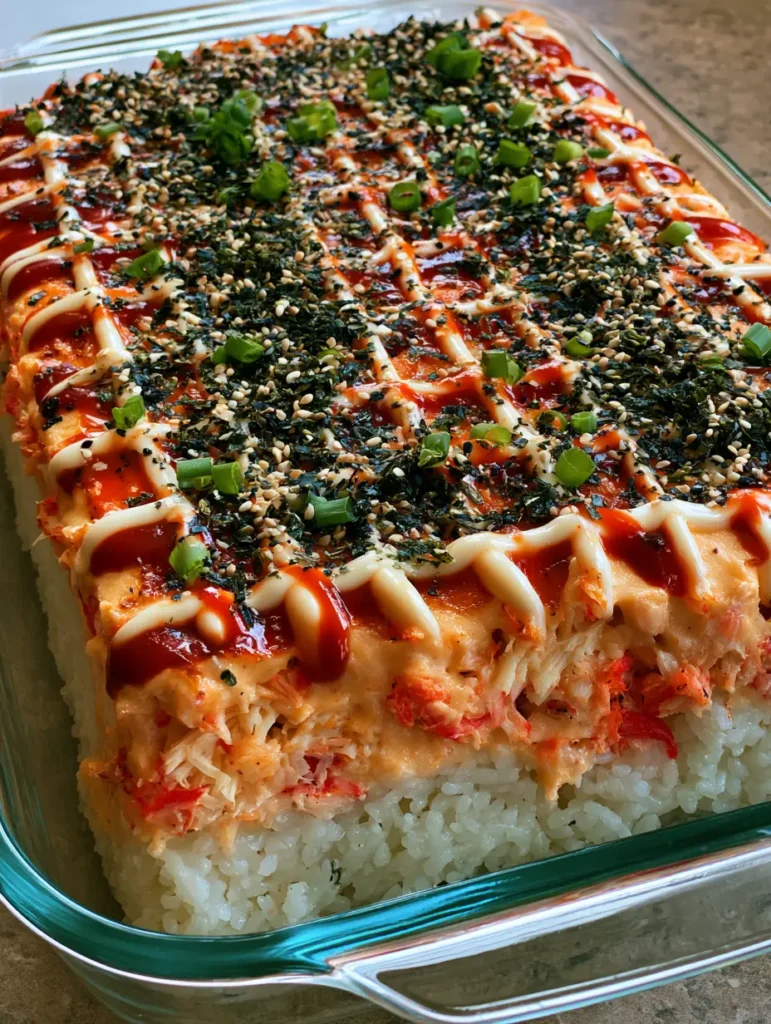
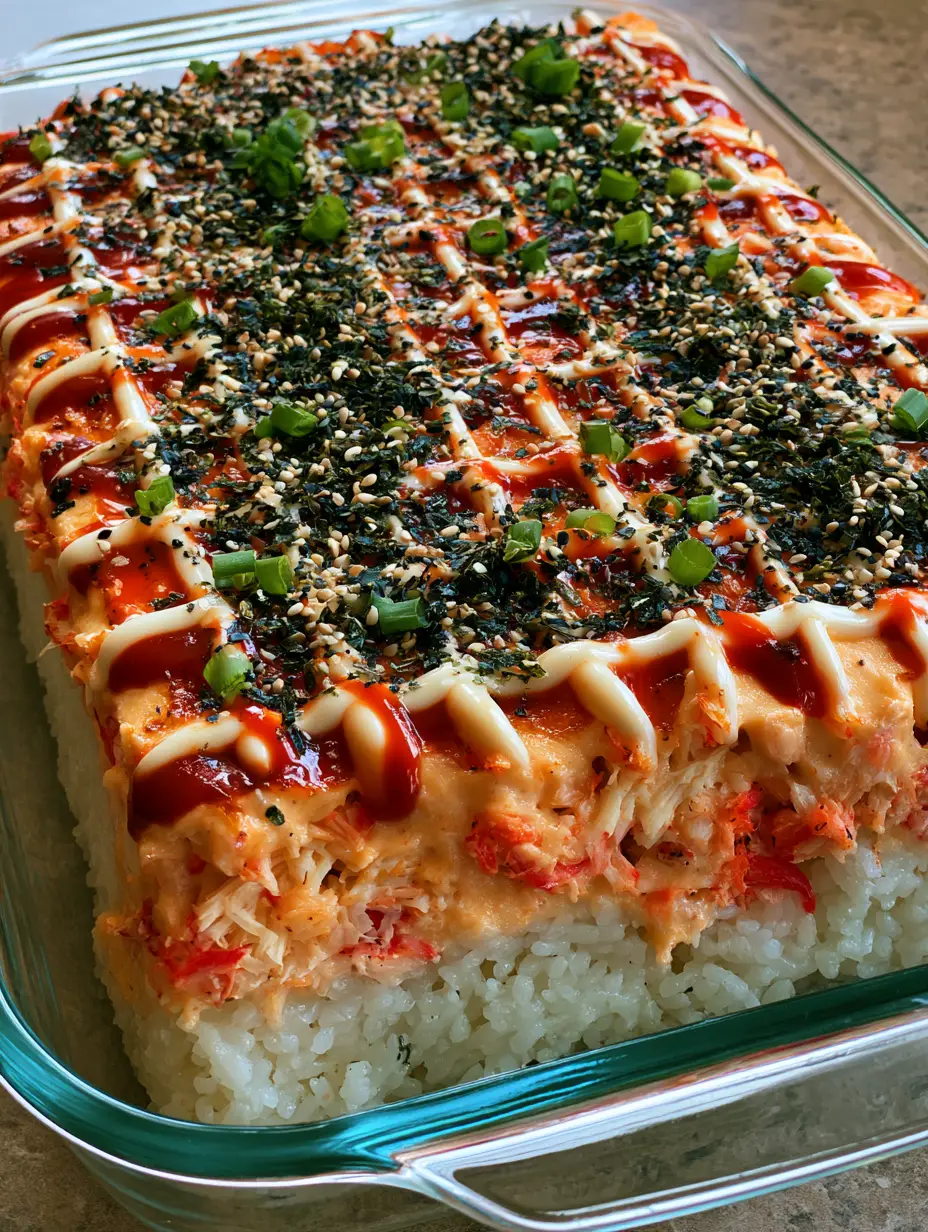
Our version stays true to the stunning visual aesthetics you’ve seen trending. Think a thick foundation of pearly white seasoned rice, a heart of succulent flaked salmon and shredded crab, and a top surface that is perfectly bubbly and charred. It’s finished with a professional-grade grid of cool Japanese mayo and fiery sriracha, making it the undeniable star of any dinner table or potluck gathering.
Whether you are a seasoned home cook or looking for a foolproof way to impress guests, this recipe delivers on every front. From the crunch of the toasted sesame seeds to the salty punch of dried seaweed furikake, every bite is a balanced explosion of texture and taste. Let’s dive into how you can recreate this restaurant-quality masterpiece in your own kitchen.
Why This Deconstructed Sushi Masterpiece Works
- Textural Contrast: You get the softness of the seasoned sushi rice paired with a creamy seafood center and a slightly crisp, charred topping.
- Visual Showstopper: The precise grid pattern of sriracha and mayo against the bright green scallions creates a stunning presentation that looks like it came from a professional kitchen.
- Flavor Harmony: The acidity of the rice vinegar cuts through the richness of the spicy mayo binder, while the furikake adds a deep sea-salt umami finish.
- Effortless Entertaining: Unlike individual rolling, this casserole allows you to feed a crowd without the tedious labor of traditional sushi making.
The Essential Pantry Staples for a Perfect Salmon Sushi Bake
Short-Grain Sushi Rice: You need 3 cups (approx. 600g) of high-quality short-grain rice. This specific grain is starchy and sticky, providing the structural integrity needed for a thick, compressed base layer.
Fresh Salmon Fillets: Use 1 lb (450g) of salmon, seasoned and baked until it flakes easily. Freshly cooked salmon provides a much more delicate and luxurious texture than canned alternatives.
Shredded Imitation Crab: 8 oz (225g) of imitation crab (surimi) adds a mild sweetness and a different “shredded” texture that complements the chunky flaked salmon perfectly.
Japanese Kewpie Mayonnaise: You’ll use 1/2 cup (120ml) for the binder and more for the drizzle. Kewpie is essential because it uses only egg yolks and MSG for a richer, more savory profile than American mayo.
Sriracha Chili Sauce: 2 tbsp (30ml) mixed into the binder and more for the topping. This provides the heat and the “pale orange” color described in the visual blueprint.
Rice Vinegar, Sugar, and Salt: This trio is used to season the rice while it’s hot. This is what gives the rice its “pearly” finish and signature tangy sushi flavor profile.
Toasted Sesame Seeds (Black and White): These provide a nutty crunch and a visual pop. Using both colors ensures your dish matches the sophisticated look of a high-end sushi bar.
Furikake or Dried Seaweed Flakes: A heavy dusting of this seasoning adds saltiness and a concentrated ocean flavor that ties the seafood elements together.
Fresh Scallions: Use the bright green tops, finely chopped. This adds a necessary hit of freshness and a vibrant color contrast to the warm tones of the bake.
Must-Have Kitchen Tools for This Recipe
To achieve the layered perfection shown in our visuals, you will need a 9×13 inch (23×33 cm) rectangular glass Pyrex baking dish. The clear glass is vital so you can see the distinct layers of white rice and orange-pink seafood. A rice cooker is highly recommended for consistent results, though a heavy-bottomed pot works too. Finally, a kitchen torch or a high-heat broiler setting is necessary to achieve that signature bubbly, charred top surface.
Mastering the Layers: How to Build Your Casserole
Preparing the Seasoned Rice Foundation
Start by rinsing your sushi rice under cold water until the water runs clear; this removes excess surface starch and prevents the rice from becoming gummy. Once cooked, transfer the hot rice to a large bowl and gently fold in a mixture of rice vinegar, sugar, and salt. While still warm, press the rice firmly into the bottom of your Pyrex dish to create a solid, compressed foundation that won’t fall apart when sliced.
Crafting the Creamy Seafood Center
If you have leftover parmesan crusted baked salmon, it can work here, but for the best results, use fresh flaked salmon. In a medium bowl, combine the cooked salmon flakes and the shredded imitation crab. Fold in the Kewpie mayo and sriracha until the mixture is a uniform pale orange. This creates a chunky, creamy texture that mimics the interior of a spicy crab roll.
Achieving the Perfect Charred Finish
Spread the seafood mixture evenly over the rice. Place the dish under the broiler for 5-8 minutes. Watch for the visual cues: the mayo should begin to bubble and small golden-brown charred spots should appear across the surface. This caramelization intensifies the savory “umami” notes of the fish and mayo.
The Final Decorative Drizzles and Garnishes
Once out of the oven, use a squeeze bottle to create a precise grid pattern of Japanese mayo and sriracha. The thick white lines should intersect the deep red lines perfectly. Immediately sprinkle with a heavy dusting of both black and white sesame seeds, the dried seaweed flakes, and the finely chopped scallions. The heat from the bake will slightly toast the seaweed, releasing its aroma.
Pro Secrets for a Restaurant-Quality Charred Finish
- The Compression Trick: Use a piece of parchment paper or a wet spatula to press the rice down. A firm base is the difference between a “bake” and a pile of loose rice.
- Broiler Watch: Every oven is different. Do not walk away from the broiler! You want “charred,” not “burnt.” Look for the fat in the mayo to start sizzling.
- Mayo Matters: If you can’t find Kewpie, add a pinch of sugar and a drop of rice vinegar to regular mayo to mimic the flavor, though the texture will be slightly different.
- Cool Before Cutting: Let the bake sit for 5 minutes before serving. This allows the rice to set slightly, making it easier to scoop onto nori sheets.
How to Store, Reheat, and Enjoy Leftovers
This Salmon Sushi Bake is best served fresh and warm, but it does store well. Keep leftovers in an airtight container in the refrigerator for up to 2 days. To reheat, we recommend using an air fryer at 350°F (175°C) for 3-5 minutes to maintain the texture of the rice without drying out the salmon.
We do not recommend freezing this dish. The texture of the sushi rice and the creamy mayo binder will break down during the thawing process, resulting in a soggy consistency that loses its visual appeal.
What to Serve With Your Sushi Bake
To round out a full Japanese-inspired spread, serve this bake with small sheets of roasted nori (seaweed). You can scoop a portion of the bake directly onto the nori to eat it like a hand roll. For a lighter side, a fresh cucumber salad with japanese steakhouse ginger dressing provides a crisp, acidic contrast to the rich bake.
If you enjoy this flavor profile, you might also love our spicy shrimp sushi stacks for a cold appetizer version. For those who want more seafood inspiration, our honey garlic shrimp makes for a fantastic quick weeknight addition.
Frequently Asked Questions
You can prepare the rice and the seafood mixture up to a day in advance. Assemble and bake just before serving to ensure the rice stays soft and the topping is perfectly bubbly.
Yes, you can use canned salmon in a pinch. However, fresh cooked salmon provides a much better texture and a cleaner flavor that complements the creamy spicy mayo binder.
The most popular way is to scoop a small portion of the warm bake onto a small sheet of roasted nori (seaweed snack), wrap it slightly, and eat it like a mini hand roll.
Kewpie mayo is highly recommended because it is richer and more savory than standard American mayonnaise. It helps achieve that restaurant-quality flavor and the perfect bubbly char under the broiler.
Short-grain Japanese sushi rice is essential. Its high starch content makes it sticky enough to form a solid base layer that holds its shape when the bake is sliced and served.
The Ultimate Salmon Sushi Bake Recipe
This recipe is designed to deliver a visually stunning, multi-layered casserole that tastes even better than it looks. Follow the measurements closely to ensure the perfect balance of creamy seafood and seasoned rice.
Salmon Sushi Bake: The Ultimate Creamy, Charred Deconstructed Sushi Casserole
Ingredients
Equipment
Instructions
- While the cooked sushi rice is still hot, fold in the rice vinegar, sugar, and salt. Gently mix until the rice is pearly and sticky.
- Press the seasoned rice firmly into the bottom of a 9x13 inch Pyrex dish to create an even, thick foundation.
- In a bowl, combine the flaked cooked salmon, shredded imitation crab, 1/2 cup Kewpie mayo, and 2 tbsp Sriracha. Spread this creamy mixture evenly over the rice.
- Place the dish under the broiler for 5-8 minutes until the top is golden-brown and bubbly with slight charred spots.
- Drizzle a grid pattern of Japanese mayo and Sriracha over the hot bake. Top with sesame seeds, furikake, and chopped scallions.
Notes
Serve with small sheets of roasted nori for the best experience.
Closing & Call to Action
The Salmon Sushi Bake is more than just a trend; it’s a versatile, crowd-pleasing dish that brings the best of sushi flavors into a warm casserole format. Its combination of creamy seafood, tangy rice, and charred topping makes it an instant favorite for anyone who tries it. If you enjoyed this recipe, please leave a comment below and let us know how your charred topping turned out!
Don’t forget to save this to your favorite boards on Pinterest so you can find it whenever the sushi craving hits. For more elevated home-cooking inspiration, sign up for our newsletter!