There is a common misconception in the culinary world that pork chops are destined to be dry, leathery, and uninspiring. We have all been there—staring down a plate of overcooked meat that requires a gallon of applesauce just to swallow. But what if I told you that achieving Juicy Baked Pork Chops with a restaurant-quality crust is not only possible but incredibly simple to master at home?
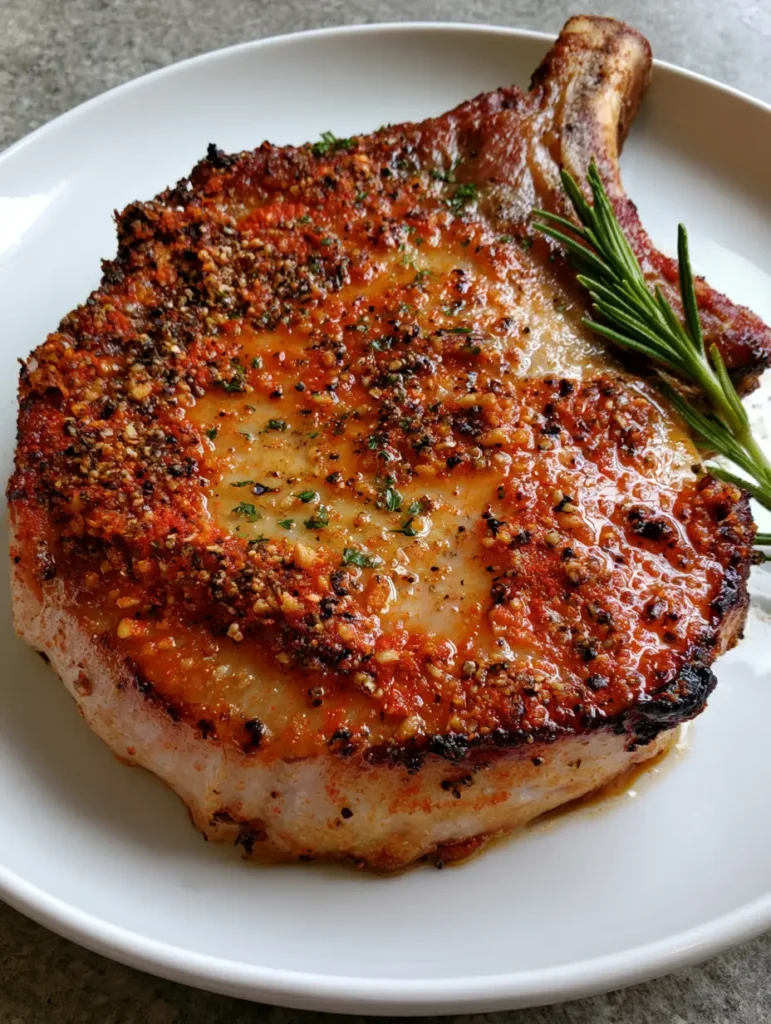
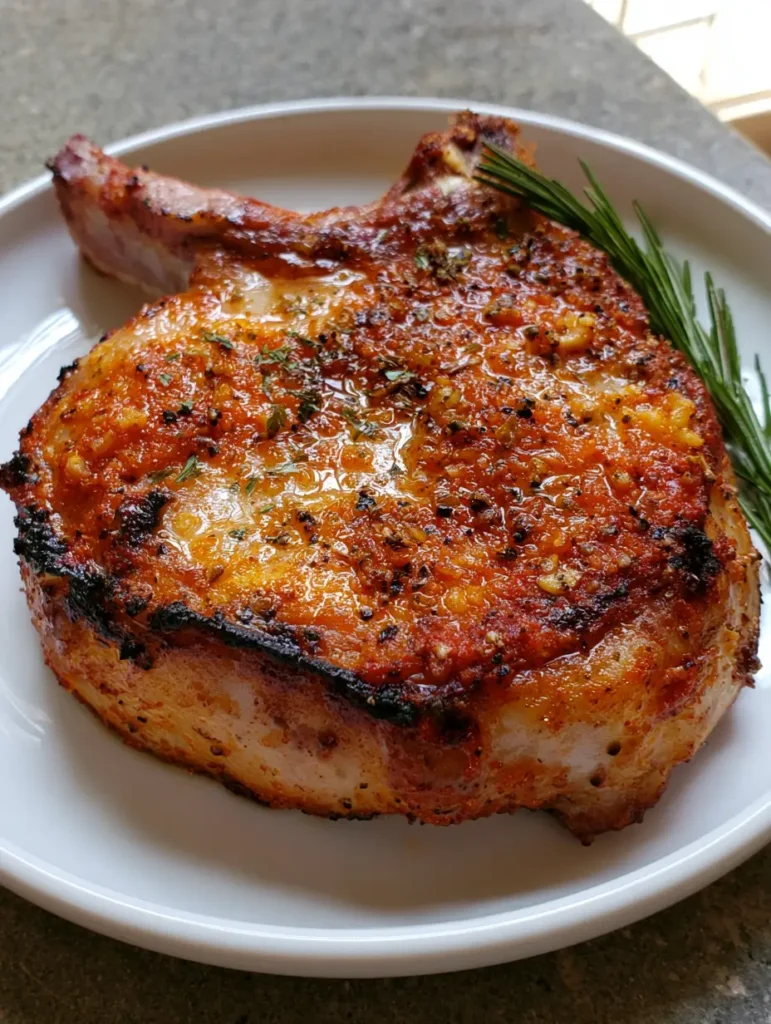
The secret lies in a dual-phase cooking method: a hard sear for texture followed by a gentle oven finish for temperature control. This recipe produces a thick-cut, bone-in masterpiece that looks exactly like a professional food photograph. We are talking about deep orange hues from smoked paprika, golden garlic granules, and a glistening butter glaze that catches the light perfectly.
By focusing on the “Forensic Visuals” of the dish, we ensure that every bite is as aesthetically pleasing as it is delicious. From the slight charring on the edges to the fresh rosemary sprig tucked against the bone, this is the definitive way to prepare pork. Whether you are hosting a dinner party or prepping a midweek meal, these chops will redefine your expectations of home-cooked protein.
Why This Method Produces the Most Succulent Results
- The Bone-In Advantage: Keeping the bone intact protects the meat from drying out and adds a deeper, more savory flavor profile during the roasting process.
- Textured Dry Rub: A heavy coating of paprika and garlic creates a “bark” that traps moisture inside while providing a beautiful, deep orange visual.
- Maillard Reaction: By searing the edges until caramelized and slightly charred, we develop complex flavors that baking alone simply cannot achieve.
- Butter Glaze Finish: A final coating of melted butter ensures the meat remains glistening and adds a luxurious mouthfeel to every slice.
- Visual Garnishing: The contrast of green rosemary and fine parsley flecks against the charred meat creates a professional, high-end presentation.
The Secret Spice Blend for Deep Color and Flavor
To achieve the specific visual of these Juicy Baked Pork Chops, we need ingredients that serve both a functional and aesthetic purpose. We aren’t just seasoning; we are building a crust. Every ingredient below is essential for that “heavy textured” look seen in elite food photography.
Thick-Cut Bone-In Pork Chops: You want chops at least 1.5 inches (3.8cm) thick. This thickness allows us to get a heavy sear without overcooking the center, ensuring the meat remains tender.
Smoked Paprika: This provides the “deep orange” color specified in our blueprint. It offers a mild earthiness and a vibrant hue that reacts beautifully to heat.
Garlic Powder & Granules: We use a mix of fine powder for coverage and “golden granules” for texture. This creates those visible bits of flavor on the surface of the meat.
Coarse Cracked Black Pepper: Forget the fine table pepper; you need large, visible cracks of pepper to provide a spicy bite and a rugged, professional appearance.
Kosher Salt: This is our foundational “invisible” ingredient. Salt draws out proteins to the surface, which helps in creating that sought-after caramelized crust.
High-Smoke Point Oil: Use avocado oil or grapeseed oil for the initial sear. These oils can handle the high heat required to char the edges without burning and turning bitter.
Unsalted Butter: The butter is used for the glaze at the very end. It adds a rich shine and helps the dried parsley flecks adhere to the meat.
Fresh Rosemary: A single sprig tucked against the side provides an aromatic infusion and a pop of “fresh green” color that elevates the plate.
Dried Parsley Flakes: These are scattered at the end. Their fine texture adds a layer of visual complexity and a subtle herbal finish.
Essential Tools for Professional Searing and Roasting
To replicate the handheld smartphone photo style of a perfect pork chop, you need the right equipment to manage heat distribution. The transition from stovetop to oven is the most critical part of this recipe.
A Cast Iron Skillet is your best friend here. It retains heat better than any other material, allowing for that “slight charring” and caramelized edges. If you don’t have cast iron, a heavy-bottomed stainless steel pan will work, but avoid non-stick at all costs for this recipe.
You will also need an Instant-Read Meat Thermometer. Precision is the difference between a juicy chop and a dry one. Aim for an internal temperature of 145°F (63°C) after resting. Finally, a pair of Heavy-Duty Tongs is necessary to hold the chop on its side to sear the fat cap—a professional trick for maximum flavor rendering.
The Step-by-Step Roadmap to Golden Charred Perfection
1. Preparing the Meat and the Dry Rub
Pat the pork chops completely dry with paper towels. Any moisture on the surface will create steam, preventing that beautiful golden-brown crust from forming. In a small bowl, combine 2 tbsp (14g) smoked paprika, 1 tbsp (10g) garlic granules, 1 tsp (5g) coarse black pepper, and 1 tsp (6g) salt.
Generously coat both sides of the pork chops with the rub. Press the spices into the meat firmly with your palms. You want a “heavy textured” layer that looks almost like a landscape of spice. Let the meat sit at room temperature for about 15 minutes to allow the salt to penetrate.
2. The High-Heat Stovetop Sear
Preheat your oven to 400°F (200°C). Heat 1 tbsp (15ml) of oil in your cast iron skillet over medium-high heat until it begins to shimmer and a light wisp of smoke appears. This is the sensory cue that the pan is ready for the Maillard reaction.
Place the chops in the pan. Listen for a loud, aggressive sizzle. Sear for 3 minutes without moving them. Use your tongs to lift the chops and sear the fat cap on the side for 60 seconds until the fat is rendered and “glistening.” Flip the chops to see the deep orange, caramelized surface.
3. The Oven Finish and Butter Glaze
Transfer the skillet directly into the preheated oven. Roast for 5–8 minutes, depending on the thickness. Use your thermometer to check for an internal temperature of 140°F (60°C); it will rise to 145°F as it rests.
In the final 2 minutes of cooking, place a 1 tbsp (14g) knob of butter on top of each chop and a fresh rosemary sprig in the pan. As the butter melts, it will mix with the pork juices and rosemary oil, creating a rich glaze. Spoon this liquid over the meat to ensure it is “glistening with rendered fat.”
Expert Tips for Success with Your Juicy Baked Pork Chops
- Don’t Skip the Rest: Let the chops rest on a warm plate for at least 5-8 minutes. This allows the juices to redistribute. If you cut too soon, the “juicy” part of your Juicy Baked Pork Chops will end up on the cutting board.
- Mind the Sugar: If your rub contains sugar, it will burn in the oven. Our paprika and garlic rub relies on spices and fats for color, which is safer for high-heat roasting.
- The Fat Cap: Always stand the pork chop on its side to sear the strip of fat along the edge. This turns a chewy piece of gristle into a crispy, flavorful delicacy.
- Carry-Over Cooking: Remember that the temperature will rise about 5 degrees after you pull the meat from the heat. Pulling at 140°F (60°C) ensures you hit the perfect 145°F (63°C) mark.
Creative Pairings for a Complete Meal
To turn these Juicy Baked Pork Chops into a full feast, you need sides that complement the rich, smoky flavors of the dry rub. A starch that can soak up the extra butter glaze is highly recommended.
For a classic “meat and potatoes” feel, serve these alongside an air fryer baked potato or some baked polenta rounds (coming soon). If you want something a bit more indulgent, these chops pair beautifully with a side of mushroom orzo or even a slice of sourdough discard focaccia to mop up the juices.
If you enjoy the flavor profile of this pork, you might also want to try our french onion pork chops for a version with a rich, savory gravy finish.
Practical Advice for Storage and Reheating
Pork chops are best enjoyed fresh, but you can store leftovers in an airtight container in the refrigerator for up to 3 days. When reheating, avoid the microwave as it will turn the meat rubbery. Instead, place the chops in a pan with a splash of water or broth, cover with a lid, and warm over low heat on the stovetop until heated through.
For freezing, wrap the cooked (and cooled) chops tightly in plastic wrap and then aluminum foil. They will stay fresh for up to 2 months. Thaw overnight in the refrigerator before reheating.
Frequently Asked Questions
Yes, but be careful as boneless chops cook much faster and have less protection against drying out. Reduce the oven time by 2-3 minutes and check the temperature frequently.
While brining is great, this recipe uses a thick-cut bone-in chop and a butter glaze finish which provides enough moisture and flavor that a brine is not strictly necessary for success.
The key is to pat the meat completely dry and use a heavy-bottomed skillet like cast iron. A high-heat sear for 3 minutes before transferring to the oven is essential for that golden color.
For safety and maximum juiciness, cook pork chops to an internal temperature of 145°F (63°C). Pull them from the oven at 140°F (60°C) as the temperature will continue to rise while resting.
This usually happens if the meat is too wet or if you move the chops too much in the pan. Pat the meat dry, apply the rub firmly, and let the chops sear undisturbed to set the crust.
The Definitive Juicy Baked Pork Chops Recipe
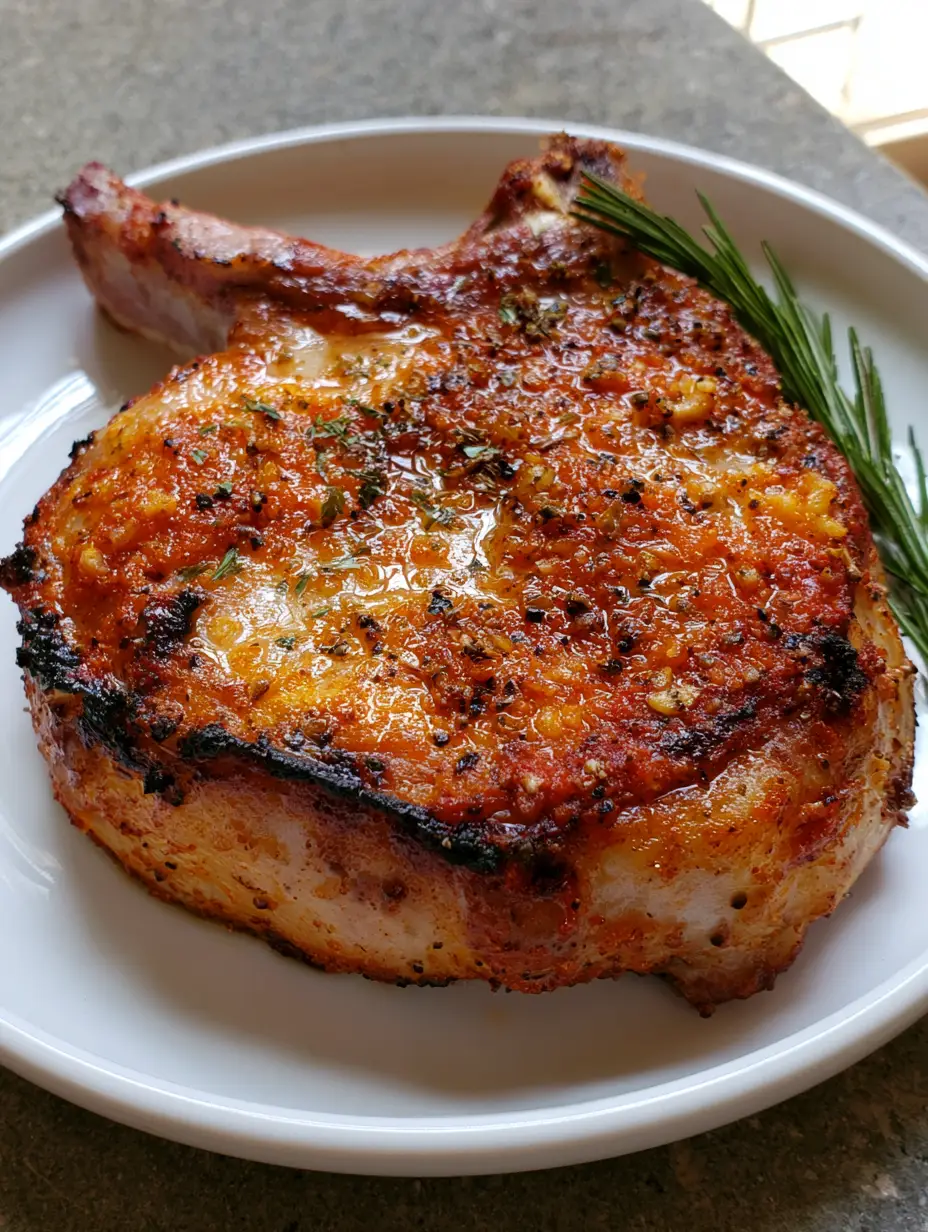
Juicy Baked Pork Chops: The Ultimate Guide to Tender Bone-In Perfection
Ingredients
Equipment
Instructions
- Preheat your oven to 400°F (200°C). Pat the pork chops dry with paper towels to ensure a good sear.
- Mix the paprika, garlic, pepper, and salt. Rub the mixture heavily onto all sides of the pork chops.
- Heat oil in a cast iron skillet over medium-high heat. Sear the chops for 3 minutes per side until caramelized. Sear the fat cap for 60 seconds.
- Transfer the skillet to the oven. Bake for 5-8 minutes. In the last 2 minutes, add butter and rosemary to the pan and baste the chops.
- Remove from oven when the internal temperature hits 140°F (60°C). Let rest for 5 minutes before serving with a garnish of dried parsley.
Notes
Resting the meat is the most important step for juiciness.

Mastering the Art of the Perfect Pork Dinner
You have now mastered the science behind the perfect Juicy Baked Pork Chops. By combining a heavy textured dry rub with a precise sear-and-bake technique, you have created a meal that is as visually stunning as it is delicious. The combination of deep orange paprika, charred edges, and that final glistening butter glaze makes this a recipe you will return to time and time again.
If you loved this recipe, please leave a comment below and let me know how yours turned out! Don’t forget to follow me on Pinterest for more culinary inspiration and high-RPM recipe guides. Sharing this recipe helps support the blog and allows us to keep creating professional-grade content for home cooks like you!