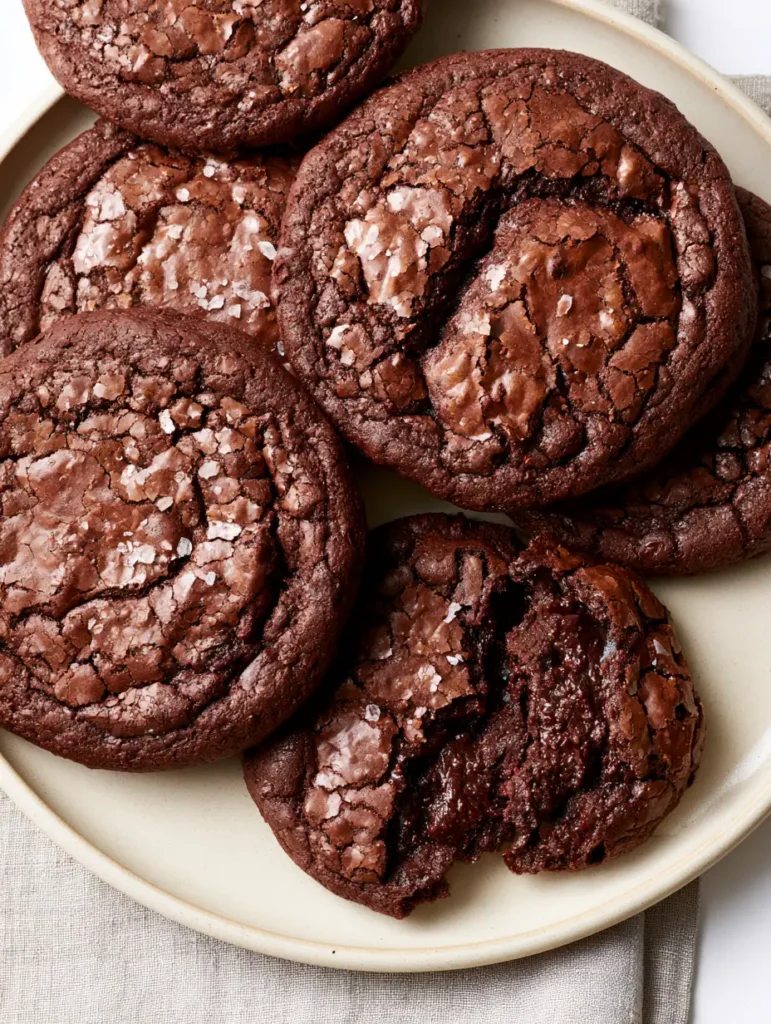
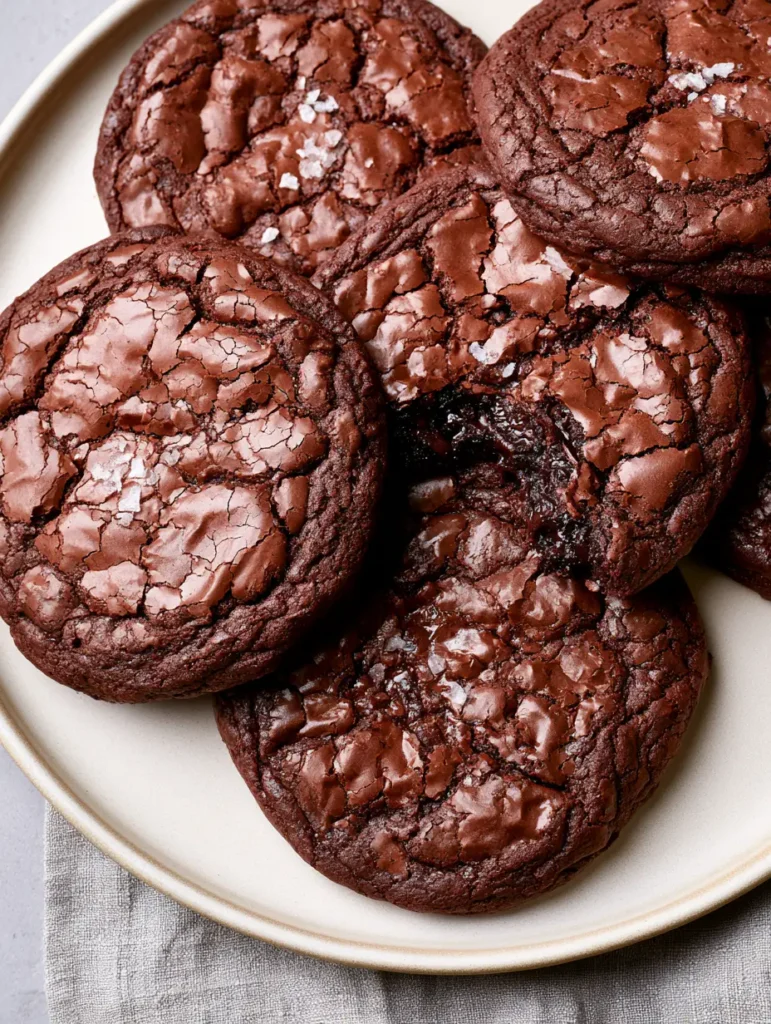
There is a specific, almost architectural beauty in the perfect Fudgy Brownie Cookies. We aren’t just talking about a standard chocolate cookie; we are chasing the elusive “brownie-in-cookie-form” holy grail. Imagine a paper-thin, shiny, crackled top crust that shatters like delicate glass upon the first bite, giving way to a dense, gooey, fudgy interior that feels like molten silk.
This recipe is designed to replicate that exact visual and sensory experience you see in high-end culinary photography. From the deep, rich chocolate crevices to the slightly raised, chewy outer edges, every element has been scientifically calibrated. Whether you are an experienced baker or a chocolate enthusiast, these cookies will redefine your expectations of what a dessert can be.
By the time you pull these out of the oven and garnish them with a light sprinkle of flaky sea salt, you will have achieved a result that looks like a professional handheld smartphone photo from a high-end food blog. Let’s dive into the chocolatey depths of this masterclass recipe.
Why These Fudgy Brownie Cookies Outperform Every Other Recipe
- The Signature Crackle: We utilize a specific aeration technique with eggs and sugar to create a meringue-like film that rises and shatters during baking.
- Dual-Chocolate Intensity: By combining high-quality melted dark chocolate with Dutch-processed cocoa powder, we achieve a color and flavor profile that is profoundly rich.
- The Texture Contrast: These cookies feature a distinct “chewy edge” vs. “fudgy center” dynamic, ensuring every bite offers a different structural sensation.
- Salted Perfection: A light touch of flaky sea salt isn’t just a garnish; it’s a flavor bridge that amplifies the dark chocolate’s complexity.
Essential Components for the Perfect Chocolate Base
High-Quality Dark Chocolate (60-70% Cacao): 7 oz (200g). This is the structural heart of the cookie; use a bar you would enjoy eating on its own, as chips often contain stabilizers that prevent the gooey interior.
Unsalted Butter: 1/2 cup (115g). Butter provides the necessary fat for a melt-in-your-mouth texture and helps emulsify the melted chocolate into a glossy sheen.
Large Eggs: 2 units (approx. 100g). Eggs are the primary leavening agent here; when whipped correctly with sugar, they create the “lift” that results in the crackled top crust.
Granulated Sugar: 3/4 cup (150g). White sugar is essential for the crackle, as it dissolves and migrates to the surface to form that delicate, shiny film.
Light Brown Sugar: 1/2 cup (100g). The molasses content in brown sugar provides the “chewy” factor and adds a hint of caramel-like depth to the chocolate base.
Dutch-Processed Cocoa Powder: 1/2 cup (45g). Dutch-processing neutralizes acidity, resulting in a darker color and a smoother, more “oreol-like” chocolate flavor compared to natural cocoa.
All-Purpose Flour: 1 cup (125g). We use a minimal amount of flour to ensure the cookies remain dense and fudgy rather than cakey or bread-like.
Baking Powder: 1/2 tsp (2g). This provides a tiny bit of vertical lift, helping to create those “deep rich chocolate crevices” mentioned in our visual blueprint.
Kosher Salt: 1/2 tsp (3g). Salt is a foundational ingredient that balances the sweetness and enhances the perception of the dark chocolate’s bitter notes.
Vanilla Extract: 1 tsp (5ml). Think of vanilla as the “highlighter” for chocolate; it adds a floral aromatic layer that completes the flavor profile.
Flaky Sea Salt: For garnish. Specifically, use Maldon or a similar brand to achieve those visible, crystalline flakes on the finished surface.
Professional Tools for Culinary Precision
To achieve the “thick, circular” appearance with “raised edges” seen in our reference images, you need more than just a spoon. A stand mixer with a whisk attachment is highly recommended, as the sugar and eggs must be beaten for a full 5-8 minutes to achieve the proper aeration. Without this, your cookies will be flat and dull instead of shiny and crackled.
Additionally, use a large cookie scoop (3 tablespoons) to ensure uniform sizing. Baking these on a heavy-gauge aluminum sheet pan lined with parchment paper ensures even heat distribution, preventing the bottoms from burning before the centers are set. Finally, a fine-mesh sieve is necessary for sifting the cocoa and flour to prevent unsightly lumps in your glossy batter.
Step-by-Step Instructions to Achieve the Fudgy Brownie Cookie Masterpiece
Step 1: The Chocolate Melt and Emulsification
In a medium heat-proof bowl, combine your chopped dark chocolate and unsalted butter. Set this over a pot of simmering water (a double boiler) or microwave in 20-second bursts, stirring constantly.
Continue stirring until the mixture is completely smooth and reflects light with a mirror-like shine. Remove from heat and let it cool for about 5 minutes; it needs to be warm but not hot enough to scramble the eggs in the next step.
Step 2: The Secret Aeration Phase (The “Crackle” Creator)
This is the most critical step. In your stand mixer, combine the granulated sugar, light brown sugar, and the two large eggs. Turn the mixer to medium-high speed and let it run for 5 to 8 minutes.
You are looking for “ribbon stage”—the mixture should triple in volume, turn a very pale tan color, and when you lift the whisk, the batter should fall back into the bowl in a thick, defined trail that sits on the surface for several seconds before disappearing. This creates the meringue top.
Step 3: Integrating the Chocolate and Dry Aromatics
With the mixer on low, slowly pour in the melted chocolate-butter mixture and the vanilla extract. Mix just until combined, being careful not to deflate all the air you just worked so hard to incorporate.
In a separate bowl, sift together the all-purpose flour, Dutch-processed cocoa powder, baking powder, and kosher salt. Using a rubber spatula, fold the dry ingredients into the wet batter by hand. Stop the second you see no more white streaks of flour.
Step 4: Scooping and the “Shiny Surface” Set
Preheat your oven to 350°F (175°C). Use your 3-tbsp scoop to drop mounds of dough onto your prepared baking sheet, spacing them at least 2 inches apart. You should notice the batter has a thick, glossy, almost “mousse-like” consistency.
Do not let the dough sit for too long before baking. The “shiny crackle” depends on the sugar being suspended in that egg foam; if the dough sits for 30 minutes, the sugar will dissolve further into the flour, and you’ll lose the effect.
Step 5: Baking for Sensory Cues
Slide the tray into the center rack of the oven. Bake for 10 to 12 minutes. At the 9-minute mark, look through the oven glass. You should see the cookies puffing up, and the surface beginning to “shatter” into those beautiful crevices.
The cookies are done when the edges look set and “slightly raised,” but the centers still look a bit soft and underdone. They will firm up as they cool to create that “dense, gooey, fudgy interior.”
Step 6: The Finishing Flourish
Immediately upon removing the tray from the oven, sprinkle a light pinch of flaky sea salt over the center of each cookie. Let them rest on the hot baking sheet for 10 minutes before transferring them to a wire rack. This “carry-over cooking” is what ensures the chewy edge perfectly transitions into the molten center.
Expert Tips for Visual and Textural Success
- Room Temperature Eggs: Always use room temperature eggs. They emulsify better and hold more air during the whipping process, which is the engine behind the crackled top.
- The Pan Bang: If your cookies aren’t showing enough “crevices,” gently lift the baking sheet an inch off the oven rack and drop it halfway through baking. This “deflation” forces the cracks to form.
- Don’t Overbake: A fudgy brownie cookie can turn into a dry biscuit in just 60 seconds. Error on the side of “slightly underdone” for the best results.
- Quality of Cocoa: If you use natural cocoa (like Hershey’s) instead of Dutch-processed, the cookies will be lighter in color and more acidic. For the visual prompt’s “dark chocolate” look, Dutch-processed is non-negotiable.
Storage, Reheating, and Freezing
These cookies are at their absolute peak about 30 minutes after baking, once the chocolate has slightly set but remains soft. Store leftovers in an airtight container at room temperature for up to 3 days.
If you prefer an even “fudgier” experience, these cookies are incredible when chilled in the refrigerator. The cold tightens the fats, making the center feel like a thick chocolate truffle. To regain the “gooey” interior, microwave a single cookie for 8-10 seconds before serving.
You can also freeze these cookies for up to 3 months. To freeze the dough, scoop it into balls and freeze on a tray before transferring to a bag. Bake directly from frozen at 325°F (165°C), adding 2-3 minutes to the total bake time.
What to Serve With These Chocolate Delights
While a cold glass of milk is the classic choice, these cookies are sophisticated enough to pair with more complex flavors. If you are hosting a dessert party, try serving them alongside our triple chocolate mousse domes for a study in chocolate textures.
For those who love a “salty and sweet” combination, these pair beautifully with a scoop of peanut butter ice cream, or you can even crumble them over the top of our brownie-bottom mini cheesecakes for an ultra-indulgent treat. If you’re looking for a lighter contrast, the sharp, nutty notes of our thick and chewy peanut butter cookies make for an excellent platter pairing.
Frequently Asked Questions
It is not recommended. Chocolate chips contain stabilizers to help them keep their shape, which can lead to a grainier texture. For the best ‘gooey’ interior, use a high-quality chocolate bar chopped into small pieces.
You can, but the flavor will be more acidic and the color will be lighter. Dutch-processed cocoa is what provides that deep, dark, ‘Oreo-like’ chocolate richness seen in the photos.
No! Unlike most cookie recipes, these should be baked immediately. If the batter sits, the sugar dissolves further into the flour, and you will lose that signature shiny, shattered top crust.
This usually happens if the melted chocolate and butter were too hot when added to the egg mixture, or if your eggs were cold. Ensure your chocolate is slightly cooled and eggs are room temperature for proper emulsification.
The shiny crust is essentially a thin layer of meringue. If your tops are dull, you likely didn’t beat the eggs and sugar long enough. Ensure you whip them for at least 5-8 minutes until the mixture is pale and thick.
The Ultimate Fudgy Brownie Cookies Recipe
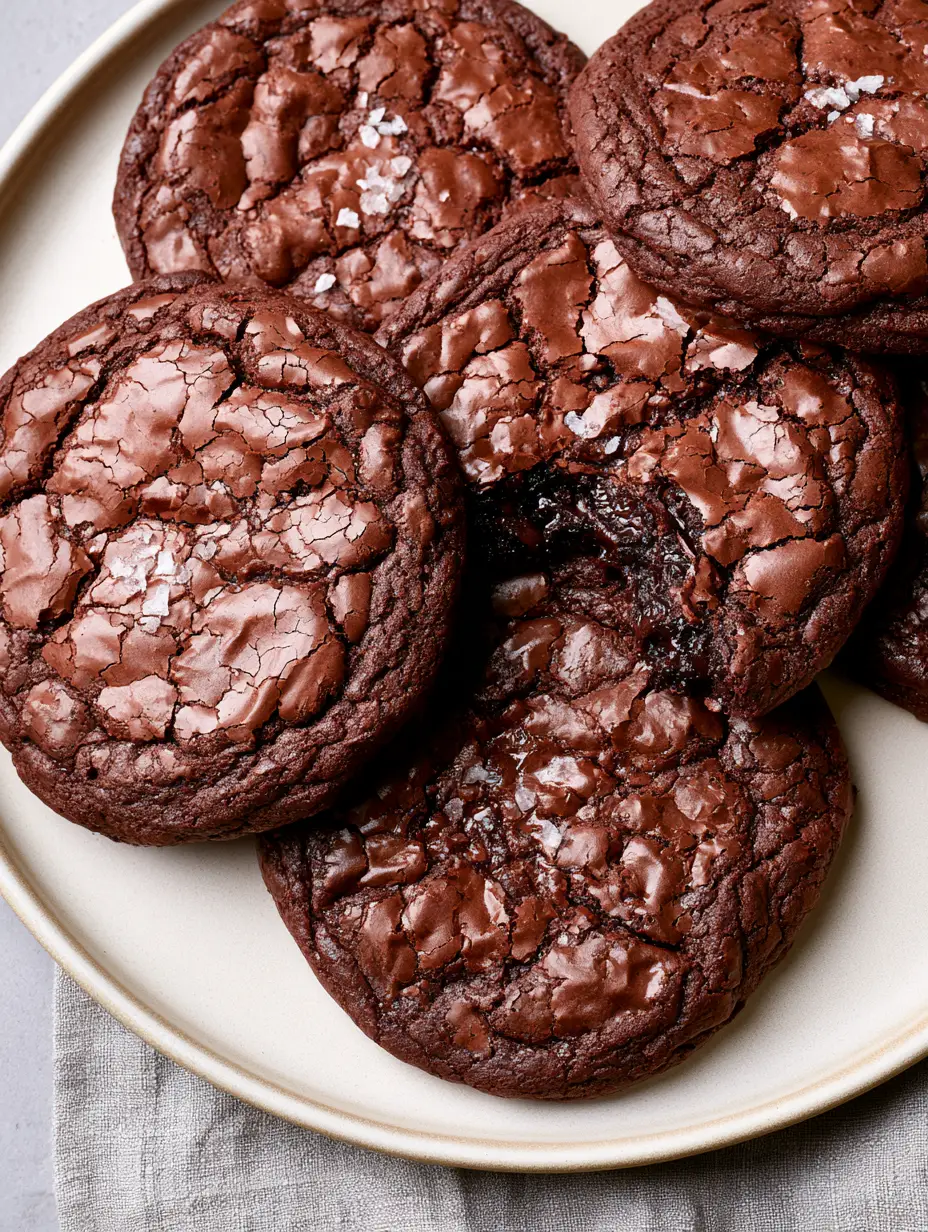
Fudgy Brownie Cookies: The Ultimate Recipe for a Shiny Crackled Top
Ingredients
Equipment
Instructions
- Melt dark chocolate and butter together until shiny and smooth. Let cool for 5 minutes.
- Whip eggs and sugars on high for 5-8 minutes until thick ribbon stage is reached.
- Fold in melted chocolate mixture followed by sifted dry ingredients until no streaks remain.
- Scoop 3-tbsp mounds onto tray. Bake at 350°F (175°C) for 10-12 minutes until edges are set and tops are crackled.
- Sprinkle immediately with flaky sea salt and cool on the pan for 10 minutes.
Notes
Do not overbake; the center should look soft when pulled from the oven.

Closing Thoughts on This Dark Chocolate Masterpiece
Mastering Fudgy Brownie Cookies is a rite of passage for any serious home baker. It’s a recipe that relies as much on technique as it does on ingredients. When you see that shiny, paper-thin crust shatter for the first time, you’ll know you’ve nailed it. These cookies are more than just a snack; they are a decadent experience designed to impress.
If you enjoyed this deep dive into chocolate science, please leave a comment below and let us know how your crackled tops turned out! Don’t forget to share your photos and save this recipe to your dessert boards on Pinterest.