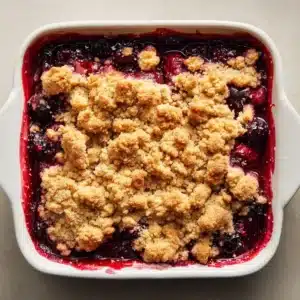
Welcome to the most festive treat of the holiday season! These are not your average Candy Cane Cookies. We are diving deep into the world of layered magic bars, creating a dessert that is as visually stunning as it is addictively delicious. Imagine a thick, crumbly golden graham cracker crust, holding up a dense, gooey layer of baked sweetened condensed milk and creamy vanilla pudding. This layer is studded with half-melted white chocolate chips, creating pockets of creamy sweetness in every single bite.
The magic culminates on top, with a generous blanket of bright red and white crushed peppermint candy cane chunks. A final, artistic drizzle of thick, opaque white chocolate icing cascades over the top, promising a perfect balance of minty crunch and sweet creaminess. This is the ultimate holiday dessert, guaranteed to steal the show at any cookie exchange or family gathering.
 1")
Why This Peppermint Magic Bar Recipe Is a Holiday Must-Have
These Candy Cane Cookies are more than just a recipe; they are an experience. Here’s what makes them truly special:
- A Symphony of Textures: From the sandy, buttery graham cracker crust to the soft, chewy filling and the crunchy candy cane topping, every bite is a delightful contrast.
- Visually Spectacular: Just look at them! The distinct layers and festive colors make these bars a showstopper on any dessert table, perfectly capturing the holiday spirit.
- Incredibly Easy to Make: Despite their impressive appearance, these cookies follow a simple layering process. There’s no need for chilling dough or intricate decorating skills.
- Rich & Decadent Flavor: The combination of creamy white chocolate, sweet condensed milk, and sharp, cool peppermint is a classic holiday pairing that tastes like pure celebration.
The Anatomy of a Perfect Peppermint Magic Bar
Each ingredient in these Candy Cane Cookies is chosen to build the perfect layered experience. Here’s what you’ll need and why:
For the Golden Graham Cracker Crust
- Graham Cracker Crumbs: 1 1/2 cups (180g). This forms the buttery, crunchy foundation of our bars. The golden-brown flavor is the perfect counterpoint to the sweetness above it.
- Unsalted Butter: 1/2 cup (113g), melted. Butter is the essential binder that holds the crumbs together, creating a firm yet crumbly crust that slices beautifully.
- Granulated Sugar: 1/4 cup (50g). A touch of sugar enhances the sweetness of the crust and helps it crisp up perfectly in the oven.
For the Gooey White Chocolate & Pudding Layer
- Sweetened Condensed Milk: One 14-ounce (396g) can. This is the magic ingredient! It bakes into a dense, caramel-like, gooey layer that defines the texture of these bars.
- Instant Vanilla Pudding Mix: One 3.4-ounce (96g) package, dry. The pudding mix is our secret weapon. It infuses a creamy vanilla flavor and helps the filling set to a perfect, soft consistency.
- White Chocolate Chips: 1 cup (170g). These chips are scattered throughout the filling, becoming partially melted during baking to create luscious pockets of creamy white chocolate.
For the Festive Candy Cane Topping
- Crushed Candy Canes: 1 cup (150g). This provides the signature peppermint flavor and a delightful, crunchy texture. The bright red and white pieces make the bars unmistakably festive.
- White Chocolate for Drizzling: 1/2 cup (85g) chips. We’ll melt these down for the final touch. This opaque drizzle adds another layer of sweetness and visual flair.
- Coconut Oil or Vegetable Oil: 1 tsp (5ml). Adding a little oil to the melting chocolate ensures it drizzles smoothly and sets with a beautiful, soft sheen.
Essential Tools for Building Your Cookie Bars
You don’t need any fancy equipment to make these stunning Candy Cane Cookies. Here is a short list of what you will need to have ready.
- 9×13 inch (23×33 cm) Baking Pan: The standard size ensures the layers are the perfect thickness.
- Parchment Paper: Crucial for lifting the bars out of the pan easily for clean cuts.
- Mixing Bowls: You’ll need a couple for mixing the crust and melting the chocolate.
- Offset Spatula or Spoon: For evenly spreading the layers.
- Rolling Pin & Ziplock Bag: The easiest, no-mess way to crush your candy canes.
Bringing Your Candy Cane Cookie Dreams to Life: A Step-by-Step Guide
Follow these simple steps to assemble and bake your new favorite holiday treat. The process is straightforward and delivers a visually perfect result every time.
Step 1: Constructing the Buttery Graham Cracker Foundation
First, preheat your oven to 350°F (175°C). Line a 9×13 inch baking pan with parchment paper, leaving some overhang on the sides to act as handles later. In a medium bowl, combine the graham cracker crumbs and granulated sugar. Pour in the melted butter and stir until the mixture resembles wet sand. Press this mixture firmly and evenly into the bottom of your prepared pan. Bake for 10 minutes to set the crust. You’ll know it’s ready when the edges are lightly golden and fragrant.
Step 2: Layering the Magical, Gooey Filling
Once the crust is pre-baked, remove it from the oven. In a separate bowl, whisk together the sweetened condensed milk and the dry instant vanilla pudding mix until smooth and slightly thickened. Pour this mixture evenly over the warm crust. Use a spatula to spread it all the way to the edges. Sprinkle the 1 cup (170g) of white chocolate chips evenly over the pudding layer.
 2")
Step 3: Baking to Golden-Brown Perfection
Return the pan to the oven and bake for 20-25 minutes. The visual cue you’re looking for is lightly golden brown edges and a center that is mostly set. It will still have a slight wobble, which is perfect for that desired gooey texture upon cooling. Be careful not to overbake, as the filling can become too firm.
Step 4: The Final Festive Flourish
Remove the pan from the oven and immediately sprinkle the crushed candy canes over the top. Let the bars cool at room temperature for at least 1 hour, then transfer to the refrigerator to cool completely for another 2-3 hours. This cooling period is critical for clean cuts. Once fully chilled, melt the remaining 1/2 cup (85g) of white chocolate with the teaspoon of oil in the microwave in 30-second intervals, stirring until smooth. Drizzle this over the cooled bars. Let the drizzle set before cutting into squares and serving.
Pro Secrets for Flawless Peppermint Cookie Bars
Want to ensure your Candy Cane Cookies are perfect every time? Here are a few expert tips from our kitchen.
- Don’t Skip the Parchment Paper: Using a parchment sling is the only way to easily lift the entire block of bars out for perfect, clean slicing.
- Patience is Key for Cooling: Do not try to slice these bars while they are still warm! They need to be thoroughly chilled in the refrigerator to fully set. This is the secret to getting those beautiful, distinct layers you see in the photos.
- Crushing Candy Canes: For chunks of varying sizes, place candy canes in a sturdy ziplock bag, wrap it in a kitchen towel, and gently whack it with a rolling pin or meat mallet.
- The Drizzle Technique: For a professional-looking drizzle, use a spoon or fork to flick the melted white chocolate back and forth over the bars. You can also use a small piping bag for more control.
Storing, Reheating, and Freezing Your Creations
To keep your Candy Cane Cookies fresh, store them in an airtight container. They can be kept at room temperature for up to 3 days, but for a firmer, chewier texture, we recommend storing them in the refrigerator for up to a week. Due to the candy cane topping, freezing is not recommended, as the peppermint pieces can become sticky and bleed color upon thawing.
What to Serve With These Festive Treats
These Candy Cane Cookies are a standout dessert on their own, often served on a holiday cookie platter. If you’re building a list for a cookie exchange, consider pairing them with other festive options like our Dark Chocolate Orange Shortbread Cookies. For those who love layered bars, exploring different flavor combinations can be fun; our Raspberry Coconut Magic Bars offer a fruity twist on the same concept. And if you want another decadent white chocolate dessert, you must try this easy White Chocolate Raspberry Fudge.
Frequently Asked Questions About Candy Cane Cookies
Have questions? We have answers! Here are some common queries about making these peppermint magic bars.
Absolutely! These bars are perfect for making ahead. You can make them up to 3 days in advance. Store them, uncut, in the covered baking pan in the refrigerator. Drizzle and slice just before serving for the best presentation.
Yes, you can. A crust made from crushed vanilla wafers, shortbread cookies, or even chocolate wafer cookies would also be delicious with the peppermint and white chocolate filling.
While the white chocolate is key to the visual blueprint and flavor profile, you could substitute semi-sweet or milk chocolate chips for a different flavor combination, like chocolate peppermint.
Place the unwrapped candy canes in a heavy-duty ziplock bag. Place the bag on a cutting board and cover it with a kitchen towel. Gently hit the bag with a rolling pin or meat mallet until you have a mix of coarse and fine pieces.
The most common reason is that they have not been chilled for long enough. They must be completely cold and firm for the filling to set. Ensure they chill for at least 2-3 hours in the refrigerator before attempting to slice them.
Your Official Candy Cane Cookies Recipe Card
Here is the complete, printable recipe with exact measurements and instructions. Get ready to bake the most talked-about dessert of the holiday season!
The Ultimate Candy Cane Cookies (Festive Peppermint Magic Bars)
Ingredients
Equipment
Instructions
- Preheat your oven to 350°F (175°C). Line a 9x13 inch baking pan with parchment paper, leaving an overhang. In a medium bowl, combine graham cracker crumbs and sugar. Stir in melted butter until it resembles wet sand. Press firmly into the bottom of the prepared pan.
- Bake the crust for 10 minutes until the edges are lightly golden. Remove from oven.
- In a separate bowl, whisk together the sweetened condensed milk and dry instant vanilla pudding mix until smooth. Pour this over the warm crust and spread evenly. Sprinkle 1 cup (170g) of white chocolate chips over the top.
- Return the pan to the oven and bake for 20-25 minutes, until the edges are golden brown and the center is mostly set (it will have a slight wobble).
- Remove from the oven and immediately sprinkle the crushed candy canes over the surface. Allow to cool at room temperature for 1 hour.
- Transfer the pan to the refrigerator and chill for at least 2-3 hours, or until completely firm. Melt the remaining 1/2 cup (85g) white chocolate with the oil. Drizzle over the cooled bars. Let the drizzle set before using the parchment handles to lift the bars out and slice into squares.
Notes
Patience is Key for Cooling: Do not try to slice these bars while they are still warm! They need to be thoroughly chilled in the refrigerator to fully set.
Crushing Candy Canes: For chunks of varying sizes, place candy canes in a sturdy ziplock bag, wrap it in a kitchen towel, and gently whack it with a rolling pin or meat mallet.
 4")
Join the Holly Harvest Community!
We hope you love these Candy Cane Cookies as much as we do! If you make them, please leave a comment and rating below—we love hearing from you. For more delicious inspiration and behind-the-scenes fun, be sure to follow us on Pinterest. Happy baking!