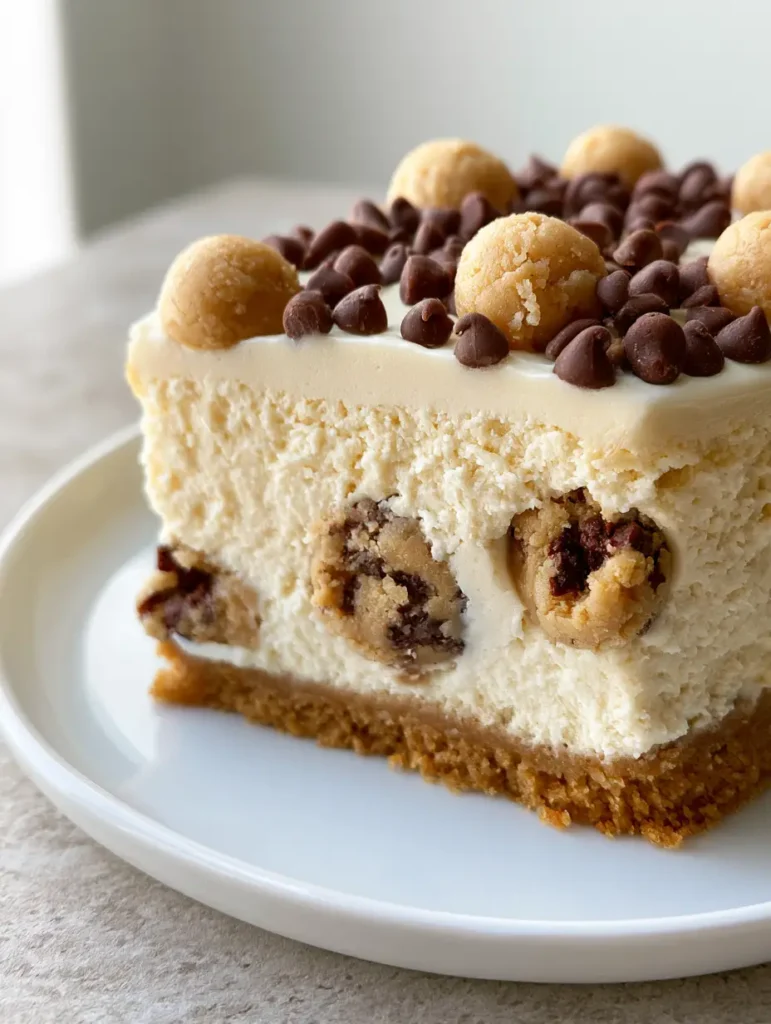
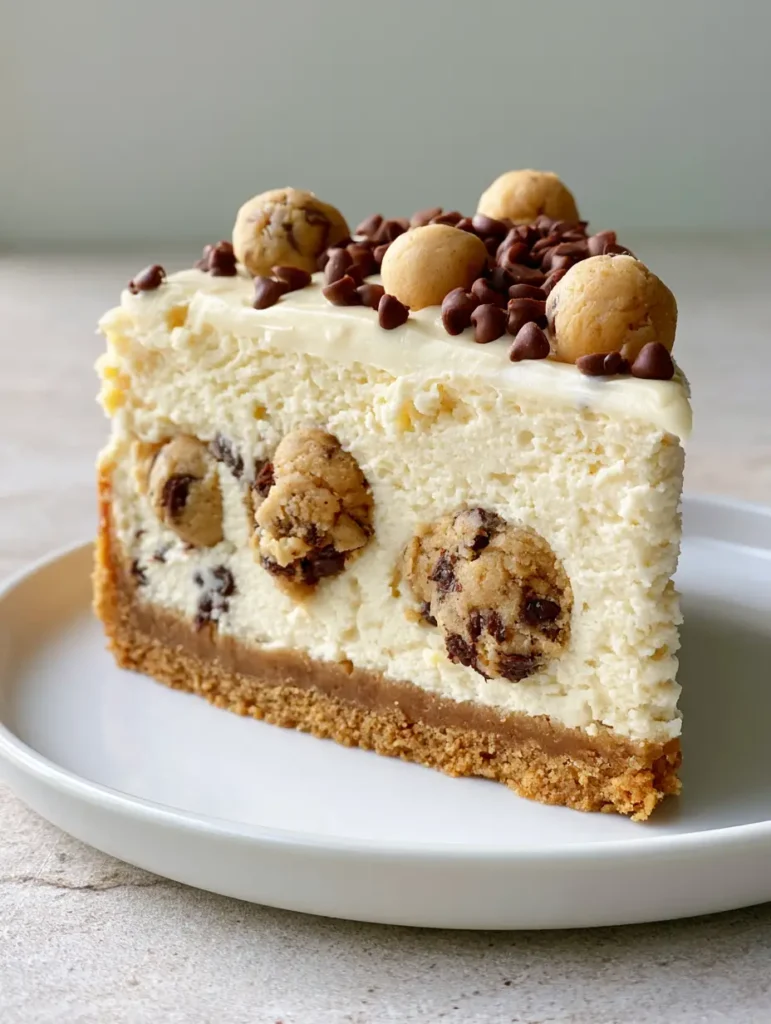
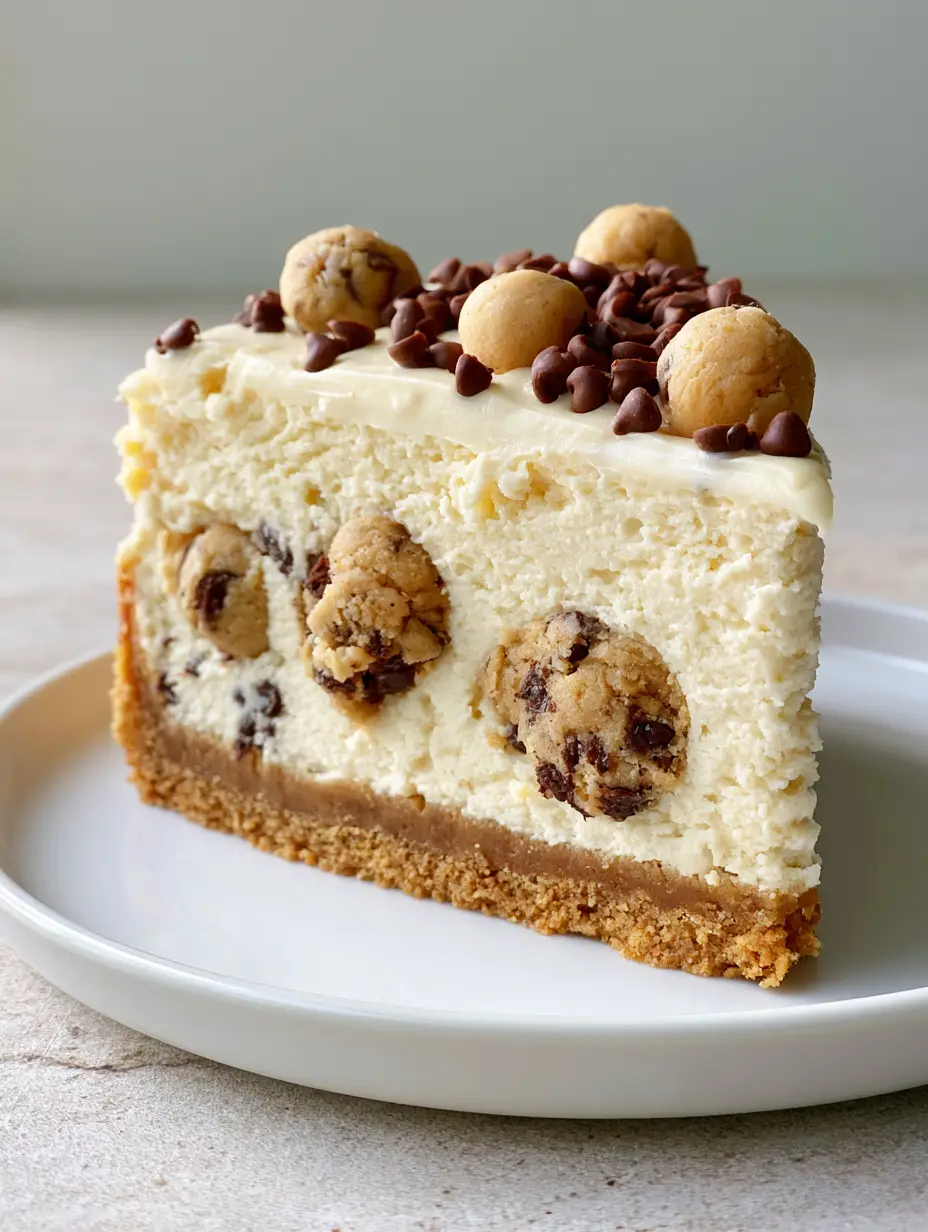
There is something undeniably nostalgic and deeply satisfying about the combination of buttery cookie dough and velvety cheesecake. This Chocolate Chip Cookie Dough Cheesecake isn’t just another dessert; it is a structural masterpiece designed to stop the scroll with its towering height and dense, ivory-colored cross-section.
Every bite delivers a contrasting textural experience, moving from the crunch of a compressed golden cookie crust to the silkiness of the filling, punctuated by massive, distinct chunks of raw-style edible cookie dough. We have engineered this recipe to mirror the handheld, natural-light aesthetic of a professional bakery find, ensuring your final result looks exactly like the artisanal slice on a grey stone countertop.
Whether you are celebrating a milestone or simply craving the ultimate indulgence, this cheesecake provides a multi-layered flavor profile that balances the tang of premium cream cheese with the deep, caramel notes of brown sugar and semi-sweet chocolate. Prepare to master the art of the “tall slice” with this definitive guide.
Why This Chocolate Chip Cookie Dough Cheesecake Is a Dessert Game-Changer
- The “Tall Slice” Architecture: This recipe utilizes a specific ratio of ingredients and a 9-inch (23cm) springform pan to ensure a towering height that displays a clear side-view cross-section.
- Triple Chocolate Integration: We feature mini semi-sweet chocolate chips in the filling, large frozen dough chunks in the middle, and delicate spheres of dough on the top surface.
- Scientifically Sound “Raw” Dough: Our edible cookie dough is crafted with heat-treated flour and no eggs, making it 100% safe to consume while maintaining that authentic, grainy-sweet texture.
- Dense Ivory Finish: Unlike airy or mousse-like cakes, this version is a true New York style, offering a heavy, smooth ivory-colored cheesecake filling that stays structurally sound when sliced.
The Secret Components of Our Compressed Golden Cookie Crust
The foundation of any elite cheesecake is the crust, and for this Chocolate Chip Cookie Dough Cheesecake, a standard graham cracker base simply won’t do. We utilize finely ground, hard-baked chocolate chip cookies to create a compressed golden-brown buttery cookie crust that provides a sturdy, flavorful base.
Chocolate Chip Cookie Crumbs (2 cups / 240g): You want these pulsed until they resemble coarse sand to ensure a tight, compressed foundation that won’t crumble when sliced.
Unsalted Butter (6 tbsp / 85g): Melted butter acts as the “glue” for your crust; use high-quality European-style butter for the best fat content and flavor.
Brown Sugar (1 tbsp / 12g): A touch of extra brown sugar helps the crust caramelize slightly during the pre-bake, enhancing the “golden-brown” visual prompt requirement.
Salt (1/4 tsp / 1.5g): A pinch of fine sea salt is essential to cut through the richness of the chocolate chips and cream cheese.
Essentials for the Dense Ivory Filling and Edible Dough Chunks
Achieving that specific ivory-colored, dense texture requires room-temperature ingredients and a gentle mixing speed to avoid incorporating too much air. This keeps the filling smooth and prevents the unsightly bubbles often found in lesser cheesecakes.
Full-Fat Cream Cheese (32 oz / 900g): This is the soul of the recipe; ensure it is completely softened to avoid lumps in your dense ivory cheesecake filling.
Granulated Sugar (1 cup / 200g): We use white sugar specifically for the filling to maintain that bright, ivory color without darkening it with molasses.
Sour Cream (1/2 cup / 120ml): This provides the necessary acidity and moisture to ensure the cheesecake is creamy rather than dry.
Large Eggs (4 units): Eggs provide the structure; add them one at a time to ensure the emulsion remains stable and the cake doesn’t crack.
Mini Semi-Sweet Chocolate Chips (1.5 cups / 255g): Smaller chips stay suspended in the batter more effectively than standard chips, ensuring a “generous scattering” throughout the slice.
Heat-Treated All-Purpose Flour (1.5 cups / 180g): For the edible dough, heat the flour to 160°F (71°C) to kill any bacteria, ensuring the “raw-style” chunks are safe to eat.
Pro-Grade Baking Tools for Cheesecake Success
To achieve the handheld smartphone photo aesthetic—where the slice stands perfectly vertical—you need the right gear. A 9-inch (23cm) springform pan is non-negotiable for releasing the cake without damaging the sides.
You will also need a large roasting pan to facilitate a water bath (bain-marie), which provides the gentle, humid heat necessary for a crack-free surface. A stand mixer with a paddle attachment is preferred over a whisk to keep the batter dense and ivory-colored rather than frothy. Finally, a kitchen scale is your best friend for precise Imperial (Metric) measurements, ensuring consistent results every time.
Mastering the Art of the Cookie Dough Cheesecake: Step-by-Step
Phase 1: Preparing the Edible Cookie Dough Chunks
In a medium bowl, cream together 1/2 cup (115g) of softened butter with 1/2 cup (100g) of brown sugar and 1/4 cup (50g) of white sugar. Stir in 2 tbsp (30ml) of milk and 1 tsp (5ml) of vanilla. Mix in your heat-treated flour and 1/2 cup (85g) of mini chips until a thick dough forms. Roll half of the dough into large, distinct chunks and the other half into small spheres for the top surface. Freeze these for at least 30 minutes to ensure they maintain their shape during the baking process.
Phase 2: Constructing the Compressed Golden Crust
Preheat your oven to 325°F (160°C). Combine your cookie crumbs, melted butter, and brown sugar in a bowl. Press the mixture firmly into the bottom of your parchment-lined springform pan using the bottom of a flat measuring cup. Bake for 10 minutes until the crust is fragrant and set, then allow it to cool completely before adding the filling.
Phase 3: Crafting the Dense Ivory Filling
Beat the cream cheese and sugar on medium-low speed until smooth and free of lumps. Add the sour cream and vanilla, mixing just until combined. Incorporate the eggs one at a time, beating on the lowest speed possible. Fold in 1 cup (170g) of the mini semi-sweet chocolate chips by hand. The batter should look thick, heavy, and ivory-colored.
Phase 4: The Layering and Baking Process
Pour about two-thirds of the cheesecake batter over the cooled crust. Distribute the large chunks of frozen edible cookie dough throughout the batter, pressing them down slightly so they are “embedded throughout.” Pour the remaining batter over the top, creating a smooth, light layer of creamy cheesecake batter. Sprinkle the top with the small spheres of dough and the remaining mini chocolate chips.
Phase 5: The Water Bath and Cooling
Wrap the outside of the springform pan in three layers of heavy-duty aluminum foil to prevent water from seeping in. Place the pan in a large roasting dish and fill the dish with 1 inch (2.5cm) of boiling water. Bake for 70-80 minutes, or until the edges are set but the center still has a slight jiggle. Turn off the oven, crack the door, and let the cheesecake cool inside for one hour—this is the secret to a perfectly flat, unedited-style top.
Fail-Proof Tips for the Perfect Water Bath and Creamy Finish
- The Temperature Rule: Every single dairy ingredient—the cream cheese, eggs, and sour cream—must be at room temperature to ensure a smooth cross-section without white lumps.
- Prevent Seepage: If you are worried about foil leaking, place the springform pan inside a slightly larger silicone cake pan before putting it in the water bath.
- The Clean Slice: To get that “clear side-view cross-section” seen in the prompt, use a thin knife dipped in hot water and wiped clean between every single cut.
- Freeze the Dough: If the cookie dough chunks aren’t frozen solid before they go into the batter, they will melt and swirl into the cheesecake rather than remaining as “large, distinct chunks.”
Preserving Your Masterpiece: Storage and Freezing Guide
Cheesecake is a labor of love, and it actually tastes better after 24 hours in the refrigerator as the flavors meld and the texture firms up. Store your Chocolate Chip Cookie Dough Cheesecake in an airtight container in the fridge for up to 5 days. Keep it away from strong-smelling foods like onions, as the high fat content in the cream cheese will absorb those odors.
For long-term storage, this cheesecake freezes beautifully. You can freeze the entire cake or individual slices. Wrap the cake tightly in plastic wrap, followed by a layer of heavy-duty aluminum foil. It will maintain its quality for up to 3 months. To thaw, simply place it in the refrigerator overnight. Do not thaw at room temperature, as this can cause the ivory filling to lose its structural integrity.
Elevating the Experience: What to Serve Alongside
While this Chocolate Chip Cookie Dough Cheesecake is a titan on its own, pairing it with the right elements can turn it into a full culinary event. If you are serving this as part of a larger spread, consider the balance of flavors. Since this cake is incredibly rich, a tart contrast like our Unicorn Lemonade can provide a refreshing palate cleanser between bites.
For a themed dessert night, you might pair it with another fruit-forward option like our peach cobbler with oatmeal crumble. If you’re looking for something lighter to serve before this decadent finish, a vibrant spicy pineapple cucumber salad works wonderfully to prep the taste buds for the heavy cream and chocolate to come. For those who love the “cheesecake salad” trend, you could even offer a side of Hawaiian Cheesecake Salad for a fun textural comparison.
Common Questions About This Decadent Cheesecake
Most store-bought dough contains raw eggs and untreated flour, which are not ideal for the ’embedded’ raw-style effect. It is safer and tastier to use the heat-treated, eggless edible dough recipe provided here.
For that professional cross-section look, use a long, thin knife. Dip the blade in hot water, wipe it completely dry, and make one clean slice. Repeat the cleaning and heating process for every single cut.
Yes, provided the cookie dough is ‘edible style.’ This means you must heat-treat the flour to 160°F (71°C) and omit raw eggs from the dough mixture to ensure it is safe to consume after baking.
Cracks usually occur due to over-mixing (incorporating too much air) or drastic temperature changes. Using a water bath and letting the cake cool slowly in the oven with the door cracked are the best preventative measures.
A yellow tint often comes from using too many egg yolks or low-quality butter. To keep it ivory, use large white-sugar crystals and avoid over-baking, which causes the surface to brown.
The Official Recipe for the Ultimate Chocolate Chip Cookie Dough Cheesecake
Chocolate Chip Cookie Dough Cheesecake: The Ultimate Tall and Creamy Dessert
Ingredients
Equipment
Instructions
- Heat flour in the microwave or oven until it reaches 160°F (71°C) to make it safe for raw consumption.
- Cream butter and sugars; mix in milk, vanilla, and flour. Fold in chips. Shape into large chunks and small spheres, then freeze for 30 minutes.
- Mix crust ingredients and press firmly into a 9-inch springform pan. Bake at 325°F (160°C) for 10 minutes.
- Prepare filling by beating cream cheese, sugar, sour cream, and eggs. Fold in chips and embedded dough chunks. Bake in a water bath for 70-80 minutes.
Notes
Do not skip the water bath; it is essential for the smooth, crack-free finish shown in the photos.
Closing & Call to Action
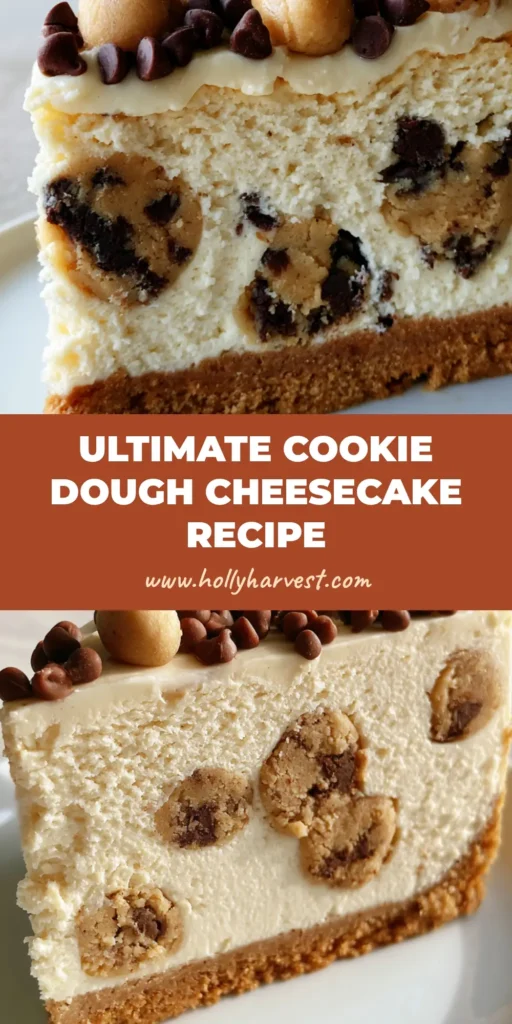
Mastering this Chocolate Chip Cookie Dough Cheesecake is a milestone for any home baker. Its combination of a compressed golden cookie crust and dense ivory filling creates a sensory experience that is as visually stunning as it is delicious. By following our sensory cues—like looking for that slight center jiggle and the golden-brown crust—you’ll ensure a result that looks exactly like a professional handheld photo.
If you enjoyed making this recipe, we would love to hear from you! Please leave a comment below with your results or any questions you may have. Don’t forget to share your tall slices on social media and follow us on Pinterest for more elite dessert inspiration. Happy baking!