The quest for the perfect weeknight dinner often leads us to a crossroads between flavor and convenience. Sheet Pan Chicken Fajitas represent the pinnacle of this intersection, offering a restaurant-quality “sizzle” with the cleanup ease of a single dark metal baking sheet.
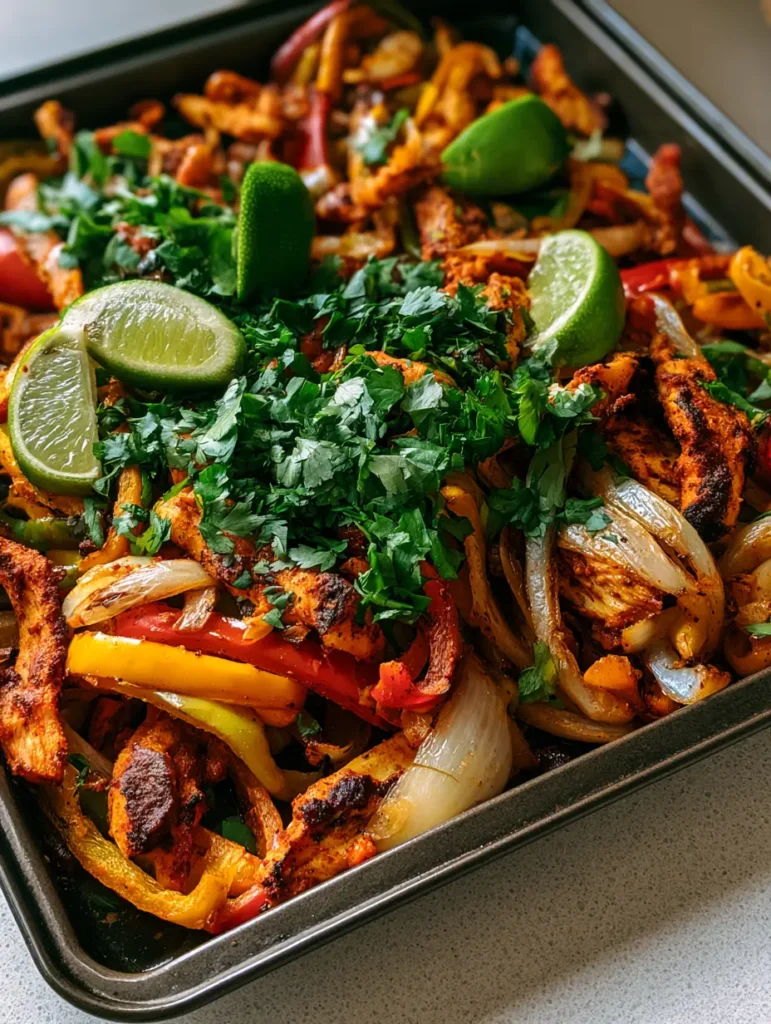
Imagine thin strips of lean chicken breast, seasoned to perfection and roasted until the edges are golden-brown and crispy. Surrounding them are vibrant red, yellow, and green bell peppers, blistered by the high heat of the oven until they are soft and sweet.
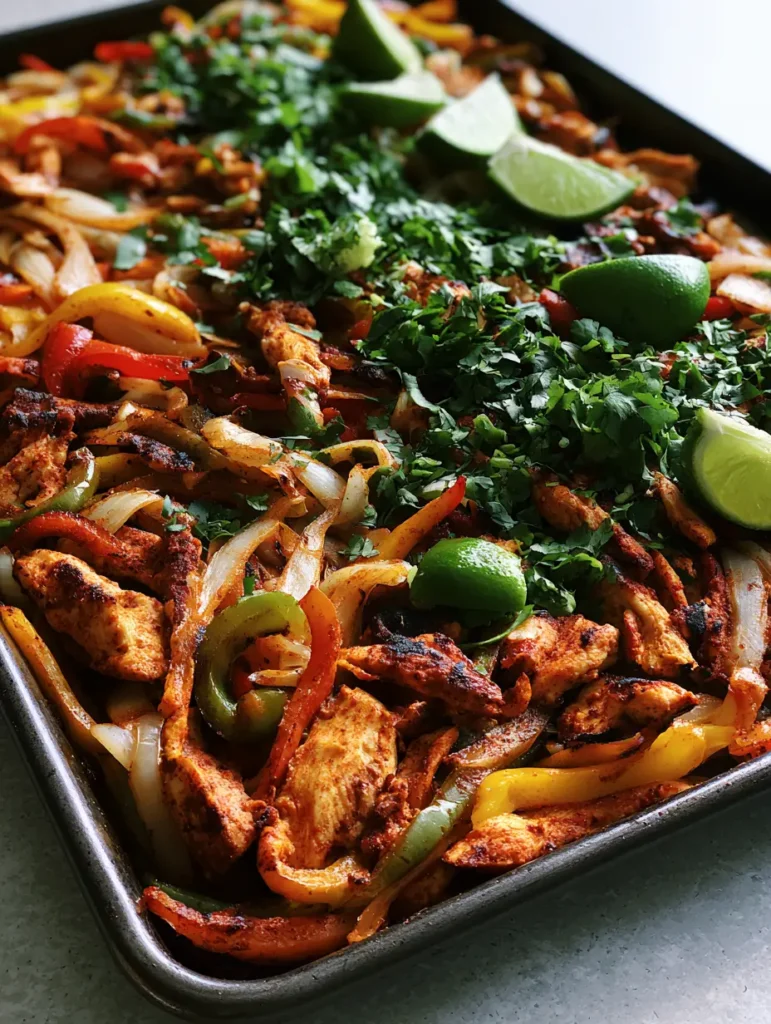
This recipe isn’t just about throwing things on a tray; it is about the culinary science of high-heat roasting. By the time you pull this pan out of the oven, the white onions will be translucent and caramelized, perfectly complementing the matte, dark red-orange spice rub that coats every morsel.
Why You Will Crave This One-Pan Mexican Feast
- Visual Perfection: Every bite features the charred vegetable edges and caramelized blisters that signify deep, roasted flavor.
- Effortless Cleanup: By utilizing a single sheet pan, you save time on dish duty without sacrificing the complexity of the meal.
- Balanced Textures: You get the crunch of the charred onion, the softness of the roasted peppers, and the juicy snap of seared chicken.
- Nutrition Dense: Packed with lean protein and a rainbow of antioxidant-rich peppers, this is a meal that feels as good as it tastes.
The Anatomy of a Perfect Fajita: Essential Ingredients
To achieve the specific visual and flavor profile of these Sheet Pan Chicken Fajitas, we must select ingredients that stand up to intense heat. We aren’t just looking for color; we are looking for the ability to caramelize.
Chicken Breast (1.5 lbs / 680g): We use boneless, skinless breasts sliced into 1/2-inch (1.3cm) strips. Slicing against the grain ensures the chicken remains tender while the high heat creates those coveted golden-brown charred edges.
The Pepper Trio (3 large peppers): One red, one yellow, and one green bell pepper provide the classic fajita aesthetic. These peppers contain natural sugars that, when roasted at 425°F (220°C), produce beautiful caramelized blisters.
White Onion (1 large): Sliced into thin wedges, white onions turn translucent and slightly browned in the oven. They provide a sharp-to-sweet flavor transition that balances the smoky spices.
Avocado Oil (2 tbsp / 30ml): A high-smoke-point oil is non-negotiable here. It allows the chicken to sear without the oil breaking down and creating bitter off-flavors.
The Smoky Spice Rub: A blend of chili powder, cumin, smoked paprika, and garlic powder creates a matte, dark red-orange coating. The smoked paprika is the “secret” to achieving that deep, earthy color seen in the visual blueprint.
Fresh Garnishes: Heavy handfuls of chopped fresh cilantro and several lime wedges are essential. The acidity of the lime cuts through the smokiness, while the cilantro adds a bright, herbal finish.
Professional Tools for the Best Roast
To replicate the result seen in professional food photography, your equipment matters as much as your ingredients. A dark metal sheet pan is preferred because dark surfaces absorb more heat, leading to better browning on the bottom of the chicken and vegetables.
You will also need a sharp chef’s knife for uniform slicing. Uniformity is the key to ensuring that the peppers don’t turn to mush before the chicken reaches its safe internal temperature. If you love organized prep, having several small bowls for your spice blend will make the process seamless.
The Science of the Sizzle: Step-by-Step Instructions
Phase 1: Precision Prep and the Spice Infusion
Preheat your oven to 425°F (220°C). This high temperature is vital for the “sizzle” effect; any lower and the vegetables will steam rather than roast, losing that characteristic char.
In a small bowl, whisk together 1 tbsp (8g) chili powder, 1 tsp (2g) cumin, 1 tsp (2g) smoked paprika, 1/2 tsp (1.5g) onion powder, and 1 tsp (6g) sea salt. This creates the matte red-orange rub that defines the dish’s appearance.
Slice your chicken breast into even strips. Pat them dry with a paper towel before adding the oil; moisture is the enemy of the sear. Toss the chicken, sliced peppers, and onions in a large bowl with the avocado oil and the spice rub until every surface is heavily coated.
Phase 2: The High-Heat Roast
Spread the mixture across your dark metal sheet pan in a single layer. Overcrowding the pan will cause the ingredients to release steam, preventing the edges from becoming golden-brown.
Slide the pan into the center of the oven. Roast for 18-22 minutes. At the 10-minute mark, use a sturdy spatula to toss the ingredients. This ensures the chicken sears on all sides and the onions caramelize evenly.
Phase 3: Achieving the Visual Char
During the last 2 minutes of cooking, you may choose to turn on the broiler. Watch closely! You are looking for the bell peppers to develop small black “char” spots and for the onion edges to turn a deep, translucent brown.
Remove the pan from the oven when the chicken is firm to the touch and the spices have formed a dry, matte crust. The aroma should be intensely smoky and savory.
Phase 4: The Fresh Finish
While the pan is still sizzling, squeeze two fresh lime wedges over the entire tray. The steam will carry the citrus scent through the meat. Finish with a heavy sprinkling of chopped fresh cilantro for that vibrant green contrast against the dark red-orange base.
Expert Tips for Sheet Pan Excellence
- The “Dry” Secret: Always pat your chicken dry. If the chicken is wet, the spice rub will become a paste rather than a crust.
- Temperature Control: If your oven runs cool, preheat the sheet pan itself for 5 minutes before adding the ingredients. This creates an instant sear.
- Don’t Skimp on Oil: The oil isn’t just for sticking; it conducts heat. Without enough oil, you won’t get the roasted blisters on the peppers.
- The Acid Balance: If the dish tastes “flat,” add more lime. Acid is the volume knob for flavor in Mexican-inspired cooking.
Optimal Storage and Reheating Strategies
Sheet Pan Chicken Fajitas are a meal-prep dream. Store leftovers in an airtight container in the refrigerator for up to 4 days. The flavors actually deepen as the spices meld with the juices from the peppers.
To reheat, avoid the microwave if possible, as it can make the chicken rubbery. Instead, toss the leftovers back onto a sheet pan and flash-fry them under the broiler for 3-5 minutes. This restores the charred texture of the vegetables.
Creating a Full Cantina Experience
While these fajitas are a complete meal on their own, they thrive when paired with the right sides. For a refreshing contrast to the smoky chicken, serve them alongside a crisp cowboy caviar recipe (coming soon).
If you prefer a more traditional spread, these fajitas sit perfectly next to a bowl of black beans and rice with sausage (coming soon). For those looking for a fusion twist, the charred vegetables in this recipe share a similar flavor profile to the roasted elements in a bibimbap recipe (coming soon).
Finally, if you have leftover chicken, it makes an incredible topping for a bbq chicken flatbread the following day, adding a smoky Mexican flare to your lunch.
Frequently Asked Questions
Absolutely. They stay fresh in the fridge for up to 4 days. For the best texture, reheat them in an air fryer or under the broiler rather than the microwave.
Yes! Chicken thighs are more forgiving and stay juicy at high temperatures. However, they may require an extra 3-5 minutes of cooking time to achieve the same charred edges as breasts.
To mimic the restaurant experience, preheat your serving plates or a cast-iron skillet and transfer the hot chicken and peppers onto it immediately after taking the sheet pan out of the oven.
The key is high heat (425°F or higher) and not overcrowding the pan. If the ingredients are too close together, they will steam instead of roast. Patting the chicken dry before seasoning also helps.
Use an oil with a high smoke point like avocado oil or grapeseed oil. Extra virgin olive oil can smoke and turn bitter at the 425°F temperature required for this recipe.
The Master Sheet Pan Chicken Fajitas Recipe
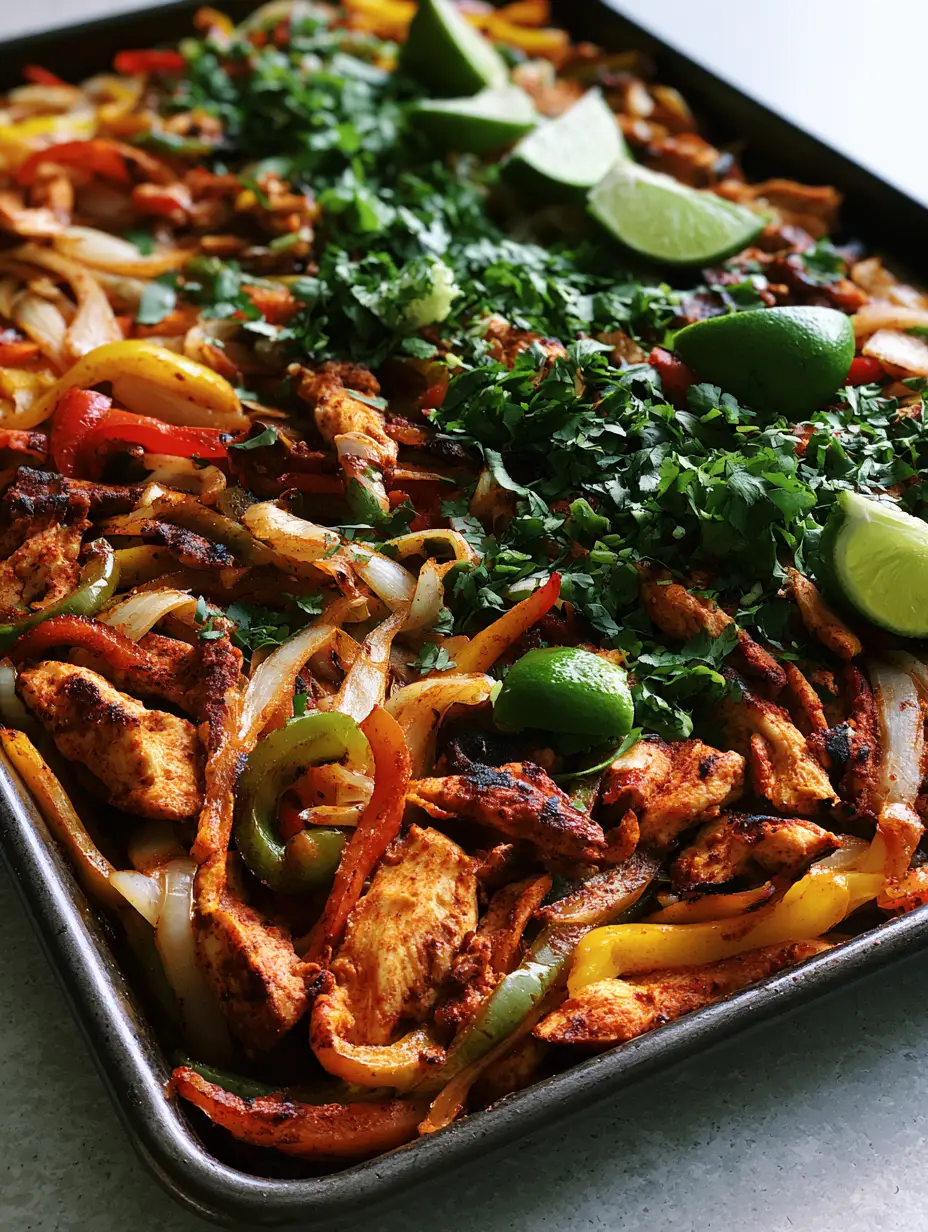
Sheet Pan Chicken Fajitas: The Ultimate Weeknight Sizzle and Char
Ingredients
Equipment
Instructions
- Preheat your oven to 425°F (220°C). Slice the chicken, peppers, and onions into uniform strips.
- In a large bowl, toss the chicken and vegetables with avocado oil and the spice rub until thoroughly coated in a matte red-orange layer.
- Spread ingredients in a single layer on a dark metal sheet pan. Roast for 18-22 minutes, tossing halfway through to ensure golden-brown charred edges.
- Remove from oven. Top with heavy amounts of chopped cilantro and squeeze fresh lime wedges over the sizzling pan.
Notes
Use a dark baking sheet for better heat absorption and charring.
Join the Harvest Community
Mastering the Sheet Pan Chicken Fajitas is a milestone for any home cook looking to balance health and flavor. The combination of charred edges, succulent chicken, and vibrant peppers creates a sensory experience that is hard to beat.
If you enjoyed this recipe, please leave a comment below and let us know how your “sizzle” turned out! Don’t forget to sign up for our newsletter for more one-pan wonders and share this recipe to your favorite boards on Pinterest.