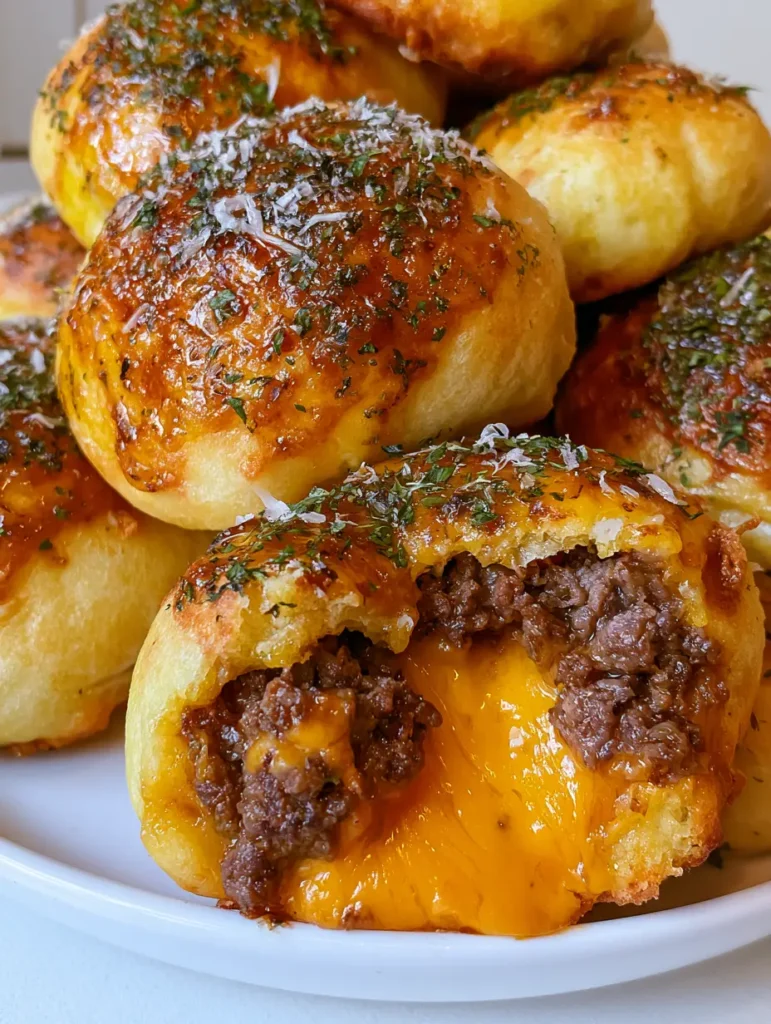
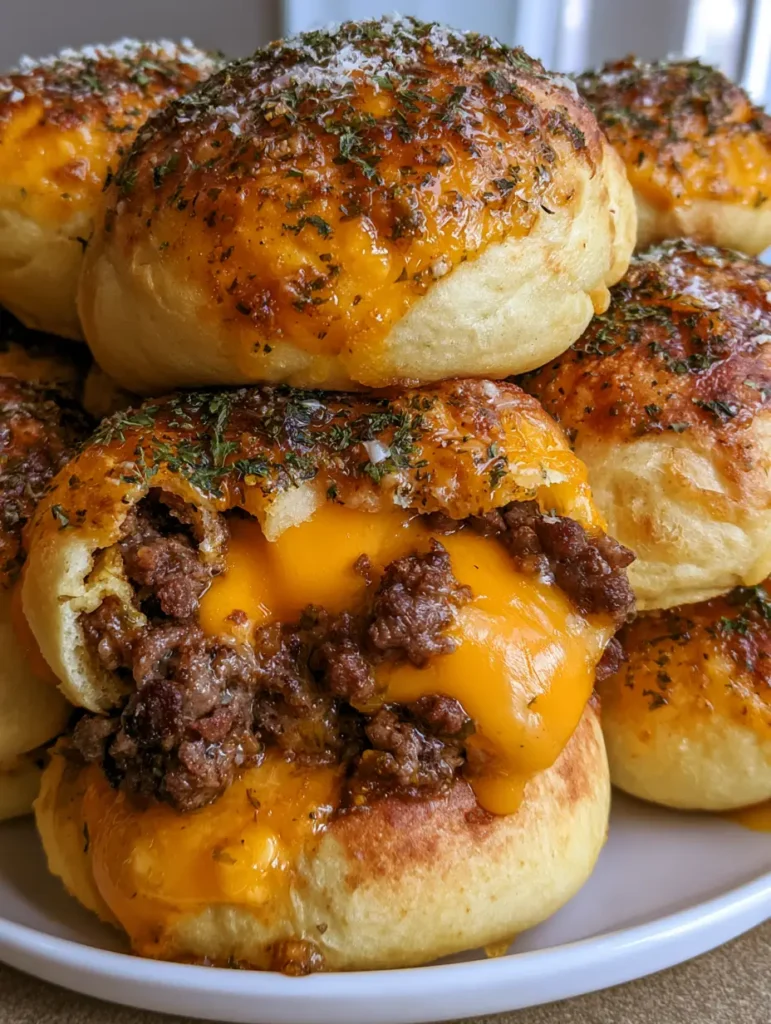
Cheeseburger Bombs are the revolutionary fusion of a juicy, seasoned burger and a soft, pillowy dinner roll. Imagine a golden-brown baked dough ball that, when torn open, reveals a molten center of gooey orange cheddar cheese and savory browned ground beef. This recipe transforms the classic American burger into a portable, crowd-pleasing snack that is as visually stunning as it is delicious.
Whether you are hosting a game day party or looking for a fun weeknight dinner, these Cheeseburger Bombs deliver high-impact flavor with a professional finish. The glossy garlic butter glaze and a dusting of white parmesan cheese create a sensory experience that rivals any gourmet gastropub. You can almost hear the slight crunch of the toasted dough before hitting the soft, buttery interior.
Why You Will Crave These Golden-Brown Stuffed Burger Bites
- Textural Contrast: You get a slightly toasted, crispy exterior paired with a soft, steamed dough and a crumbly meat filling.
- Flavor Explosion: The combination of seasoned beef, sharp orange cheddar, and pungent garlic butter hits every savory note.
- Visual Appeal: The contrast of green dried parsley flakes against the white parmesan and golden dough makes these an Instagram-ready masterpiece.
- Portability: Unlike a traditional burger, these Cheeseburger Bombs are self-contained and perfect for dipping.
Creating these bites requires a balance of culinary physics and flavor layering. By following this guide, you will master the art of the perfect seal, ensuring no cheese escapes during the baking process. If you enjoy handheld snacks, you might also want to try these teriyaki chicken wonton tacos for your next gathering.
Essential Components for the Perfect Cheeseburger Filling
Ground Beef (450g / 1 lb): We recommend using an 80/20 lean-to-fat ratio. The fat is necessary to keep the filling moist inside the dough shell during the high-heat baking process.
Sharp Orange Cheddar (170g / 6 oz): Using a block of cheddar cut into cubes, rather than shredded cheese, ensures that “thick, gooey” center described in the visual prompt. Pre-shredded cheese contains anti-caking agents that can prevent a smooth melt.
Worcestershire Sauce (15ml / 1 tbsp): This provides the “umami” backbone to the meat, enhancing the browned beef crumbles without adding excessive moisture. It helps achieve that deep, savory profile essential for authentic cheeseburger flavor.
Yellow Onion (110g / 1 cup finely diced): The onions should be sautéed until translucent to provide a subtle sweetness that balances the salty cheese and rich butter glaze.
Foundational Seasonings: You will need 1 tsp (5g) of garlic powder, 1 tsp (5g) of onion powder, and 1/2 tsp (2.5g) of smoked paprika. These “invisible” ingredients ensure the beef crumbles are well-seasoned and aromatic.
The Science of the Perfect Golden-Brown Dough Shell
Refrigerated Biscuit Dough (approx. 450g / 16 oz): For the most consistent results, a “Grands” style flaky biscuit dough provides the structure needed to hold the heavy filling. The layers in the dough expand in the oven, creating the soft, baked dough ball texture seen in the photos.
Unsalted Butter (60g / 4 tbsp): Melted butter serves as the carrier for the garlic and parsley. It creates that “glossy garlic butter” finish that makes the bombs look professional and prevents the dough from drying out.
Finely Grated Parmesan (30g / 1/4 cup): This is the final visual and salty touch. The “finely grated white parmesan” should be applied immediately after the butter glaze so it adheres to the surface.
Dried Parsley Flakes (1 tbsp): These provide the “speckled green” aesthetic. Dried parsley is preferred over fresh here because it maintains its color better during the final stages of heat application.
Necessary Kitchen Tools for Success
To achieve the handheld smartphone photo quality results, you need the right gear. A large cast-iron skillet or non-stick frying pan is essential for browning the beef crumbles until they reach a deep, caramelized brown. You will also need a standard baking sheet lined with parchment paper to prevent sticking and ensure even heat distribution.
A pastry brush is non-negotiable for applying the garlic butter. You want to “generously brush” the tops to get that glossy sheen. Finally, a sharp chef’s knife is required for finely dicing the onions and cutting the cheddar into uniform cubes for even melting. If you are a fan of precision cooking, you likely used similar tools for steak bites with mushroom orzo.
Detailed Step-by-Step Instructions for Burger Bombs
Searing the Beef for Maximum Flavor
Heat a splash of olive oil in your skillet over medium-high heat. Add the ground beef (450g) and break it into small crumbles with a wooden spoon. You are looking for a “well-seasoned, browned” look, so don’t rush this process; let the meat develop a crust before stirring.
Add the diced onions and cook for another 3-4 minutes until softened. Stir in your Worcestershire sauce, garlic powder, onion powder, paprika, salt, and pepper. Drain any excess grease—too much moisture will cause the dough to become soggy and prevent a proper seal.
Preparing and Stuffing the Dough
Preheat your oven to 400°F (200°C). Flatten each biscuit dough piece into a circle about 4 inches (10cm) in diameter. Place a generous tablespoon of the cooled beef mixture into the center of each circle.
Press a cube of the orange cheddar firmly into the center of the meat. To seal, pull the edges of the dough over the filling and pinch them tightly. Roll the ball gently between your palms to smooth out the seams, ensuring a perfect sphere shape.
Baking to Golden Perfection
Place the bombs seam-side down on your prepared baking sheet. This ensures the weight of the bomb keeps the seal closed as the dough expands. Bake for 12-15 minutes.
Watch for the visual cue: the exterior should transition from a pale cream to a “golden-brown” hue. The dough should sound slightly hollow when tapped, indicating the interior is fully cooked and the cheese has transitioned to a “gooey melted” state.
The Final Garlic Parmesan Glaze
While the bombs are baking, whisk together the melted butter (60g) and two cloves of minced garlic. As soon as the Cheeseburger Bombs come out of the oven, use your pastry brush to coat each one generously.
Immediately sprinkle with the dried parsley flakes and the finely grated parmesan cheese. The residual heat will slightly toast the parmesan and help the parsley stick, creating the “glossy and speckled” finish described in our visual blueprint.
Expert Culinary Tips for Flawless Seams
- Cool the Meat: Never put hot meat onto cold dough. The heat will begin to melt the fats in the dough prematurely, making it slippery and impossible to seal.
- The Pinch Technique: Use dry fingers to pinch the dough. If your fingers are oily from the beef, the dough won’t stick to itself.
- Uniformity: Use a cookie scoop to portion the meat. This ensures every Cheeseburger Bomb cooks at the same rate.
- Don’t Overstuff: It is tempting to add more cheese, but overstuffing leads to “blowouts” where the cheddar leaks onto the pan.
For more tips on handling protein and fats, our guide on garlic butter steak bites (coming soon) offers excellent insights into achieving the perfect sear and butter finish.
Safe Storage and Reheating Methods
If you have leftovers, store them in an airtight container in the refrigerator for up to 3 days. To maintain the “golden-brown” toasted exterior, we recommend reheating them in an oven or air fryer at 350°F (175°C) for 5-7 minutes. Microwave reheating is possible but will result in a softer, less crispy dough.
You can also freeze these before or after baking. If freezing before baking, place the stuffed dough balls on a tray until solid, then transfer to a freezer bag. Bake from frozen, adding 5-8 minutes to the total cooking time.
What to Serve with Cheeseburger Bombs
These bombs are incredibly rich, so they pair well with acidic or creamy sides. A classic dipping sauce like honey mustard or a spicy mayo works perfectly. If you want to lean into the burger theme, a side of pickles and a crisp green salad provides a necessary contrast to the heavy cheddar.
For a full appetizer spread, consider serving these alongside a bacon cheeseburger queso dip for the ultimate cheese-lover’s experience. Alternatively, if you are serving these as a main course, a side of creamy Cajun chicken pasta can turn this into a high-protein feast.
Frequently Asked Questions
Absolutely! Cook them at 350°F (175°C) for 8-10 minutes, or until the exterior is golden-brown and the dough is cooked through.
Yes, pizza dough works well, but it will result in a chewier, bread-like texture rather than the soft, flaky texture of biscuit dough.
Yes, you can assemble them up to 4 hours in advance and keep them refrigerated until you are ready to bake. Glaze them with butter only after baking.
Ensure the beef filling is not too oily and pinch the dough seams very tightly. Placing them seam-side down on the pan also helps keep them closed.
A high-quality sharp orange cheddar block cut into cubes provides the best ‘melt’ and visual appeal compared to shredded cheese.
The Ultimate Recipe for Garlic Parmesan Cheeseburger Bombs
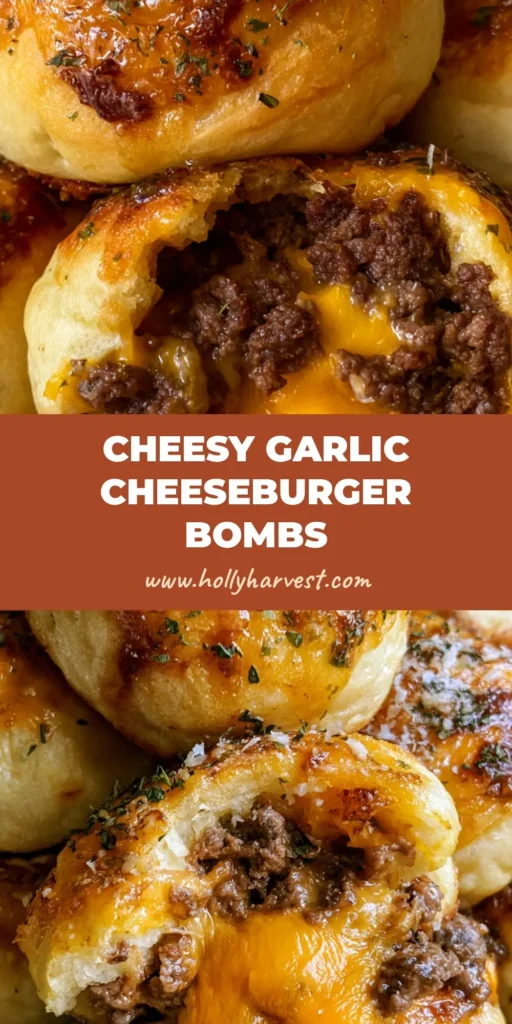
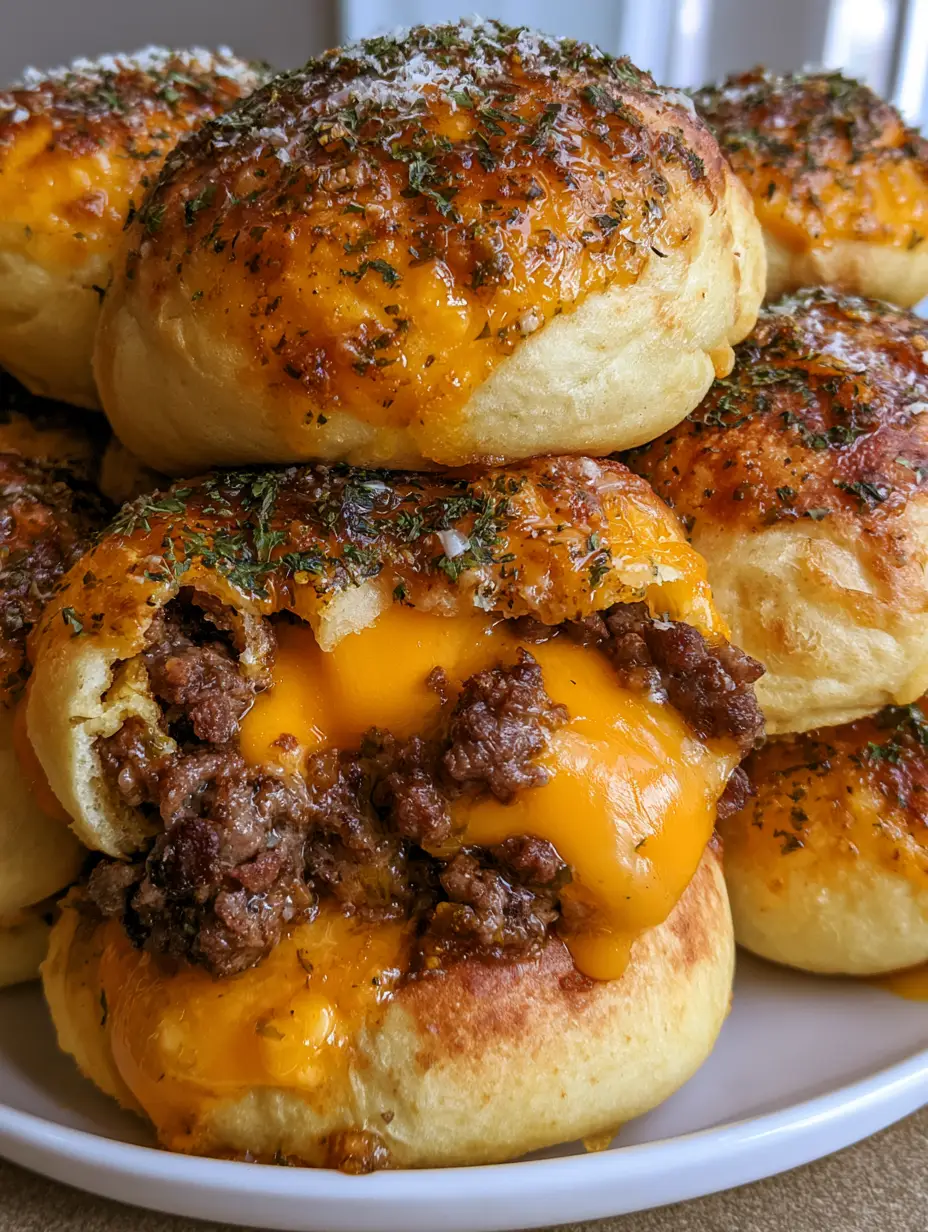
Cheeseburger Bombs: The Ultimate Stuffed Garlic Butter Burger Bites
Ingredients
Equipment
Instructions
- In a skillet over medium-high heat, brown the ground beef (450g) until fully cooked. Add diced onions and sauté until translucent.
- Stir in Worcestershire sauce, garlic powder, onion powder, salt, and pepper. Drain excess grease and let the mixture cool slightly.
- Flatten each biscuit dough piece into a 4-inch circle.
- Place 1 tbsp of beef and one cheddar cube in the center. Pinch the edges together tightly to seal and roll into a ball.
- Place seam-side down on a baking sheet. Bake at 400°F (200°C) for 12-15 minutes until golden-brown.
- Brush with garlic butter immediately after baking. Sprinkle with parmesan and parsley flakes.
Notes
Pinch seams very tightly to prevent cheese from leaking.
Closing & Call to Action
These Cheeseburger Bombs are more than just a snack; they are a culinary experience that combines the comfort of a home-cooked burger with the elegance of a perfectly baked pastry. The combination of the gooey orange cheddar and the glossy garlic butter glaze is sure to make this a staple in your recipe rotation.
If you enjoyed this recipe, please leave a comment below and let us know how your Cheeseburger Bombs turned out! Don’t forget to share your photos and tag us. For more mouth-watering inspiration, follow us on Pinterest and pin this recipe to your favorite boards!