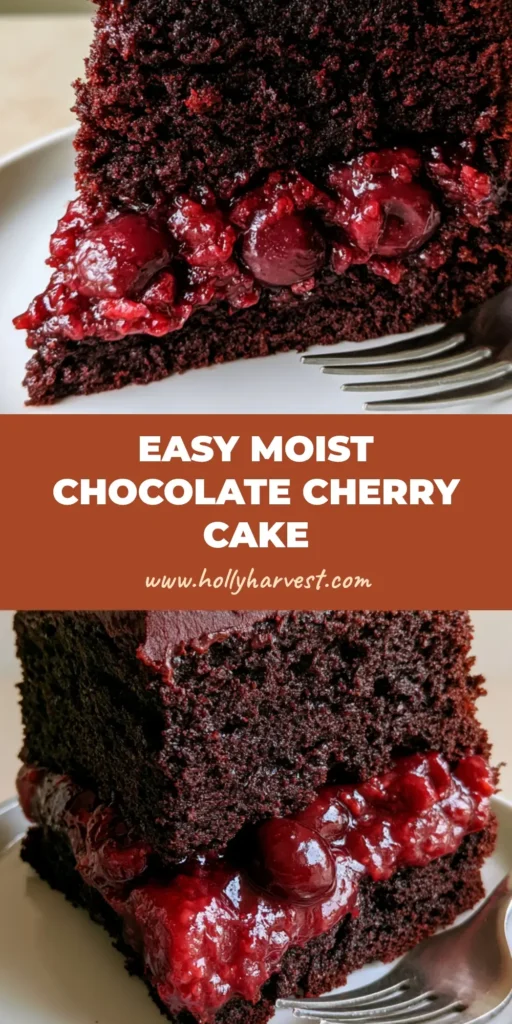
There is something inherently celebratory about a Chocolate Cherry Cake that balances deep, Dutch-processed cocoa with the vibrant, tart snap of orchard-fresh fruit. This isn’t just a dessert; it is a structural masterpiece featuring two layers of moist chocolate sponge held together by a glossy red cherry pie filling and finished with a smooth, matte dark chocolate frosting.
When you cut into this cake, you aren’t just seeing a sponge; you are witnessing a culinary contrast. The dark, nearly black crumb of the cake provides the perfect backdrop for the ruby-red, whole cooked cherries that spill out from the center, exactly like the decadent slice resting on a white ceramic plate in our kitchen today.
We have engineered this recipe to ensure that every forkful carries the weight of professional pastry standards while remaining accessible for the enthusiastic home cook. By focusing on moisture retention and a balanced “matte” finish on the frosting, we achieve a look that is as stunning in natural daylight as it is on the palate.
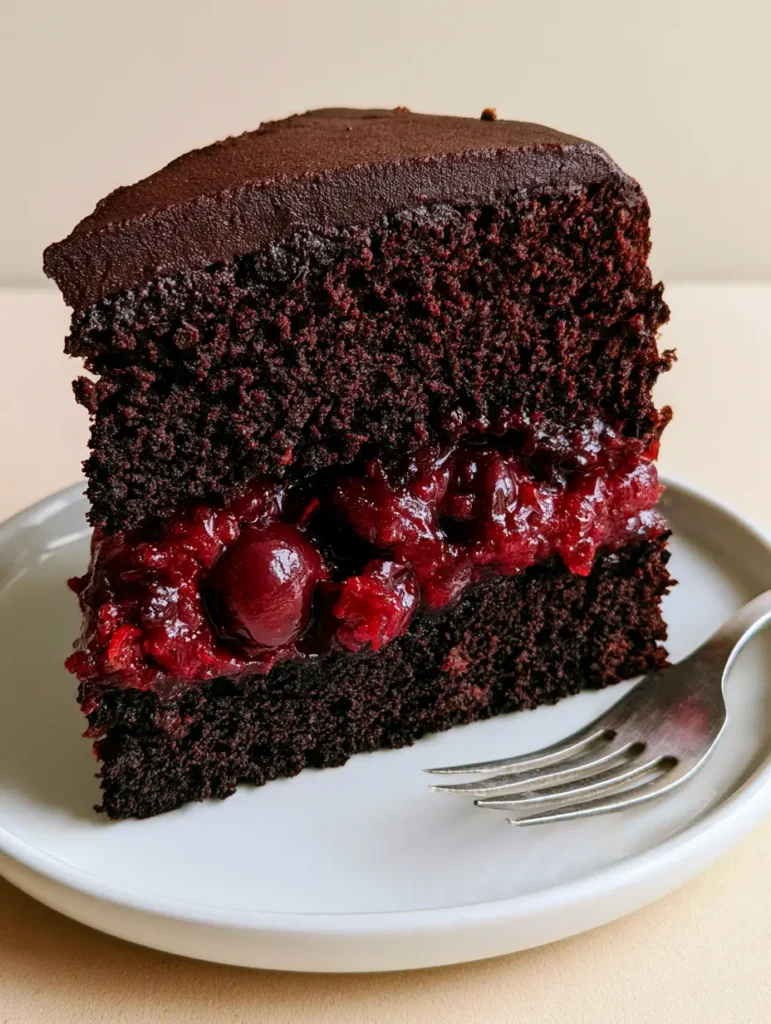
Why This Double-Layer Masterpiece Works
- The Crumb Architecture: We use a specific blooming technique for the cocoa to ensure the sponge is dark, moist, and capable of supporting the heavy cherry center.
- Glossy Visual Contrast: The filling is formulated to maintain a high-gloss sheen, providing a stunning visual “pop” against the matte chocolate exterior.
- Whole Fruit Texture: Unlike pureed fillings, our use of whole cooked cherries provides a sophisticated mouthfeel and a “forensic” match to the classic visual blueprint.
- The Matte Finish: By hitting a specific temperature with our ganache-style frosting, we achieve that smooth, non-reflective surface that defines modern professional baking.
Pantry Essentials for the Richest Chocolate Sponge
To achieve the “moist chocolate sponge” described in our visual blueprint, we must look beyond basic flour and sugar. Each ingredient here serves a structural and chemical purpose to ensure the cake doesn’t crumble under the weight of the fruit.
All-Purpose Flour: 2 cups (250g) provides the necessary gluten structure. We want enough strength to hold the layers but not so much that the cake becomes bread-like.
Dutch-Processed Cocoa Powder: 3/4 cup (75g) is essential for that deep, dark color. It is neutralized, meaning it reacts perfectly with our leaveners for a consistent rise.
Granulated Sugar: 2 cups (400g) does more than sweeten; it hygroscopically holds onto moisture. This ensures the sponge remains “moist” for days after baking.
Baking Powder and Soda: 1.5 tsp (7g) of each. This dual-leavening system ensures the cake is airy enough to balance the dense dark chocolate frosting.
Buttermilk: 1 cup (240ml) at room temperature provides the acid needed to activate the baking soda. It also creates a tender “tang” that cuts through the sugar.
Hot Coffee or Boiling Water: 1 cup (240ml) is the “secret” to blooming the cocoa. Pouring hot liquid over the cocoa powder releases the aromatic fats, intensifying the chocolate flavor significantly.
Vegetable Oil: 1/2 cup (120ml) is used instead of butter. Oil remains liquid at room temperature, which is the key to a cake that feels moist on the tongue every single time.
The Secret to That Glossy Red Cherry Center
The filling is the star of the Chocolate Cherry Cake. To achieve the glossy, thick consistency seen between the layers, we focus on starch gelatinization.
Pitted Sour Cherries: 2 cans (approx. 14.5 oz each) or 3 cups (450g) of fresh pitted cherries. We need whole fruit to match the visual requirement of “visible whole cooked cherries.”
Cornstarch: 3 tbsp (24g) mixed with a little water creates the slurry. This is what transforms the cherry juices into a glossy, translucent red gel.
Lemon Juice: 1 tbsp (15ml) brightens the red color. The acidity prevents the filling from looking dull and adds a necessary “zing” to the fruit profile.
If you find yourself craving more fruit-and-chocolate combinations, you might also enjoy our chocolate covered strawberries (coming soon) for a smaller, bite-sized treat.
Achieving the Smooth Matte Dark Chocolate Frosting
The frosting in our prompt is described as “smooth” and “matte.” This is achieved by using a high-fat ganache that has been cooled and whipped just enough to lose its shine but retain its silkiness.
Dark Chocolate (60% Cacao): 12 oz (340g) finely chopped. Higher cacao content ensures the frosting isn’t overly sweet and maintains a sophisticated dark hue.
Heavy Cream: 1 cup (240ml) brought to a simmer. This melts the chocolate into a luxurious emulsion known as ganache.
Unsalted Butter: 2 tbsp (28g) whisked in at the end. This adds just enough stability to the frosting so it stands tall on the Chocolate Cherry Cake without running.
Essential Tools for Professional Results
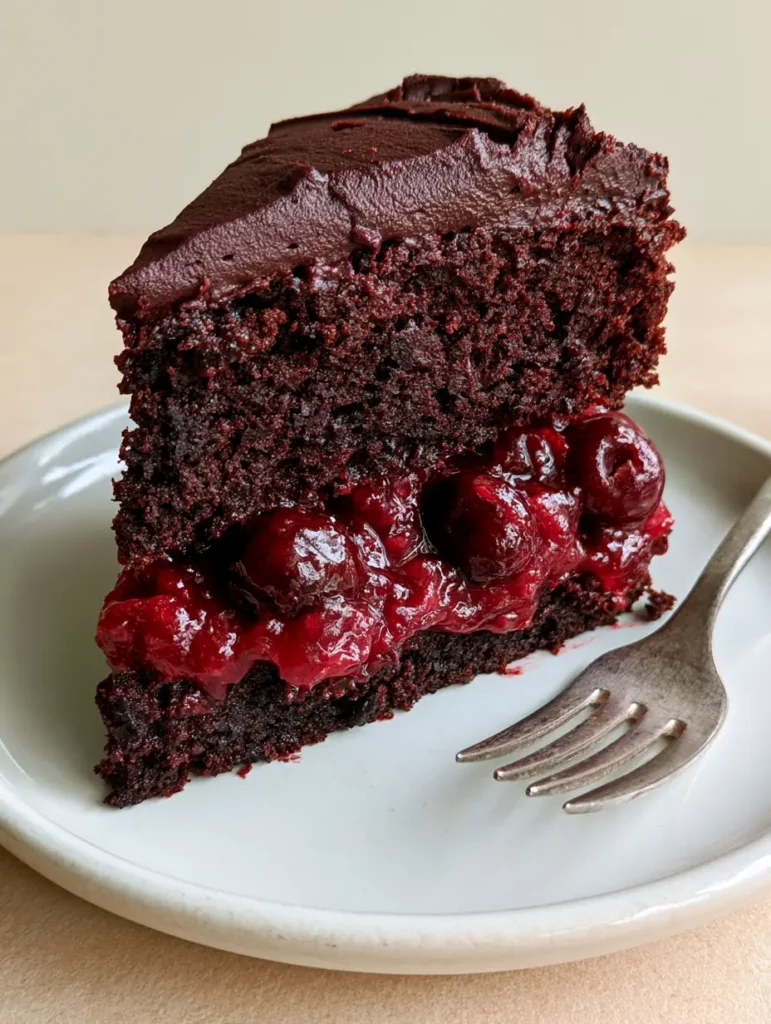
To recreate the thick slice on the white ceramic plate, you will need a few specific tools. Two 9-inch (23cm) round cake pans are standard, but ensure they have straight sides for that “standing” look.
A rotating cake turntable and an offset spatula are non-negotiable for achieving the smooth frosting finish. Finally, a large silver fork is the traditional accompaniment for serving this dense, decadent dessert.
Step-by-Step Instructions for the Perfect Layer Cake
1. Preparing the Dark Chocolate Sponge
Preheat your oven to 350°F (175°C). Grease and flour two 9-inch cake pans, lining the bottoms with parchment paper to ensure an easy release.
In a large bowl, sift together the flour, cocoa, sugar, baking soda, and baking powder. Add the eggs, buttermilk, oil, and vanilla, whisking until the batter is smooth and dark.
Carefully pour in the boiling water or hot coffee. The batter will be very thin—this is normal. Pour into the pans and bake for 30-35 minutes. Look for the “visual cue”: the top should spring back when lightly touched, and a toothpick should come out clean.
2. Simmering the Glossy Cherry Filling
While the cakes cool, combine the cherries and their juices in a saucepan with a bit of sugar and lemon juice. Bring to a simmer over medium heat.
Whisk the cornstarch with a tablespoon of water and stir it into the bubbling cherries. Watch for the “sensory change”: the liquid will turn from cloudy pink to a brilliant, glossy transparent red in seconds.
Remove from heat and let it cool completely. It must be cold before it hits the cake, or it will melt the sponge and the frosting.
3. Crafting the Matte Frosting
Place your chopped chocolate in a heat-proof bowl. Pour the simmering heavy cream over it and let it sit for 5 minutes. Gently whisk from the center outward until a glossy liquid forms.
Let the ganache sit at room temperature for 1-2 hours. As it cools, it will thicken. Once it reaches a peanut butter consistency, give it a quick whisk. It will transform from shiny to a beautiful matte finish.
4. Assembly and the “Thick Slice” Presentation
Place one cake layer on your serving plate. Pipe a “dam” of frosting around the edge to hold the filling in. Spread the glossy cherry filling—whole cherries and all—into the center.
Top with the second layer. Coat the top and sides with the matte dark chocolate frosting, using your offset spatula to smooth the surface until it is perfectly flat. For the ultimate presentation, serve a thick slice on a white ceramic plate with a silver fork.
Expert Tips for Success
- The Temperature Rule: Never assemble the cake while the layers or the filling are warm. Heat is the enemy of a “standing” slice.
- The Coffee Trick: Even if you don’t like coffee, use it in the batter. It won’t taste like mocha; it simply makes the chocolate taste “more like chocolate.”
- The Frosting Dam: Always pipe a border of frosting on the first layer before adding the cherries. This prevents the glossy filling from leaking out the sides.
- Slicing for the Camera: To get that clean, smartphone-photo-ready slice, dip your knife in hot water and wipe it dry between every single cut.
If you enjoy the rich, creamy texture of the frosting, you should try our chocolate peanut butter cheesecake, which uses a similar ganache technique.
Storage, Reheating & Freezing
This Chocolate Cherry Cake keeps remarkably well because of the oil-based sponge. Store it in an airtight container at room temperature for up to 2 days, or in the refrigerator for up to 5 days.
If you need to freeze the cake, it is best to freeze the sponge layers individually, wrapped tightly in plastic wrap. The cherry filling can also be frozen, but the matte frosting is best made fresh on the day of assembly to maintain its smooth texture.
What to Serve With This Decadent Cake
Because this cake is so rich, it pairs beautifully with light, airy accompaniments. A dollop of unsweetened whipped cream or a side of vanilla bean ice cream can help balance the intensity of the dark chocolate.
For those looking for a lighter chocolate fix later in the week, our high protein chocolate mousse offers a great alternative. If you are serving this at a dinner party, consider starting with a savory main like garlic butter steak bites (coming soon) to contrast the sweet finish.
Frequently Asked Questions
Absolutely. This cake is actually easier to slice after being refrigerated for 4-6 hours, as the filling and frosting have time to set firmly.
Yes, frozen pitted cherries work perfectly. Thaw them slightly first and ensure you include any juices that release during thawing in the saucepan to maintain that glossy red finish.
The key is to allow the cake layers to cool completely and to create a ‘frosting dam’—a ring of frosting piped around the edge of the first layer—to contain the filling.
Use a long, thin knife dipped in hot water. Wipe the blade clean and re-dip into the hot water between every single cut for that professional smartphone-ready look.
Frosting is usually shiny when it is still warm or contains high amounts of corn syrup. To achieve a matte finish, allow the ganache to cool completely and give it a very brief whisk to incorporate a tiny amount of air.
The Complete Chocolate Cherry Cake Recipe
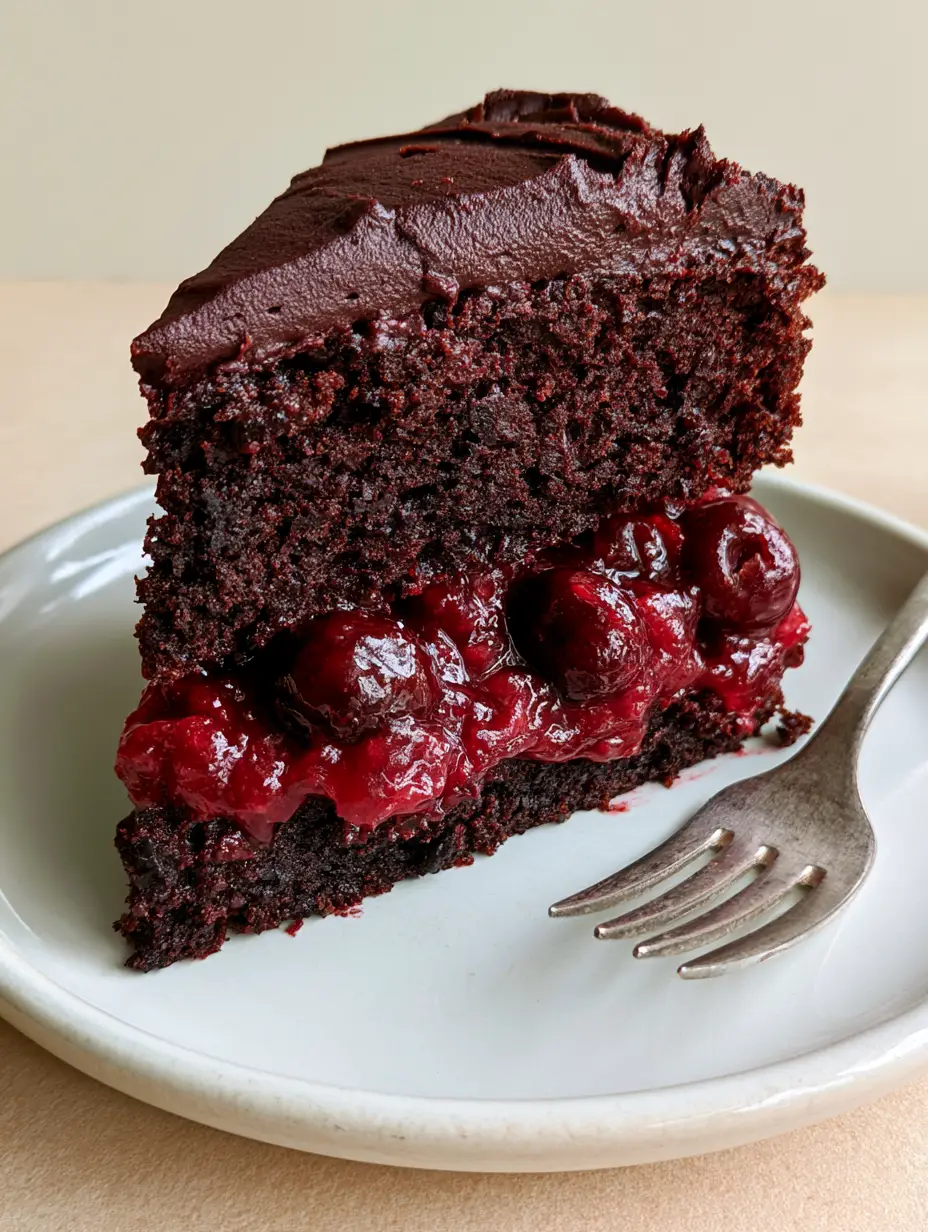
Chocolate Cherry Cake: The Ultimate Moist Double-Layer Recipe
Ingredients
Equipment
Instructions
- Sift flour, cocoa, sugar, baking soda, and powder in a large bowl.
- Add eggs, buttermilk, oil, and vanilla. Whisk in boiling water until smooth.
- Pour into pans and bake at 350°F (175°C) for 30-35 minutes until springy.
- Simmer cherries with sugar and lemon juice; stir in cornstarch slurry until glossy.
- Pour hot cream over chocolate, let sit, then whisk. Cool until matte and spreadable.
Notes
Ensure filling is cold before assembling.
Closing & Call to Action
The Chocolate Cherry Cake is the ultimate intersection of forensic visual beauty and culinary science. Whether you are baking this for a birthday or simply to practice your layer-cake skills, the combination of moist sponge and glossy cherries never fails to impress.
We would love to see your creations! If you make this cake, please leave a comment below or share your photos with us on Pinterest. Happy baking!