There is a specific kind of culinary magic that happens when a seasoned black cast iron skillet meets the high-heat intensity of a classic Shrimp Fried Rice. You can almost hear the rhythmic sizzle of the grains dancing against the iron and smell the nutty aroma of toasted sesame oil wafting through the kitchen. This isn’t just a quick weeknight meal; it is a masterclass in texture, color, and balanced umami flavors.
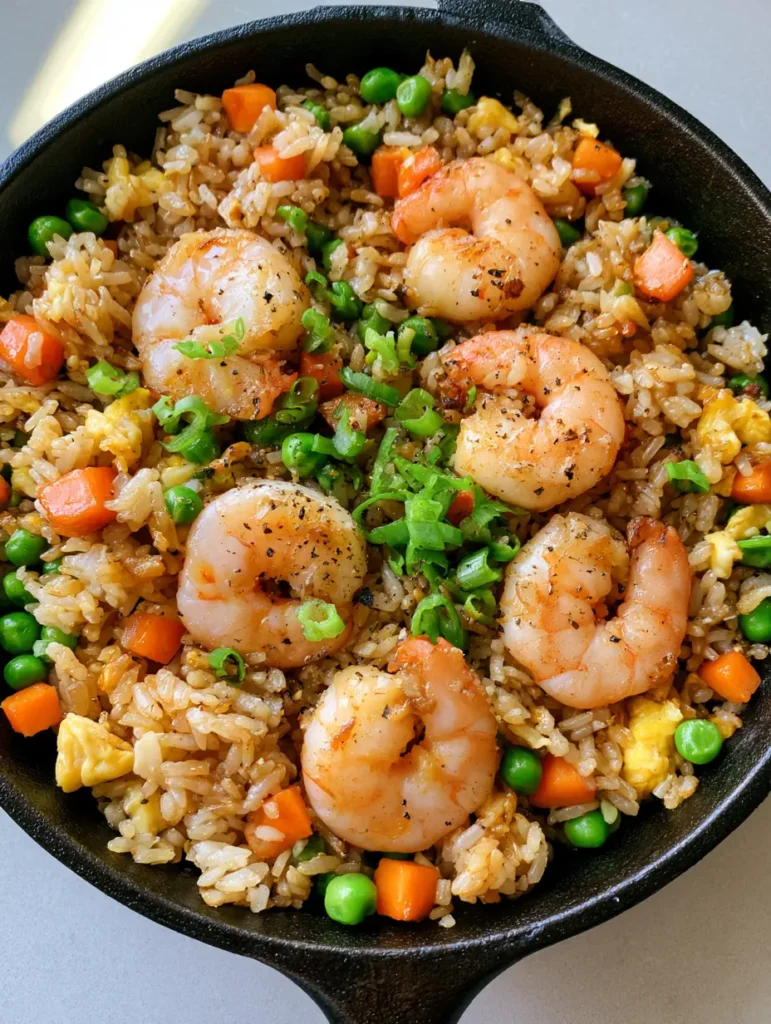
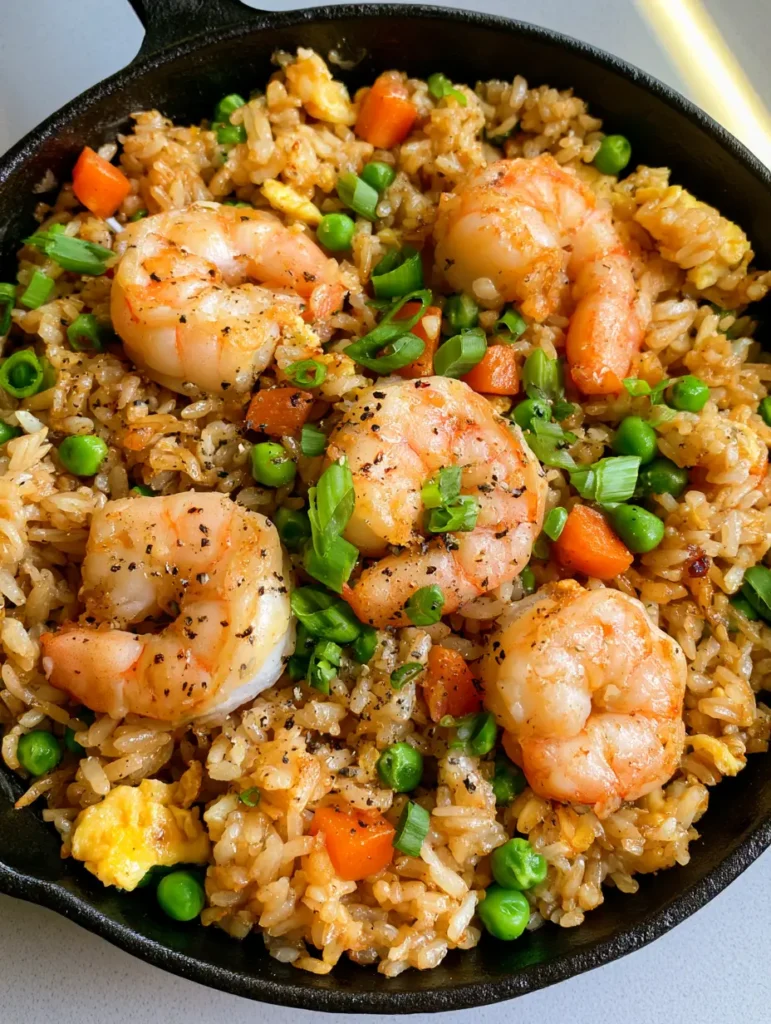
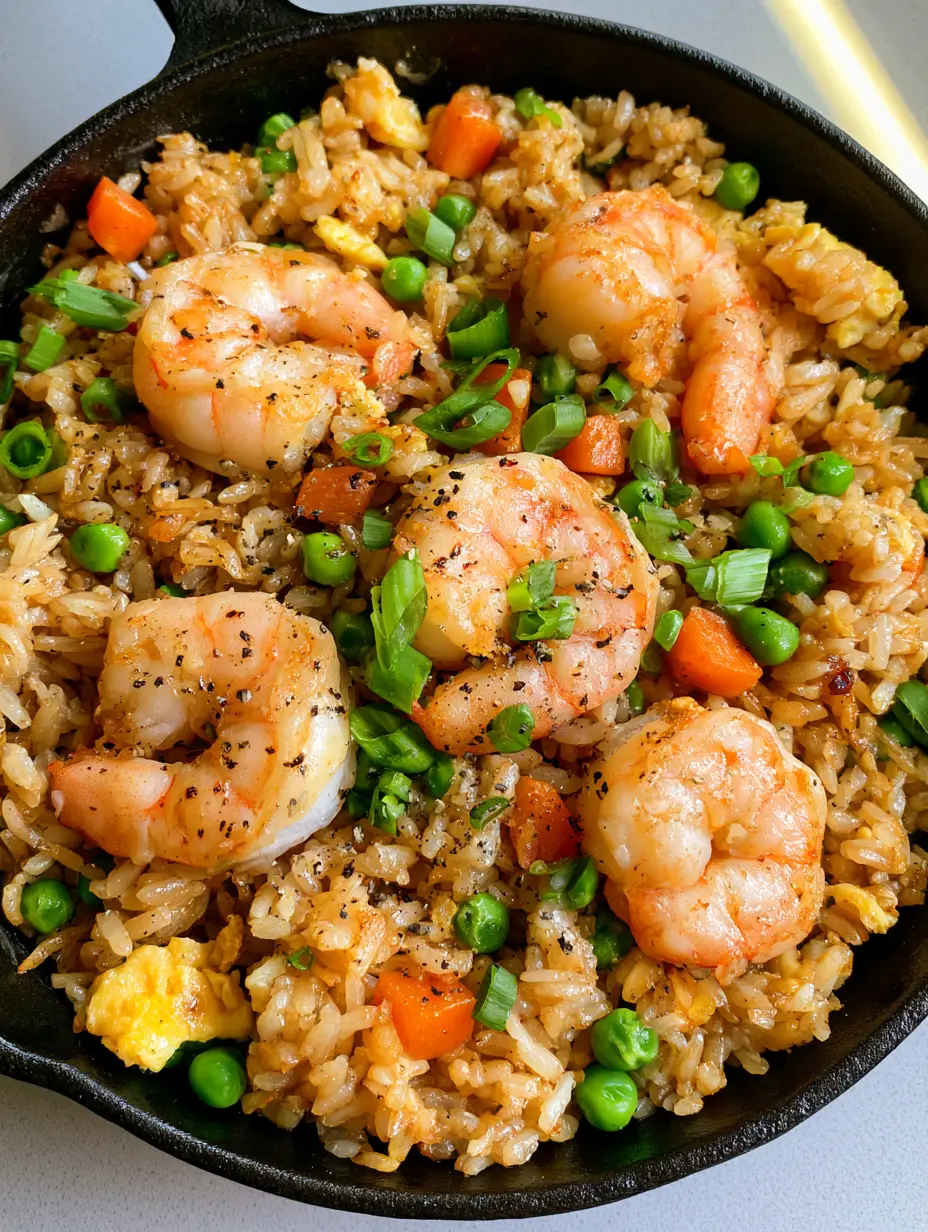
Imagine a top-down view of your stove: a dark, heavy skillet overflowing with individual grains of golden-brown jasmine rice, each one glistening with a savory soy sauce glaze. Succulent pink shrimp, marked with beautiful char from a high-heat sear, are nestled among vibrant green peas and perfectly uniform cubes of orange carrots. Fluffy, soft yellow scrambled eggs provide a gentle contrast to the bite of the rice, while a finishing touch of bright green scallions and a dusting of cracked black pepper tie the visual masterpiece together.
In this guide, we are going to bridge the gap between “takeout-style” and professional-grade home cooking. By focusing on forensic visual accuracy—ensuring every carrot is diced to perfection and every shrimp is seared to a snap—you will create a dish that looks exactly like a high-end food photography spread while tasting like a seasoned chef’s secret recipe.
Why This Cast Iron Shrimp Fried Rice Strategy Wins Every Time
- Textural Superiority: By utilizing the heat retention of cast iron, we achieve a “wok hei” (breath of the wok) effect that produces charred, succulent shrimp and toasted rice grains that never turn mushy.
- Visual Vibrancy: The contrast between the pink shrimp, orange carrots, green peas, and yellow eggs against the dark skillet creates a restaurant-quality presentation.
- Engineered Umami: A precise soy sauce glaze ensures every grain is coated in savory depth without being overwhelmed by salt.
- Perfect Grain Separation: We use specific techniques to ensure the jasmine rice remains individual and fluffy, rather than clumping into a sticky mass.
The Anatomy of Perfect Grains: Essential Ingredients
Long-Grain Jasmine Rice: You will need 4 cups (600g) of cooked, chilled jasmine rice. Using day-old rice is the “invisible” secret to success; the refrigeration process dehydrates the grain, allowing it to fry rather than steam. If you enjoy this texture, you might also love our zesty bang-bang fried rice.
Large Pink Shrimp: 1 lb (454g) of large shrimp, peeled and deveined. The shrimp are the star of the show, providing a sweet, briny pop of protein that, when seared correctly, develops a stunning light char. If you have extra shrimp on hand, consider making succulent honey garlic shrimp for your next meal.
Large Eggs: 3 large eggs, lightly beaten. These provide the soft, yellow ribbons of protein that weave through the dish, absorbing the savory sauce and adding a creamy mouthfeel.
Aromatic Base (Carrots and Garlic): 1/2 cup (75g) diced orange carrots and 3 cloves of minced garlic. The carrots provide a structural crunch and a pop of sweetness, while the garlic creates the foundational scent of the dish.
Vibrant Green Peas: 1/2 cup (75g) steamed green peas. These offer a burst of freshness and color that cuts through the richness of the fried elements.
The Glaze (Soy Sauce and Sesame Oil): 3 tbsp (45ml) low-sodium soy sauce and 1 tsp (5ml) toasted sesame oil. This combination provides the golden-brown color and the deep, earthy aroma that defines high-quality fried rice.
Garnish and Seasoning: 2 stalks of sliced fresh green onions and 1/2 tsp (1g) freshly cracked black pepper. The onions provide a sharp, fresh finish, while the pepper adds a subtle heat that lingers on the palate.
Foundational Fats: 2 tbsp (30ml) vegetable oil or grapeseed oil. A high-smoke point oil is scientifically required to sear the shrimp and toast the rice at temperatures that would burn butter or extra virgin olive oil.
Essential Equipment for Skillet Mastery
To achieve the visual result described in our blueprint—specifically those individual glistening grains and seared shrimp—a 12-inch (30cm) seasoned cast iron skillet is the preferred tool. Its thermal mass allows it to stay ripping hot even when cold ingredients are added.
You will also need a sturdy metal spatula (to scrape the flavorful “fond” off the bottom of the pan), a small bowl for whisking eggs, and a sharp chef’s knife for achieving those uniform carrot cubes. If you’re used to one-pot meals, this setup will feel as familiar as making a ground beef and rice casserole.
Step-by-Step Instructions for Culinary Perfection
Phase 1: Searing the Shrimp for Maximum Color
Pat your 1 lb (454g) of shrimp completely dry with paper towels. This is a critical forensic step; moisture is the enemy of the sear. Season lightly with a pinch of salt.
Heat 1 tbsp (15ml) of oil in your cast iron skillet over medium-high heat until it just begins to shimmer and smoke. Add the shrimp in a single layer, ensuring they do not overlap. Let them sit undisturbed for 90 seconds.
Look for the visual cue: a deep pink hue and distinct light char marks on the underside. Flip and cook for another 60 seconds until opaque. Remove the shrimp from the skillet and set aside; they will finish slightly in the residual heat, remaining succulent rather than rubbery.
Phase 2: Developing the Vegetable and Egg Base
In the same skillet, add another 1/2 tbsp (7ml) of oil. Toss in your 1/2 cup (75g) of diced carrots. Sauté for 3-4 minutes until they are tender-crisp and the edges are just beginning to soften.
Push the carrots to the outer edges of the skillet, creating a “well” in the center. Pour in your 3 beaten eggs. Use your spatula to gently scramble them in the center, looking for soft yellow curds. Just before they are fully set, break them into bite-sized pieces and incorporate them with the carrots.
Phase 3: The High-Heat Rice Fry
Turn the heat up to high. Add the remaining oil and your 4 cups (600g) of chilled jasmine rice. Use the edge of your spatula to break up any clumps of rice until the grains are individual.
Listen for the “crackle.” This sound indicates the moisture is evaporating and the Maillard reaction is beginning to toast the exterior of the rice. Stir occasionally for 3-5 minutes. The rice should begin to look golden and feel slightly firm to the touch.
Phase 4: Glazing and Final Assembly
Pour the 3 tbsp (45ml) of soy sauce and 1 tsp (5ml) of toasted sesame oil over the rice. Stir rapidly to ensure every grain is coated in the savory soy glaze. The rice will transform from a pale white to a deep, glistening golden-brown.
Fold in the 1/2 cup (75g) of steamed green peas and the seared shrimp. The heat from the rice will warm the peas through instantly. Finally, sprinkle the 1/2 tsp (1g) of cracked black pepper and the sliced green onions across the top.
Expert Tips for Shrimp Fried Rice Success
- The Temperature Rule: Never add cold rice to a cold pan. Ensure the skillet is hot enough that the rice sizzles immediately upon contact to prevent sticking.
- Shrimp Sizing: Use “Large” (31/35 count) shrimp. They are big enough to develop a char without overcooking in the center during the short searing window.
- Soy Sauce Balance: If the dish looks too light, add soy sauce one teaspoon at a time. Too much liquid will ruin the texture and make the rice mushy.
- The Resting Period: Let the finished dish sit in the hot skillet for 60 seconds off the heat before serving. this allows the flavors to meld and the bottom layer of rice to get extra crispy.
Storage, Reheating, and Meal Prep
Shrimp Fried Rice stores beautifully in the refrigerator for up to 3 days. Place it in an airtight container once it has cooled to room temperature. This recipe is an excellent candidate for meal prep, much like our protein-packed meal prep egg muffins.
To reheat, avoid the microwave if possible. Instead, add a teaspoon of oil to a skillet over medium heat and toss the rice until it is heated through and the shrimp are warm. This preserves the texture of the rice grains. If you must microwave, add a damp paper towel over the bowl to steam the rice slightly and prevent it from drying out.
What to Serve With This Skillet Masterpiece
To round out a full Asian-inspired feast, serve this rice alongside a crisp salad dressed with authentic Japanese steakhouse ginger dressing. The acidity of the dressing cuts through the richness of the fried rice perfectly.
For those who love a bit of crunch, consider serving a side of sourdough discard focaccia—while not traditional, the airy texture is a delightful companion to savory stir-fries. If you are looking for more rice-based inspiration, our savory rice and beans offers a completely different flavor profile using similar pantry staples.
Frequently Asked Questions
Yes! A heavy, well-seasoned cast iron skillet is actually the best alternative to a wok for home stoves. It retains heat exceptionally well, allowing you to achieve the ‘wok hei’ char marks on the shrimp and rice.
The golden-brown color comes from two places: the toasted Maillard reaction on the rice grains themselves and the addition of a high-quality soy sauce glaze at the end of the cooking process.
Either works, but ensure they are completely thawed and patted dry with paper towels before cooking. Any excess moisture will steam the shrimp rather than searing them, preventing those beautiful char marks.
Use an oil with a high smoke point, such as vegetable, canola, or grapeseed oil. Avoid extra virgin olive oil or butter for the main frying stage as they will burn at the high temperatures required for perfect texture.
Mushy fried rice is usually caused by using freshly cooked, warm rice which contains too much moisture. For best results, use jasmine rice that has been refrigerated for at least 12-24 hours to allow the grains to dry out.
The Ultimate Cast Iron Shrimp Fried Rice Recipe
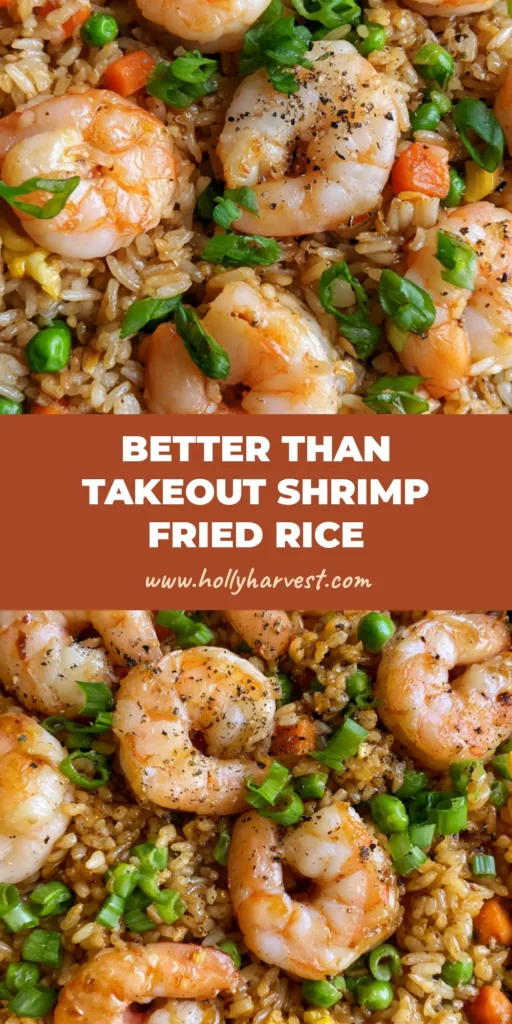
Shrimp Fried Rice: The Ultimate Cast Iron Skillet Guide to Golden Grains
Ingredients
Equipment
Instructions
- Pat shrimp dry and season with salt. Heat 1 tbsp oil in a cast iron skillet over medium-high heat. Sear shrimp for 90 seconds per side until char marks appear and they are opaque. Remove and set aside.
- Add 1/2 tbsp oil and carrots to the skillet. Sauté 3 minutes. Push carrots to the side, pour in beaten eggs, and scramble until soft yellow curds form. Mix with carrots.
- Increase heat to high. Add remaining oil and chilled rice. Break up clumps with a spatula. Fry for 3-5 minutes until the rice crackles and turns golden-brown.
- Pour in soy sauce and sesame oil, stirring to coat every grain. Fold in peas and the seared shrimp. Garnish with green onions and cracked black pepper before serving.
Notes
Ensure the cast iron skillet is preheated thoroughly to achieve the signature char on the shrimp.
Take Your Home Cooking to the Next Level
Mastering Shrimp Fried Rice is a rite of passage for any home cook looking to elevate their weeknight repertoire. By focusing on the visual cues of charred shrimp and glistening golden grains, you have created a dish that is as beautiful as it is delicious. The cast iron skillet is your best friend in this journey, providing the heat and soul required for authentic flavor.
Did you try this recipe? We would love to see your results! Leave a comment below and let us know how your rice turned out. Don’t forget to share your skillet photos on Pinterest and tag us so we can celebrate your culinary success!