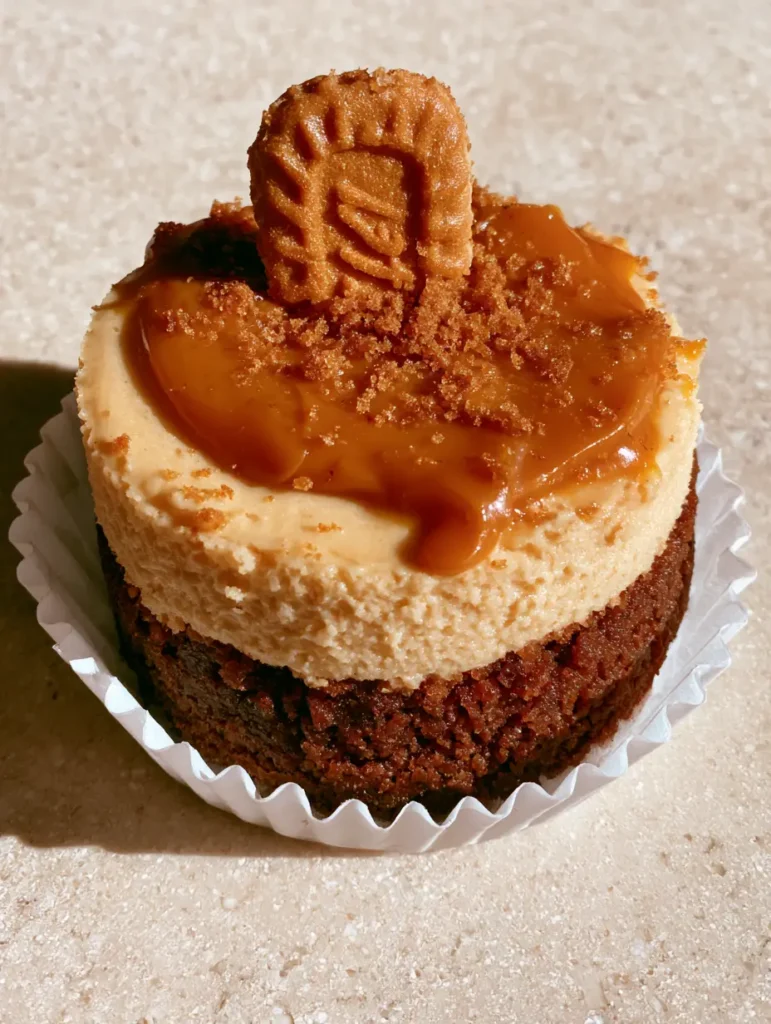
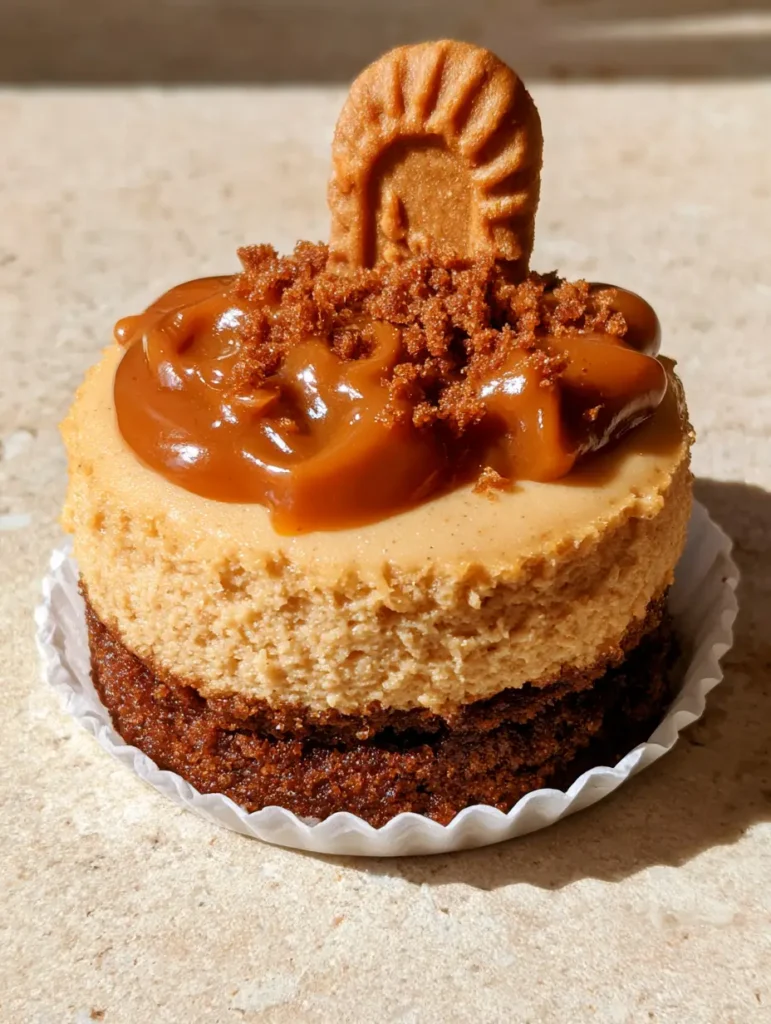
There is something inherently magical about the spicy, caramelized aroma of a Lotus Biscoff cookie. When you transform that distinct Belgian flavor into these No-Bake Mini Biscoff Cheesecakes, you aren’t just making a dessert; you are creating a multi-sensory experience. Imagine a thick, dark brown crust of pressed crumbs topped with a velvet-smooth, matte tan filling that tastes like pure cookie butter clouds.
What sets this particular recipe apart is the visual contrast. The pale, matte finish of the cheesecake layer acts as the perfect canvas for a glossy, warm brown Biscoff drizzle that pools slightly at the edges. Whether you are looking for a sophisticated finish to a dinner party or a simple weekend indulgence, these individual treats deliver professional bakery results with zero oven time.
Why These Individual Cookie Butter Treats are the Ultimate Crowd-Pleaser
- Perfect Textural Contrast: You get the crunch of the dark brown Biscoff base, the silkiness of the pale tan filling, and the luxurious pull of the melted spread.
- No-Bake Simplicity: Achieve a structurally sound, restaurant-quality dessert without ever worrying about water baths or cracked tops.
- Individual Portions: Served in elegant white fluted paper liners, these are naturally portion-controlled and easy to serve at gatherings.
- Visual Sophistication: The vertical placement of the halved Lotus Biscoff cookie garnish adds height and professional flair to every plate.
The Anatomy of a Perfect No-Bake Mini Biscoff Cheesecake
To achieve the visual and structural results seen in our professional photography, you need a balance of fat, sugar, and stabilizers. These No-Bake Mini Biscoff Cheesecakes rely on high-quality cream cheese and aerated heavy cream to stay firm yet creamy.
If you love individual desserts that don’t require an oven, you might also enjoy these brownie bottom mini cheesecakes, which offer a similarly decadent experience. For those who prefer a mix of salty and sweet, my no-bake salted caramel pretzel bars are another fantastic option for hot summer days when you want to keep the kitchen cool.
The Golden Ratio for the Pressed Cookie Base
Lotus Biscoff Cookies: 20 cookies (approx. 155g). These provide the signature “speculoos” flavor—a blend of cinnamon, ginger, and caramel—that forms our dark brown foundation.
Unsalted Butter: 4 tbsp (56g), melted. This acts as the glue, ensuring your base is thick and pressed firmly so it doesn’t crumble when the paper liner is removed.
The Secret to the Smooth Matte Tan Filling
Full-Fat Cream Cheese: 8 oz (225g), softened to room temperature. This is the structural heart of the cheesecake; using low-fat versions will result in a runny filling that won’t hold its shape.
Biscoff Cookie Butter Spread: 1/2 cup (125g). This provides the “pale tan” color and the primary flavor profile for the middle layer.
Powdered Sugar: 1/2 cup (60g). We use powdered instead of granulated sugar to ensure the texture remains perfectly smooth and matte without any grit.
Vanilla Extract: 1 tsp (5ml). A high-quality vanilla bean paste or extract enhances the warm spice notes of the cookie butter.
Heavy Whipping Cream: 3/4 cup (180ml), chilled. When whipped to stiff peaks and folded in, this creates the light, airy volume required for a no-bake masterpiece.
The Glossy Finishing Touches
Biscoff Spread (for Drizzle): 4 tbsp (60g). Melting this slightly allows it to become glossy and “pool” beautifully over the top surface.
Garnish Elements: 6 additional Lotus Biscoff cookies. These will be halved and placed vertically, with the remaining crumbs used for a fine dusting to add artisanal detail.
Essential Tools for Success
To recreate the exact look of our No-Bake Mini Biscoff Cheesecakes, you will need a standard 12-cup muffin tin and white fluted paper liners. The liners are essential for that classic “pleated” edge visible in the final presentation.
A food processor is highly recommended to achieve the “fine cookie crumbs” required for the dusting. You will also need a hand mixer or stand mixer to aerate the heavy cream properly. For the drizzle, a small offset spatula or a simple piping bag with the tip snipped off will help you control the “pooling” effect on the top surface.
Step-by-Step Evolution of the Cookie Butter Cheesecake
Constructing the Dark Brown Foundation
Begin by pulsing your cookies in a food processor until they reach the consistency of wet sand. Stir in the melted butter until every crumb is coated. Distribute the mixture evenly among 12 fluted liners.
Visual Cue: Use the bottom of a small glass to press the mixture down firmly. You are looking for a thick, dark brown, and perfectly flat layer that feels solid to the touch.
Achieving the Matte Pale Tan Filling
In a medium bowl, beat the softened cream cheese and Biscoff spread until no lumps remain. Sift in the powdered sugar and add the vanilla. In a separate chilled bowl, whip your heavy cream until it reaches stiff peaks—it should hold its shape entirely when the whisk is lifted.
Gently fold the whipped cream into the Biscoff mixture. The goal is to maintain the air while achieving a uniform, matte, pale tan color. Spoon this over your bases and smooth the tops with a spatula.
The Chill Phase
Patience is the most important “invisible ingredient.” These must chill for at least 4 hours, or ideally overnight. This allows the fats to solidify, creating a clean release from the paper liners and a stable base for the warm drizzle.
The Glossy Drizzle and Final Garnish
Warm the remaining Biscoff spread in the microwave for 15-20 seconds until it is fluid but not hot. Spoon a small amount onto each cheesecake, allowing it to pool slightly toward the edges. While the drizzle is still tacky, stand a half-cookie vertically in the center and sprinkle with a pinch of fine crumbs.
Expert Tips for Professional Results
- Temperature Control: Ensure your cream cheese is truly at room temperature to avoid tiny white flecks in your tan filling. Conversely, your heavy cream must be ice-cold to whip properly.
- The Drizzle Timing: Do not add the glossy drizzle until you are ready to serve or shortly before. If refrigerated for too long, the drizzle will lose its high-shine “glossy” finish.
- Clean Halves: To get a perfect vertical cookie garnish, use a sharp serrated knife to gently “saw” the Biscoff biscuits in half. Pressing straight down will cause them to shatter.
- Firm Base: If your base feels too crumbly, you may not have pressed it hard enough. Use significant pressure to ensure it acts as a solid plate for the creamy filling.
Pairing Your Mini Cheesecakes
These rich, spiced treats pair beautifully with a variety of flavors. If you are hosting a brunch, consider serving them alongside a savory dish like meal prep egg muffins to balance the sweetness. For a full dessert spread, they complement the dark fruit notes of a chocolate cherry cake perfectly.
If you’re leaning into a “mini” theme for a party, these go great with mini grilled cheese hawaiian rolls for a playful, finger-food-focused menu. The cinnamon notes also pair surprisingly well with a post-dinner coffee or even a light ginger-dressed fruit salad to cleanse the palate.
Storage and Preservation
Refrigeration: Keep your No-Bake Mini Biscoff Cheesecakes in an airtight container in the fridge for up to 5 days. The texture will remain stable, though the cookie garnish may soften over time.
Freezing: These freeze exceptionally well! Freeze them without the drizzle and garnish for up to 3 months. Thaw in the refrigerator for 2 hours before adding the fresh glossy drizzle and cookie half for the best visual impact.
Frequently Asked Questions
Yes! Use vegan cream cheese, a plant-based heavy whipping cream alternative, and ensure your Biscoff spread is the standard vegan version. The texture may be slightly softer, so chill for a full 24 hours.
While Biscoff provides the signature flavor, you can substitute Graham crackers or Gingersnaps. However, the visual ‘dark brown’ base and specific ‘speculoos’ taste will change.
No, the high fat content in the cookie base and cheesecake ensures they will release cleanly from the fluted paper liners once fully chilled.
The drizzle stays glossy when it is fresh. If refrigerated, it may turn matte. For the best photos or presentation, add the melted spread just before serving.
This is usually due to using low-fat cream cheese or not whipping the heavy cream to stiff peaks. Ensure all ingredients are full-fat and the cream is very cold before whipping.
The Ultimate No-Bake Mini Biscoff Cheesecake Recipe
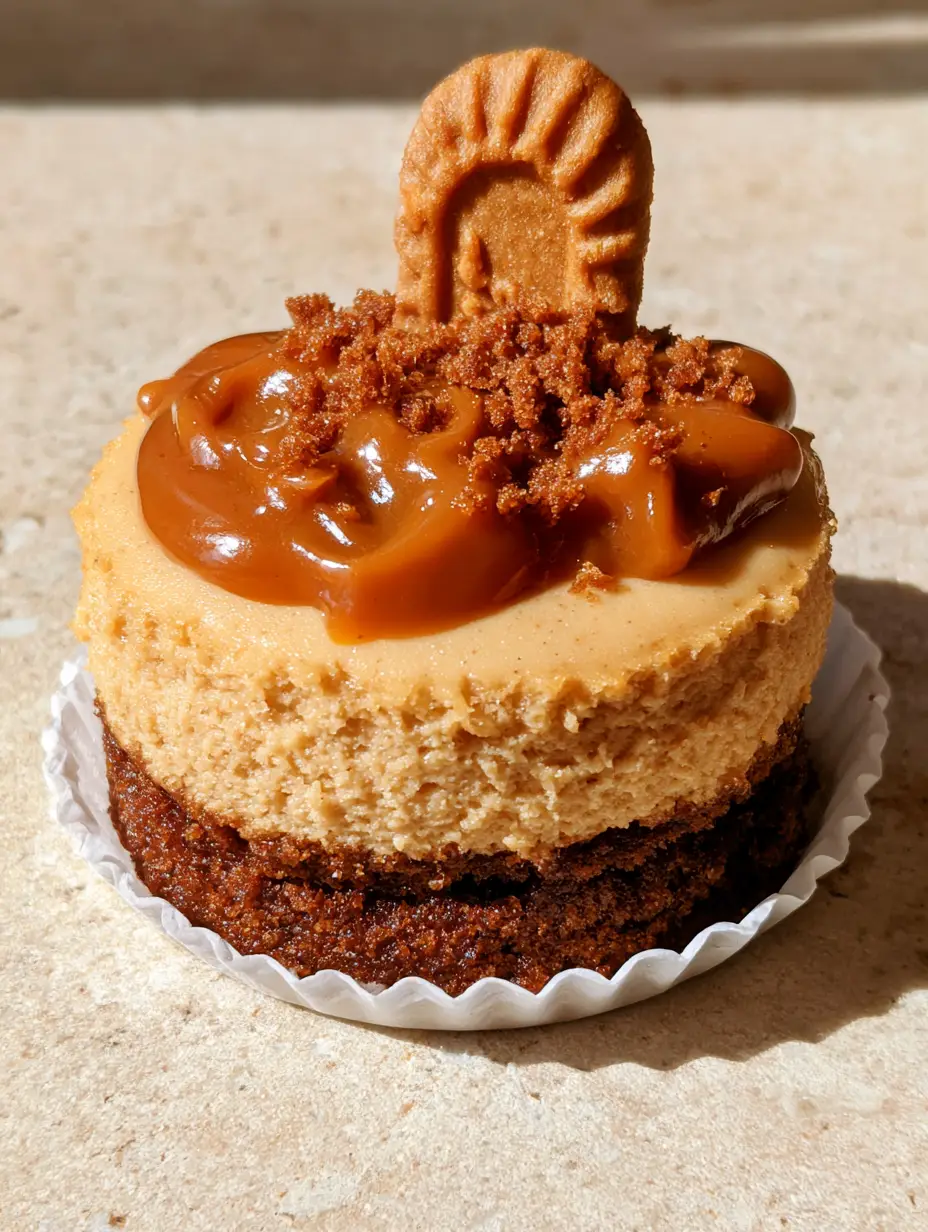
No-Bake Mini Biscoff Cheesecakes with Glossy Cookie Butter Drizzle
Ingredients
Equipment
Instructions
- Pulse 20 cookies in a food processor until fine. Mix with melted butter.
- Press 1 heaping tablespoon of crumbs into each white fluted liner. Use a glass to press firmly into a dark brown, thick layer.
- Beat cream cheese and Biscoff spread until smooth. Add powdered sugar and vanilla and beat until matte and pale tan.
- In a separate bowl, whip heavy cream to stiff peaks. Fold gently into the Biscoff mixture.
- Divide filling among liners and smooth the tops. Chill for at least 4 hours.
- Melt remaining spread and drizzle over chilled cheesecakes. Garnish with a half cookie standing vertically and extra crumbs.
Notes
Ensure the drizzle is slightly warm but not hot to keep it glossy without melting the cheesecake.
Closing & Call to Action
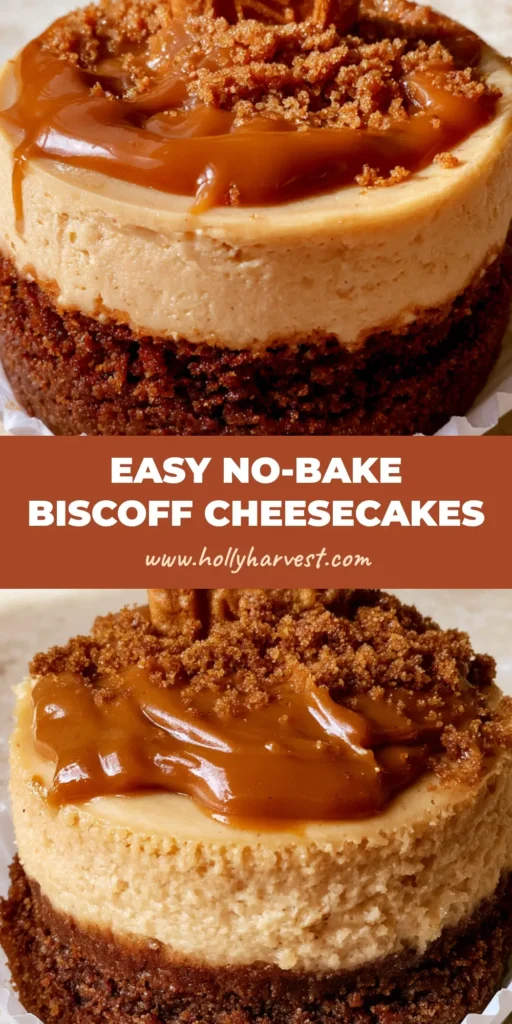
Creating these No-Bake Mini Biscoff Cheesecakes is a testament to how simple ingredients can produce extraordinary visual and culinary results. The combination of the matte filling and the glossy drizzle makes them a centerpiece-worthy dessert with minimal effort. If you enjoyed this recipe, please leave a comment below and tell us how yours turned out!
Don’t forget to share your creations and follow us on Pinterest for more visually stunning recipe inspiration. Happy “no-baking”!